Today is National Animal Cracker Day! Super important stuff. #yourewelcome
So obviously it is only appropriate to celebrate this momentous day with some delectable treats! To this day, I prefer the frosted animal crackers…probably because it was super rare when I got to enjoy these sweet cookies…like only at birthday parties…someone else’s birthday party. But now that I’m a grown woman, there are days I channel Donna and Tom (from Parks and Recreation) and I think to myself, “Girl, it’s time to Treat. Yo. Self!”
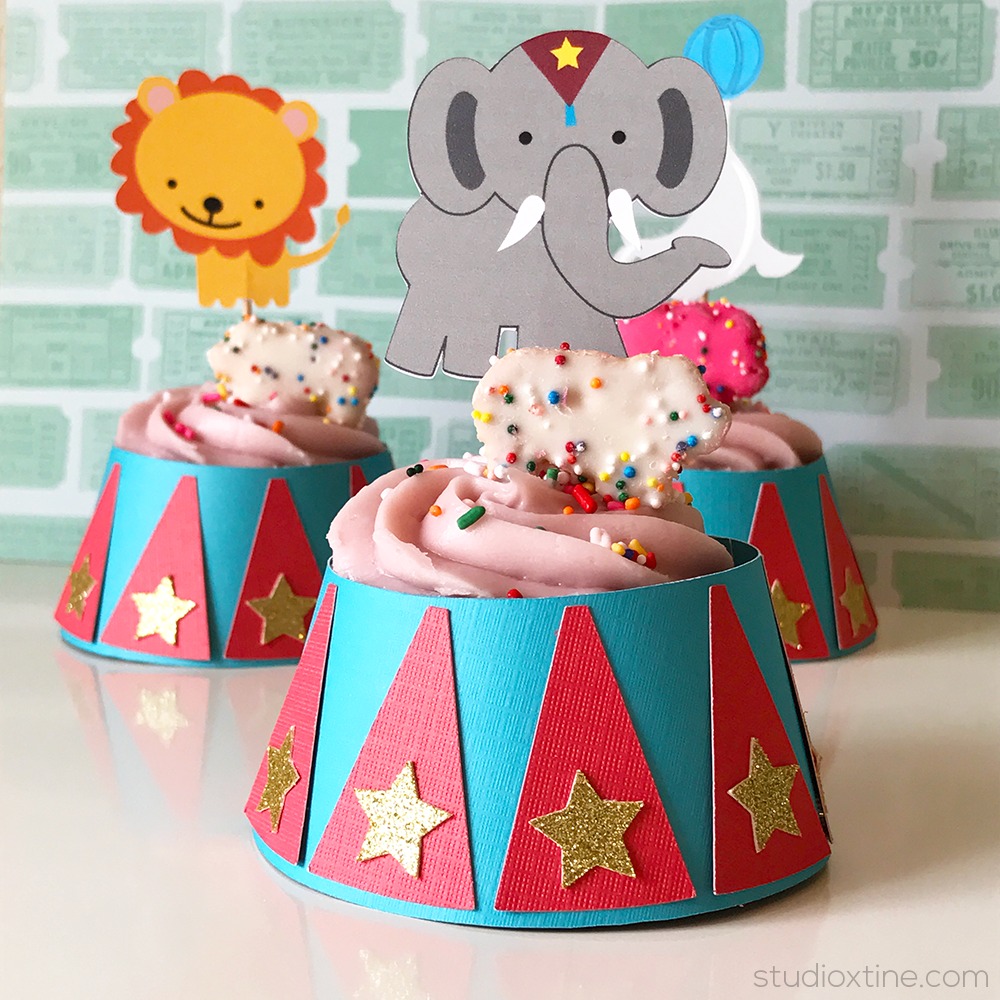
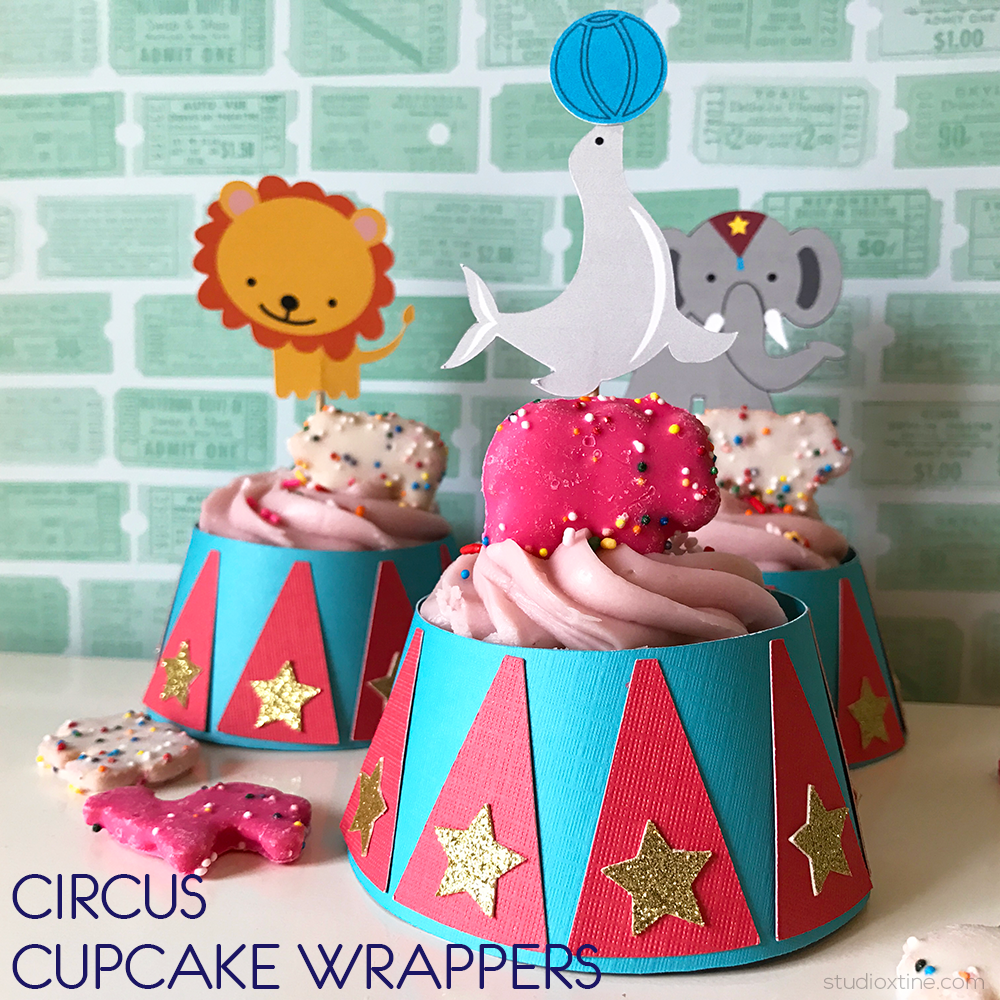
I thought it would be fun to put the frosted animal crackers on top of a yummy cupcake (go big or go home right?!). To play along with the animal (cracker) theme, I created a unique cupcake wrapper that resembled a circus podium. For those planning a circus-themed party, these cupcake wrappers will really dress up your treats and make them stand out!
Here’s how you can make these easy cupcake wrappers:
- Download the cupcake wrapper I created.
- When you open the file, it includes one podium ring, ten triangle panels, and ten stars.
- All of these shapes make one cupcake wrapper so duplicate as-needed.
- Lastly, use scrapbooking adhesive or glue to adhere the pieces.
- Download Miss Kate Cuttables’ Designs ID #42737 and #42738 from the Silhouette Design Store.
- I made these cut files into a “Print and Cut” file because I wanted to use the animals as a cupcake topper, which is another fun way to dress up the treat.
- In order to do this:
- Ungroup and release any compound paths.
- Keep the pieces you need to make the circus animal. You may need to overlap some pieces to create the full image. Delete everything else that is not used.
- Open up the “Fill Color Window” and choose a color to “fill” your animal shape.
- For most shapes’ lines, I chose “Transparent” in the “Line Color Window” except for the elephant because I wanted the elephant trunk and tusks to stand out.
- To make this a “Print and Cut” file, we need to create an outer cut line for each animal.
- Pick one animal and open the “Trace Window” and select Trace Area, from which you will adjust the High and Low Pass Filters to get a good outline of your animal.
- Then, click “Trace Outer Edge”
- Almost done…click on “Cut Settings” and make sure the outer line that you just created is the only one that has a cut line applied to it. In other words, this should be the only line in red.
- This step is optional but I highly recommend it to keep your shapes in tact. Highlight and group the various pieces per animal. Re-size your grouped shape as necessary. You may want large or small cupcake toppers.
- Lastly, open the “Registration Marks Window” and set your registration marks.
- Send it off to your printer, then place your printed document on the cutting mat, and send to Silhouette. And that’s it!