A week ago, I arrived on the beautiful island of Oahu. I soaked up the sun and ate my way through Waikiki (I had no car otherwise I would have hit up North Shore shrimp trucks or Island Snow shaved ice in Kailua)! I felt my pants were getting tighter each day because I just kept eating and eating. #noregrets
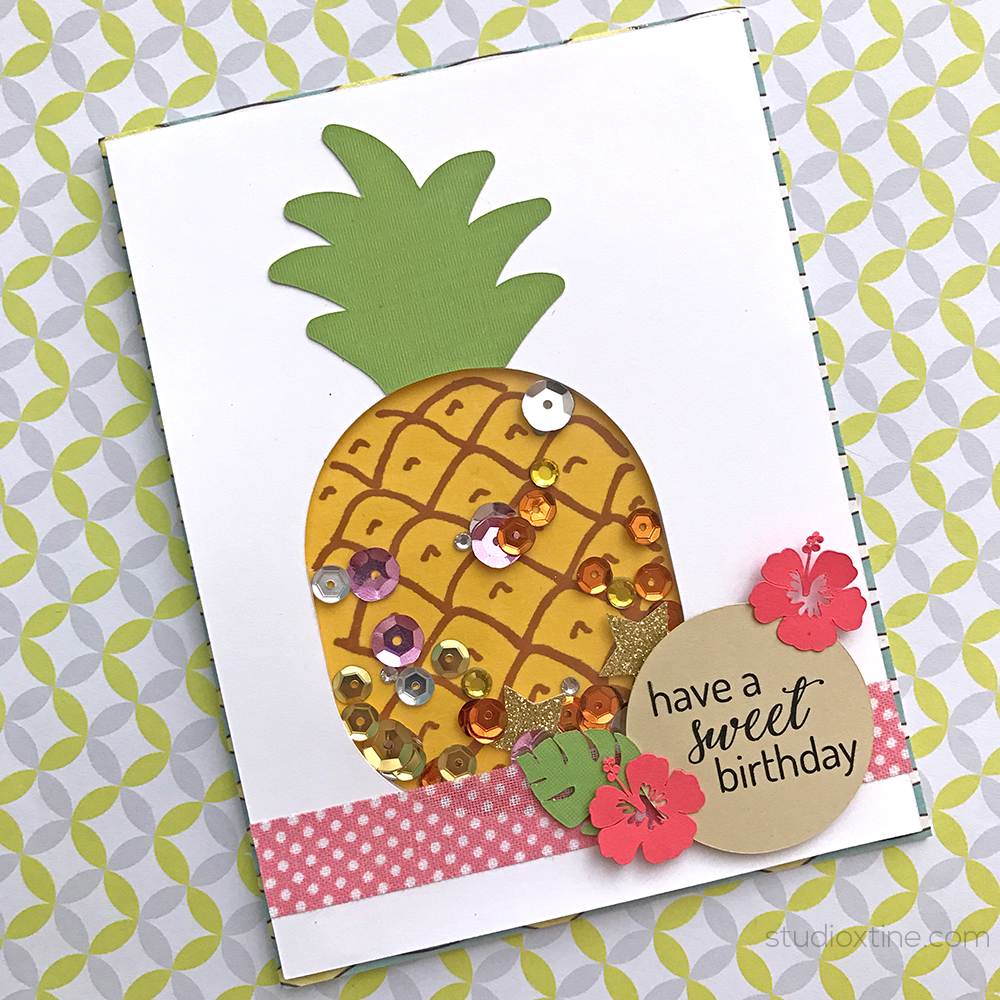
Hawaii appears to be the place to be as my mother-in-law was also in town to celebrate her birthday! Um, can I go somewhere fabulous for my birthday every year? Sigh! Soooo, it was only fitting to make a fun tropical-style birthday shaker card! Shaker cards really take your handmade cards to the next level. Not only is it fun to shake as if it was a maraca, it looks fancy-schmancy (aka it looks like you spent hours on it but ya didn’t!).
Never made a shaker card? For those with a Silhouette cutting machine, follow along this tutorial to see how easy it is!
Supplies needed:
- Download Silhouette Design ID #83612 by talented Amy Robison (whom I met on my Silhouette Summit trip!)
- Download Silhouette Design ID #192829 by Daniela Moscone
- Cardstock in green, coral, khaki, and white
- Patterned cardstock (for card base) or feel free to use anything you have
- Shaker filler materials
- I used sequins in gold, silver, light pink light orange
- Tiny rhinestones. I used a mix of Silhouette rhinestones and leftover ones I purchased from Michaels
- Dimensional adhesive
- Fabric or regular washi tape
- Brown fine-tip marker
- Clear acetate. (HACK: This is going to sound weird but it’s resourceful…I use the clear acetate that comes with dimensional stickers or clear stamps. Be sure to use ones that are truly clear and unblemished.)
- Foam tape (I purchased this one which is available in many local stores)
- Tape runner (this is my go-to crafting adhesive)
Make the card base:
- This is a standard 4.25″ wide x 5.5″ tall card. So the card base measures 8.5″ wide by 5.5″ high and then folded in the middle.
Make the white cutout layer:
- In Silhouette Studio, cut a 4.125″ wide x 5.375″ high rectangle. Then, drop in Design ID#83612.
- Right click on the design and “ungroup” the various pieces. Delete the middle and left pieces. What you have left is the pineapple top (the stem) and pineapple bottom.
- This step is optional: I modified the pineapple top by deleting (anchor) points near the bottom to give it a shorter “stem”
- Next, move the pineapple top so that it rests right above the pineapple bottom (the oval shape). Right click to group.
- Then, resize the grouped pineapple piece so that it would be almost as tall as the card.
- Ungroup the pineapple piece and “cut” the pineapple top” and “paste” onto a blank Silhouette file. This is because we want the pineapple top to be cut on a different paper. *See last step*
- Now, you should be left with just a rectangle and the oval-shaped pineapple bottom. This will be your “shaker window.”
- Using white cardstock, send to Silhouette with the appropriate cut settings.
Make the background design for the shaker window:
- I used leftover yellow scrap paper that was larger than the shaker window
- Center your cutout layer on top of the card base to determine where to place the yellow scrap paper underneath. Once you find the perfect spot, use tape runner to adhere the yellow scrap paper to the card base.
- Next, set your cutout layer down over the card base+yellow scrap paper. Hold down firmly so that the cutout layer doesn’t move.
- Take the brown fine-tip marker and draw in pineapple design on the yellow scrap paper. Be careful not to run marker too close to the cutout layer otherwise marker will bleed onto the white cutout paper.
Create shaker window:
- Trim the plastic acetate if necessary. Ideally, it should be 0.5″ larger than the cutout.
- Apply tape runner to the inside perimeter of the cutout
- Set the plastic acetate on top and press firmly. Tada! You’ve created your shaker window!
Add shaker filler material:
- On the background design, glue on a few rhinestones and sequins. These will be static embellishments. Why?? The reason why I do this is because it keeps the card visually interesting. Otherwise, all the sequins are all bunched up on the bottom of the shaker window.
- Next, cut little strips of the adhesive foam tape and place them on top of the plastic acetate, following the oval shape of the cutout.
- TIP: Offset the strips about 0.125″ from the cutout edge so that you don’t see the foam tape from the front of the window.
- TIP: Make sure to have the foam tape pieces touch from one end to another. This way the shaker filler won’t fall out of the window.
- On the background design, drop in your filler materials. I used sequins of various sizes and colors. Make a little pile in the middle of the background design.
- Take your cutout layer that now has the foam tape and set it over the card base.
- Press firmly where the adhesive foam tape is to securely close the shaker window.
- Add adhesive foam tape as necessary at the corners of the cutout layer. This will make your entire cutout layer “pop” from the card base.
- Once you have ensured your shaker window is secure, shake your card to see the filler material move around inside the window. Fun, right?!
Add final embellishments:
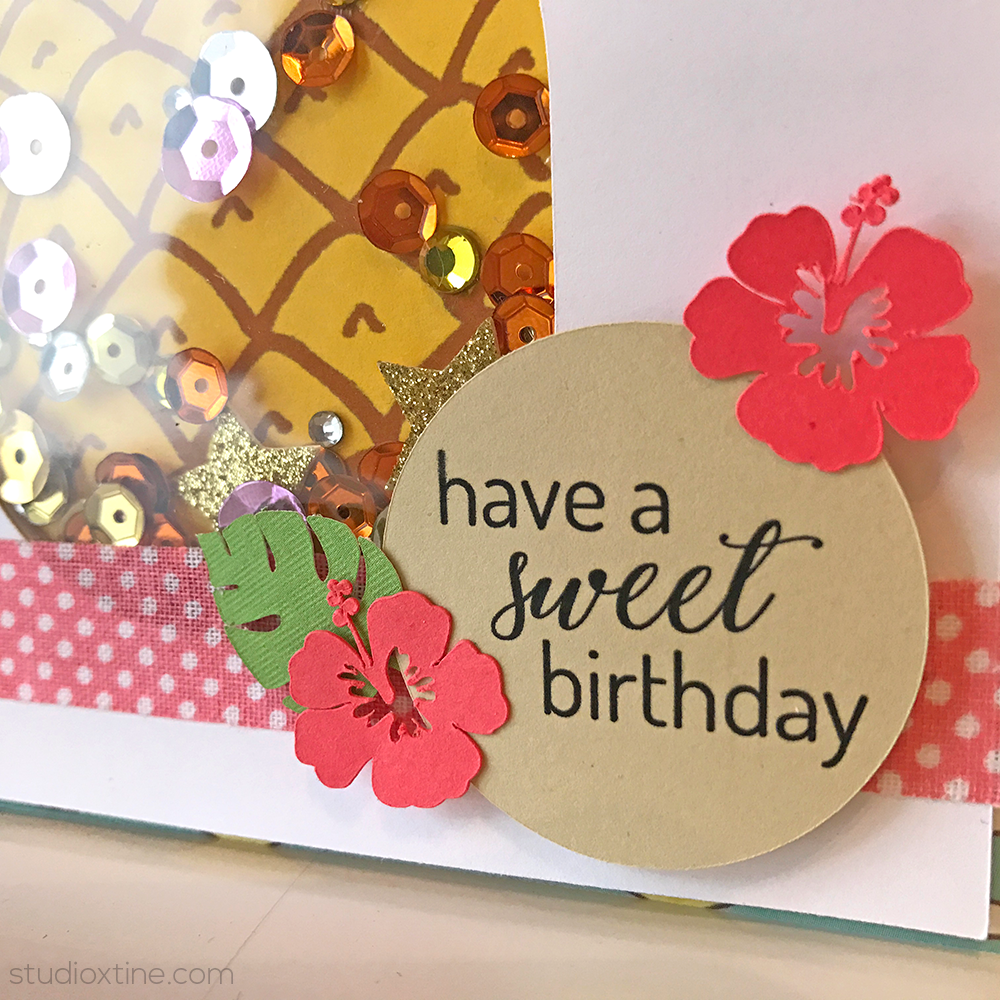
- On top of the shaker window, add a strip of washi tape. I used fabric because it was a new material I wanted to try out and I like how it brings a different texture to the card
- The circular “have a sweet birthday” tag was created using Silhouette’s Print and Cut feature. Adhere to card with dimensional adhesive to give it a layered look.
- Next, cut and add two hibiscus flowers and tropical leaf from Design ID #192829 to tie in the tropical theme.
- Lastly, remember when we saved the pineapple top (stem) onto a separate Silhouette design file? Cut the design using the same green paper as the tropical leaf. Use adhesive tape runner to adhere it above the shaker window (pineapple bottom).