

My dear friend Lauren (who was one of my bridesmaids) had her sweet baby girl last month…hooray! She’s going to be a wonderful mama! 🙂
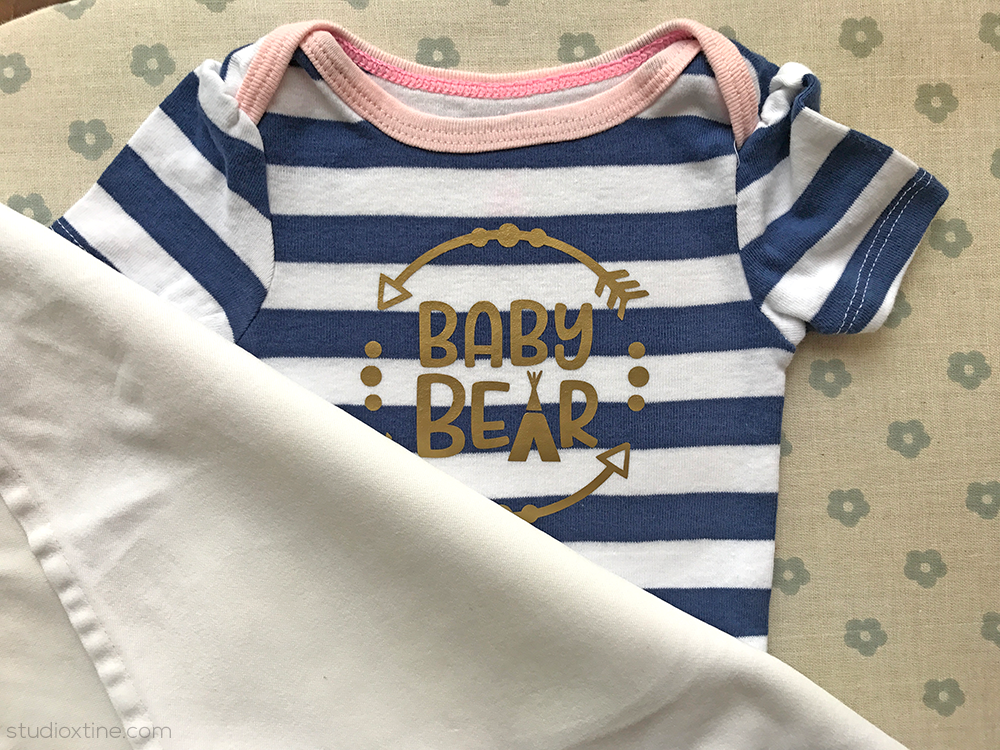
Little babies in bodysuits/onesies are so dang cute plus both my kiddos went through 4-5 outfits a day when they were so tiny thanks to spit-up and blowouts! So I thought I would customize some for her adorable babe. I purchased a 5-pack of Cat & Jack onesies from Target and added some ready-made designs using heat transfer vinyl (HTV). This new baby gift was whipped up in less than 15 mins!
Want to learn how to make some of your own custom apparel? Follow the steps below!
Supplies Needed:
- Clothing
- Heat transfer vinyl (I used smooth material in gold, black, and glitter gold)
- Iron
- Linen napkin or thin piece of fabric
- Weeding tool (I normally use an Exacto knife but this time, I tried out a new tool a friend suggested…Fiskars’ Fingertip Detail Knife. It worked great!)
- Silhouette CAMEO
- Cutting mat
Before I start, if you’re using baby clothing, I recommend washing them first (with Dreft). No tired mama with a newborn has time or energy to wash clothes!)
- Find and download a design you like in the Silhouette Design Store.
- In Silhouette Studio, adjust the size of the design so that it fits proportionately on your clothing
- Place the heat transfer vinyl on your cutting mat (clear plastic backing down, sticking it onto the cutting mat)
- IMPORTANT STEP: Mirror your design by going to “Replicate” Window and choosing “Mirror Right.” Delete the original correct-facing design. You want the mirrored design when using HTV
- Next, open the “Cut Settings” window and select “Heat Transfer Material – Smooth”. Depending on your blade, you may need to adjust other settings so that your design cuts through the HTV material (but not the clear plastic backing). TIP: You may want to do a test cut to make sure you have the correct settings before wasting your HTV material!
- Once cut, peel from cutting mat and begin weeding with your weeding tool. Be sure to remove any pieces within “looped” characters like “O” or “e” or “g” (you get the idea!)
- After weeding, you should see a mirrored image of your design.
- Place your article of clothing flat on your ironing board, smoothing out any wrinkles either by hand or with your iron.
- Set your HTV on top of clothing where you would like it to be. Be sure clear plastic backing is facing up, away from clothing. HTV should be touching your clothing
- Place your thin piece of fabric (mine is a linen napkin) on top of the HTV piece and begin ironing, pressing down firmly.
- Hold down for 10-15 seconds. TIP: do not push/move your iron. If your design is larger than your iron’s footprint, lift iron up and press down again on new area.
- Let cool for a 10 seconds.
- From one corner, lift off the clear plastic backing to see if HTV has fully transferred to clothing. If so, carefully pull off the clear plastic backing. If not, try ironing a little more/longer until HTV adheres.
- Once you have removed the clear plastic backing, put the linen napkin back over the design and iron downwards again for 10 seconds. This step is probably not necessary but I always do it as a final assurance HTV has adhered to the clothing. See picture below.
That’s it folks! Easy peasy! The hardest part will be finding a design…so many great options on the Silhouette Design Store! OR have fun and make your own design! 🙂