
Two of my friends are getting married! Hooray! A little-known fact about me…I am also a wedding planner/coordinator taking on a few clients a year. Thank goodness I was married pre-Pinterest because if Pinterest was around, I probably would have had the longest engagement period either making everything DIY or constantly changing my mind on design elements like escort card displays!
Luckily, I know where to turn to when I need to make cute cards! A quick search through the Silhouette Design Store, I stumbled upon a beautiful cutout card design where the file actually came with two cards. PERFECT!
Here’s how I made the card above:
You will need:
- Silhouette CAMEO
- Cutting Mat
- Design ID #37499
- Solid-colored cardstock
- I used a 12in x 12in coral sheet for the card
- Two 5.5in square pieces in white
- White and dark blue leftover scraps to make the “Congrats” word embellishment
- Patterned scrapbook paper (Each piece was 2.5in x 5.5in. I recommend a non-busy pattern/design)
- Dimensional adhesive
- Glue (I used Tombow Multi Liquid Glue…it’s THE BEST! A must have!)
Step-by-step tutorial:
- In Silhouette Studio, set your page size to 12in x 12in. Then open Design ID#37499 from your library.
- Right-click and ungroup. Now you have separated the top card from the bottom card.
- Starting with either the top or bottom card, right-click again and select Release Compound Path.
- For my card, I deleted “TRUE LOVE”
- Repeat steps 3-4 for the other card.
- Send to Silhouette using proper cut settings. NOTE: I selected Double Cut to ensure a clean cut.
- Peel the cards off cutting mat once cutting has finished and fold along the perforated lines.
- Use your adhesive tape runner to stick your 5.5in white square pieces on the inside of the card, where you write your message.
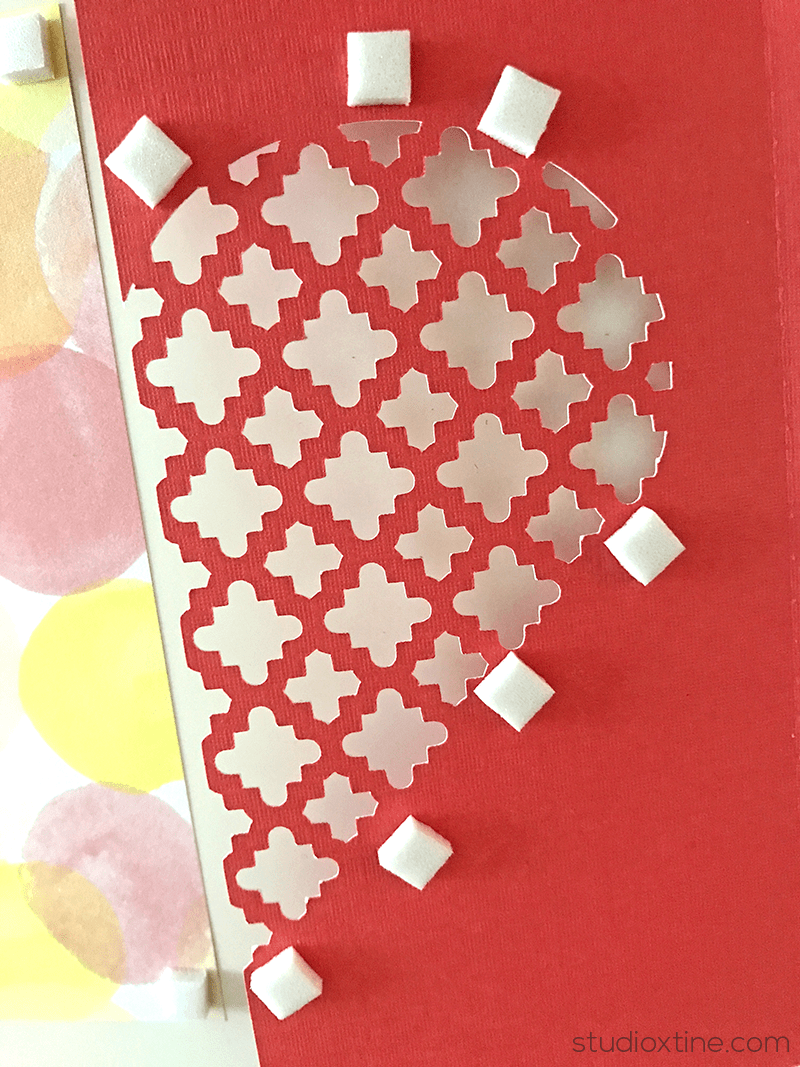
- Next, put dimensional adhesives around the heart’s perimeter on the inside flap of the card.

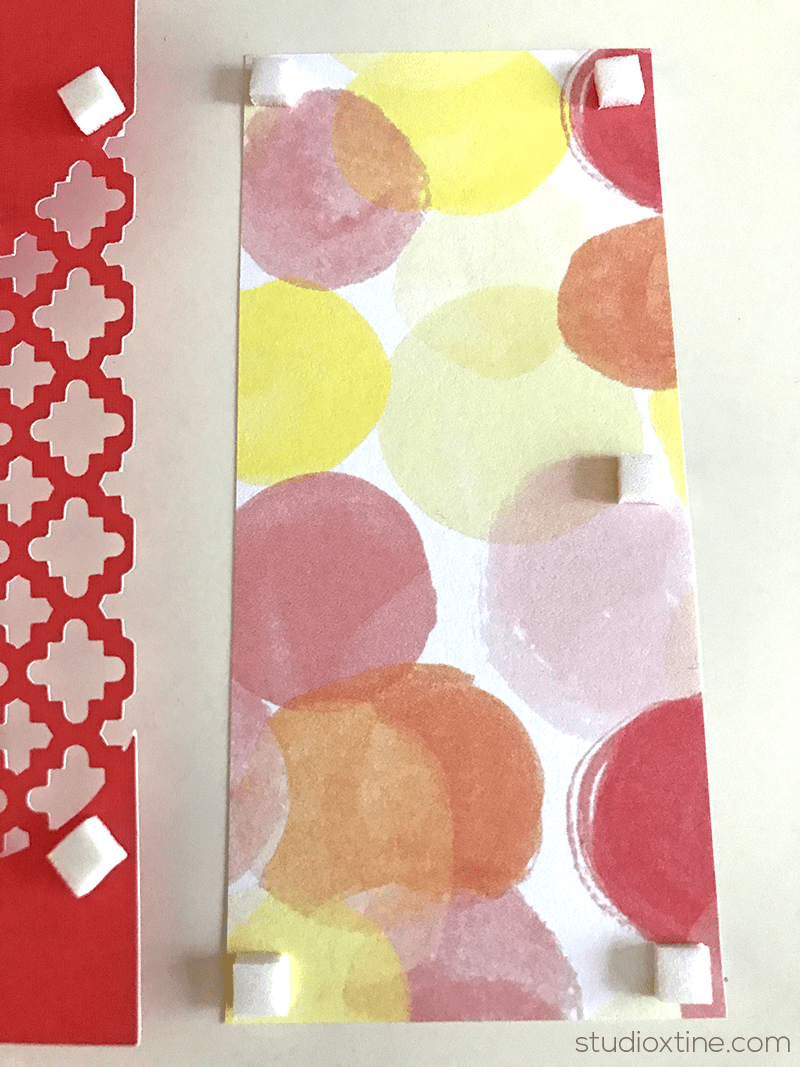
- Place dimensional adhesive on the corners of the patterned paper with paper facing up. Flip this piece over and place it on top of the inside flap of the card. NOTE: Make sure you align the flap edge with the pattern paper edge. GREAT! You’ve now created a “shadow box” appearance with the card.
- To make the “Congrats” word embellishment, I simply typed it in Silhouette. Because it’s a script font, I welded the text so that the letters connected.
- Next, I created an offset to make the white background behind “Congrats”
- If you’re making two cards, be sure to do steps 10-11 twice! Raise your hand if you like to work efficiently!
- Sent both to Silhouette to cut and glued them together with my Tombow Multi Liquid Glue.
- Lastly, I placed dimensional adhesives on the back of the embellishment and centered it over the cutout heart. The embellishment also helps keep the card closed!
These cards were quick to whip up and are so dang cute! You can change the word embellishment to anything that fits your needs. The delicate cutout design truly showcases the precision-cutting capability of the Silhouette cutting machine!!