One my “crafty” bucket list goals is to learn modern calligraphy. I took a shot at it earlier this year and even practiced a bit on my whirlwind trip to Paris…how romantic and idyllic does that sound? Well, despite being a creative person, I have a long ways to go. It definitely is one of those “practice makes perfect” kind of activity. And I just need to make time for the practicing to happen.
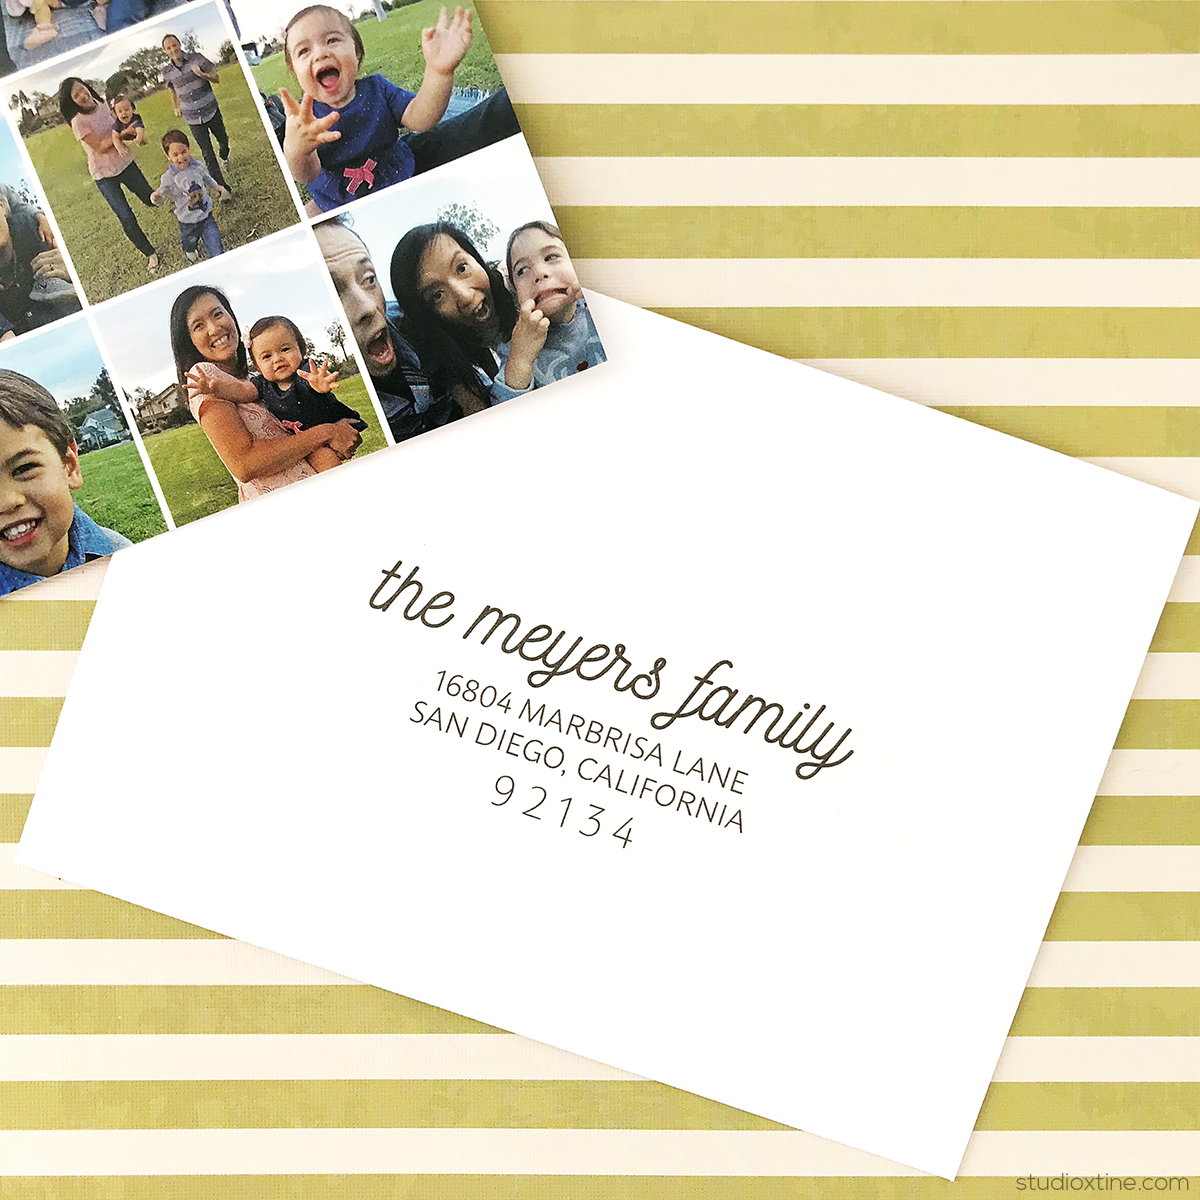
Until then, I am going to stick to my secret weapon when it comes to addressing my Christmas card envelopes. The irony is that my secret weapon really isn’t that secretive. You probably have it in your own home. I’m talking about a printer! 😱 Yup, I have used my home printer to address all my special occasion envelopes. Hooray, no more hand cramping that leads to sloppy handwriting!
In addition to a printer, you just need either Microsoft Word, Apple Pages, or if you’re fancy-schmancy, Adobe InDesign. I have a PC so I can only really vouch for Word and InDesign but all three should work just fine.
Below are the basic steps:
- First, set up your file to match the size of your envelope.
- Then add text (aka your recipient’s mailing address) using your favorite font(s) and playing around with the formatting.
- Once you are happy, insert your envelope into your printer paper/envelope tray. NOTE: you may need to flip it upside down depending on how your tray feeds your envelope.
- Do a test print to see how your text lines up and make any adjustments if needed.
- Once you have your finalized style, print again and the rest of your envelopes.
If you’re like me, you have a long list of addresses. No problem! You can use a “merge” feature that will auto-fill your addresses so that you are not typing (or copying/pasting) each one in. NOTE: After your program merges and autofills, I do recommend going through each record to make sure everything looks right.
For MS Word, check out this youtube video with step-by-step instructions on using the MS Word’s “Mail Merge” feature.
For InDesign, watch this video to see how to use the “Data Merge” feature (different name across programs but all the same function).
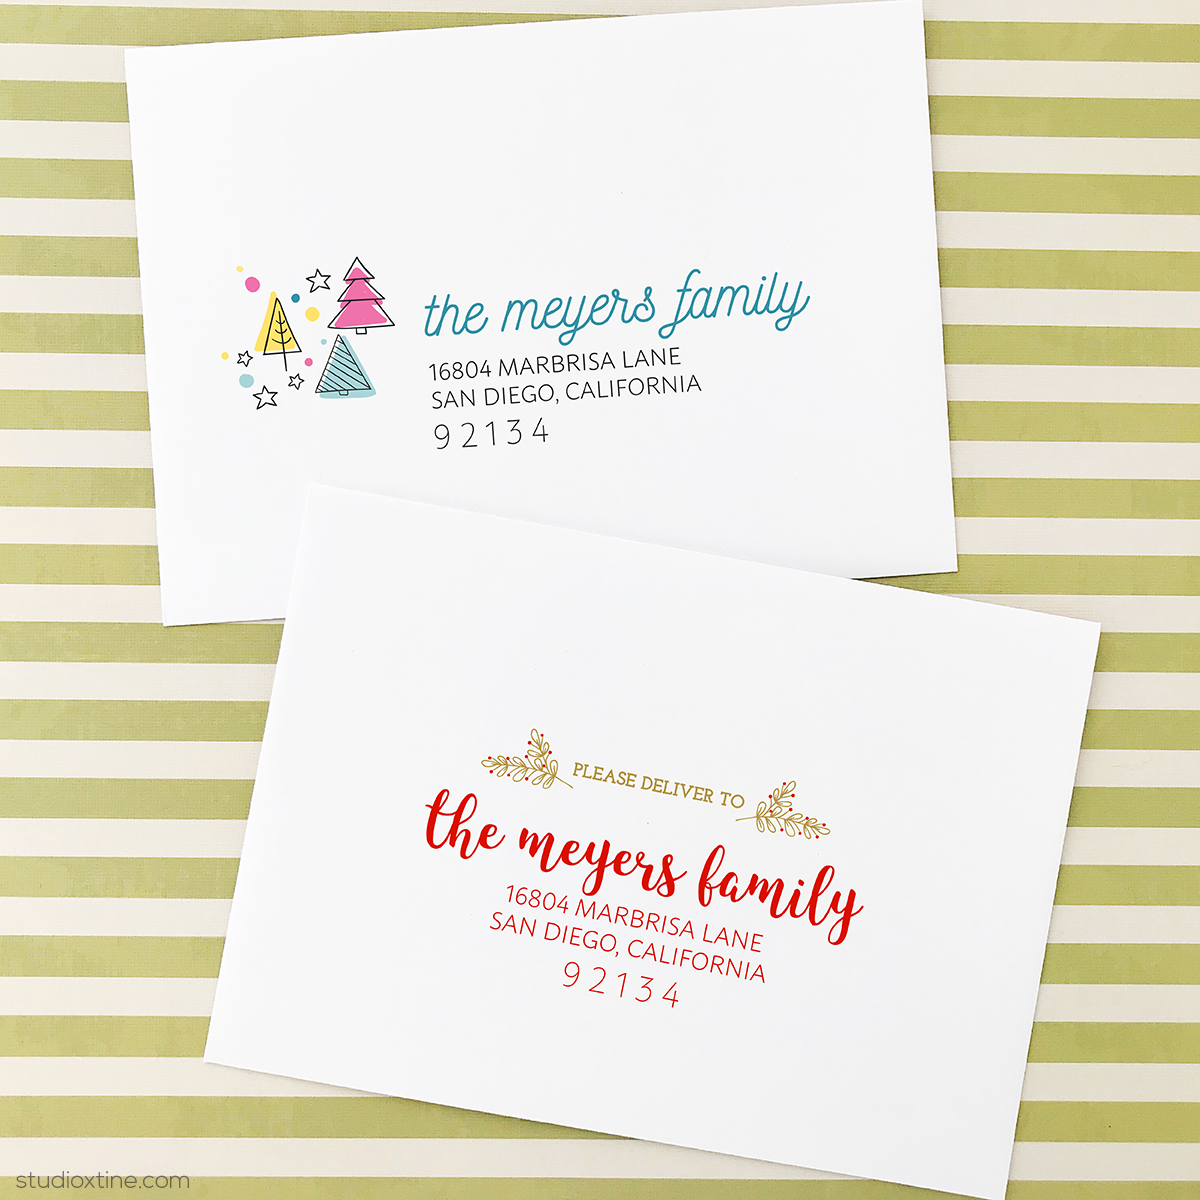
You can even have a little fun and add color plus some vector graphics on your envelope template. The possibilities are truly endless! These little design elements will surely make your envelope and Christmas photo card stand out! 🎄