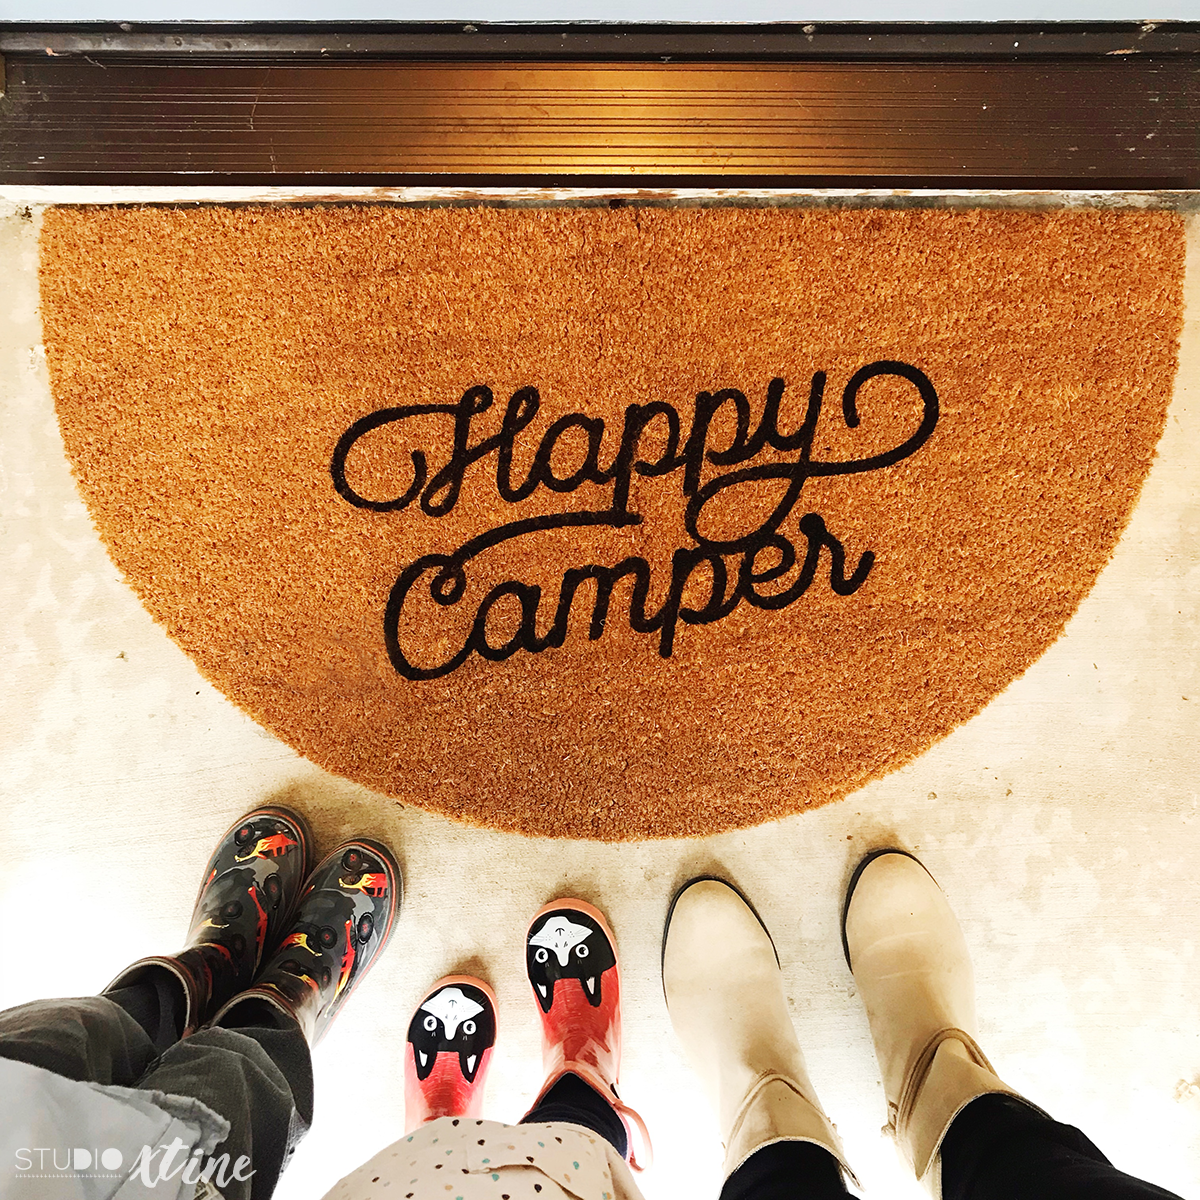
Any crafter or just anyone have something on their (craft) bucket to-do list for over a year but never get around doing it? Yup, my hand is raised. I have had this project in mind for over a year and I finally got around to making it and LOVED how it turned out! Yay, go me! Time to celebrate with a ginormous slice of Trader Joe’s Chantilly Cream Vanilla Bean Mini Sheet Cake. Since I just mentioned it, have you guys had that cake? It is a-m-a-z-e-balls. Confession: I literally ate it straight out of the tray last time. This way, it was all mine. Hubs is not interested in sharing germs during crazy flu/cold season. #worksforme
Why do I often digress when I talk about food?? I truly think it’s the sixth love language.
So, back to my latest project! As usual, my projects are spurred on by a necessity or an event, which in this case is my son’s upcoming 5th birthday party! The theme is camping/great outdoors/hiking/adventure/all of the above. I tend to have a broad theme when it comes to party planning so that I’m not stuck to a specific design/look. It gives me the flexibility to create a general appearance than trying to achieve the perfect look. Because when you can’t achieve the perfect look, it just looks poorly done.
You might be wondering what my kiddo’s birthday party has to do with a DIY doormat. Well! We are first going on an outdoor adventure hiking a local trail/canyon and returning to an event space owned by one of my dear friends. Her shop opened just a few days ago and this themed doormat will hopefully help keep the dirt out of her beautiful store. Ya never know with a bunch of preschoolers!!
If you have been thinking about making a DIY doormat, DO IT! Trust me, I waited too long and now can’t wait to make more…except I personally don’t need to make more. The steps are easy and I’ll detail them below. It’s also super easy on the wallet. As of today, my local Ikea store was selling the TRAMPA doormat for $5.99 versus the regular price of $9.99. It took a lot of self-control to say NO to my FOMO(of a good deal) condition. I wanted to grab a bunch. I mean, they could be good Valentine’s Day gifts, right? 🤔
Wanna know how to make your OWN doormat?? Read on!
Here’s what you need:
- Doormat (link)
- Outdoor acrylic paint in black (or whatever color you want) (link)
- Old artist round paintbrush. The older/stiff the bristles, the better. Some folks use stencil brushes like this one.
- Freezer paper, trimmed to measure 12in x 24in (link)
- Measuring tape
- Silhouette CAMEO
- Silhouette 12in x 24in cutting mat (link)
- Pins. I used corsage pins (like these) that I already had in my home.
- Iron
- Scotchgard protection spray (link)
For my particular project, I used Silhouette Design Store Design ID#146726 by Sophie Gallo. Isn’t her design just perfect for the occasion? Not to mention, the typography is so on point!
To make your own doormat, follow these steps:
- In Silhouette Studio, under Page Setup panel, edit your page size to 12in width and 24in length. Also select the appropriate cutting mat size (12in x 24in)
- Either create your own design or bring in a downloaded design. TIP: I suggest using a measuring tape to see roughly how large you want your design to be on the doormat.
- Resize your design as-needed in Silhouette Studio.
- Place your freezer paper down on the cutting mat (shiny side down). Press firmly throughout to make sure the paper is secured to the cutting mat.
- Send to Silhouette. Many swear by Blade Depth 1, Speed 3, and Force/Thickness 2. I think I had an older blade so I adjusted my cut settings to the following: Blade Depth 2, Speed 3, Force/Thickness 10. TIP: I highly suggest a Test Cut before cutting out your entire design.
- Once cut, carefully remove the freezer paper “stencil” from the cutting mat. For now, don’t worry about any loose pieces (aka the ones that go “inside” letters, such as A or O).
- Place the main stencil piece on top of your doormat where you would like it to be. Press down lightly with the palm of your hand. Freezer paper will lightly adhere to the doormat.
- Remove the loose pieces from cutting mat and place on top of the doormat in the appropriate spots.
- IMPORTANT STEP: Make sure you like how your stencil looks on your mat.
- With a hot iron, gently press down and the freezer paper will temporarily stick to the doormat. If you need to make any adjustments, simply lift, adjust, and iron again.
- For the tiny loose pieces, use pins to secure it to the mat. TIP: I suggest using at least two pins per loose piece.
- Now we paint! Place a large dollop of paint on a blank spot on your stencil. Don’t worry, paint won’t bleed through.
- Start dabbing paint over the stencil and be careful around the small pinned paper pieces. NOTE: do not paint/brush, DAB in a vertical motion. You can go over the same spot to get better paint coverage.
- When you’re done, while the paint is still wet, peel off the freezer paper stencil and you now see a beautiful, professional-looking, and customized doormat!
- If you want your mat to last a little longer or plan to use it outdoors, I recommend spraying one coat of Scotchgard protection spray.
So now that you know how to make one, what would you put on YOUR doormat?
