This blog post contains affiliate links. By purchasing through a link, Studio Xtine may receive a small commission that will help keep the blog running but more importantly, keep you crafting with me. 😊
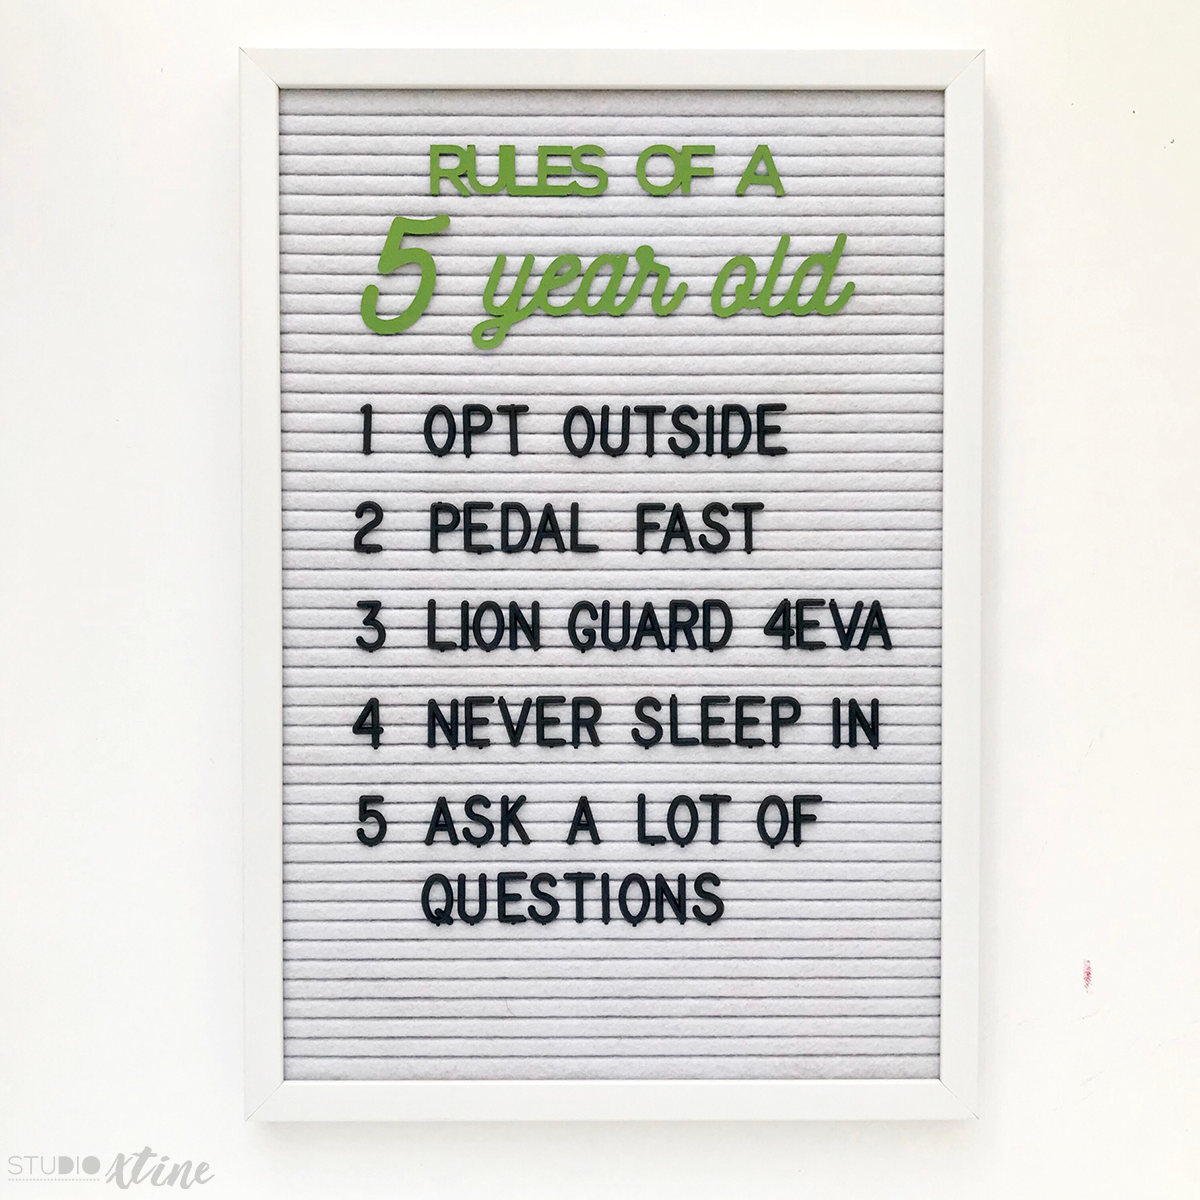
I love my $10 letterboard from WalMart. It’s made by Leisure Arts and can be found in the craft aisles. I recently used it at my son’s 5th birthday party and wondered if I could make the title of the sign stand out a little more by creating larger DIY letterboard paper letters. Turns out you can if you have a paper cutting machine like the Silhouette or Cricut.
For this project, I used basic cardstock. Below are instructions for the Silhouette CAMEO.
- In Silhouette Studio (the design software), create your text and adjust the text in terms of height and width as needed.
- For words using non-script fonts, reduce the “Character Spacing” from the “Text Style” panel so that your letters slightly touch each other (see the words “rules” and “of” in my picture above). Then, with your word selected, right-click to “Release Compound Path” followed by another right click to “Ungroup.” Now, each letter should be unique/separate from the other letters. You may need to manually move certain letters to overlap the adjacent letter.
- Once all the letters slightly overlap, choose “Weld” from the Modify panel. You should now have one “piece” of text.
- Next, we are going to make the little tabs that stick into the letterboard. These tabs secure the letters/words to the letterboard.
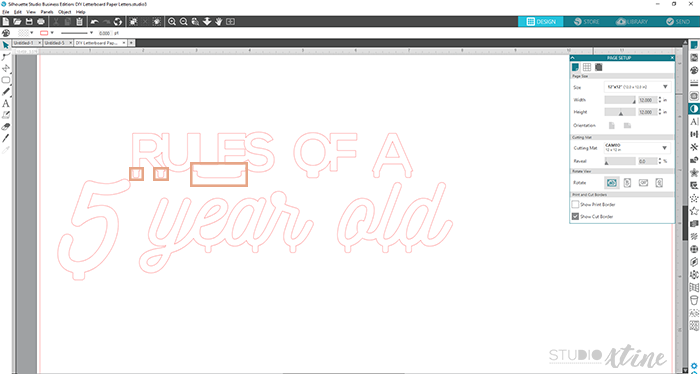
- Draw a rounded rectangle that is 0.15in tall by however wide you need it. Width is determined by where you overlap the rounded rectangle with the base of letters. For instance, I placed a wide rounded rectangle under the letters “L” and “E” in the word “Rules” and the a narrower pair under the letter “R” in the same word. See pink boxes in screenshot below.

- Once you have your rounded rectangles placed AND overlapping the letters, the next step is to “Weld” them to create the tabs.
- Draw a rounded rectangle that is 0.15in tall by however wide you need it. Width is determined by where you overlap the rounded rectangle with the base of letters. For instance, I placed a wide rounded rectangle under the letters “L” and “E” in the word “Rules” and the a narrower pair under the letter “R” in the same word. See pink boxes in screenshot below.
- Last step is easy, simply fold so that the tab creates a 90 degree angle with your paper letters/words. Stick it into your letterboard and you’ve got some cool looking customized letterboard paper letters!
Now that you have the steps, the DIY/customization possibilities are endless!! You could even use fun/colorful cardstock and really give your letterboard some pizzazz!!