True or False: If you suddenly have a trillion photos on your smartphone, congratulations! You are a new parent.
True or False: Said trillion photos sit idle on smartphones (sometimes not even backed up *gasp*) but new parents wish they could put them in baby books.
If you said true to both questions, then today’s blog post was written for you! I was in that exact boat six years ago when my firstborn torpedoed into our lives and I used my phone more for photos than for talking. My iPhone quickly filled up with photos of our son in various outfits (a human Barbie doll!) doing in-home DIY photo sessions because his busybody mommy was bored. 🤦
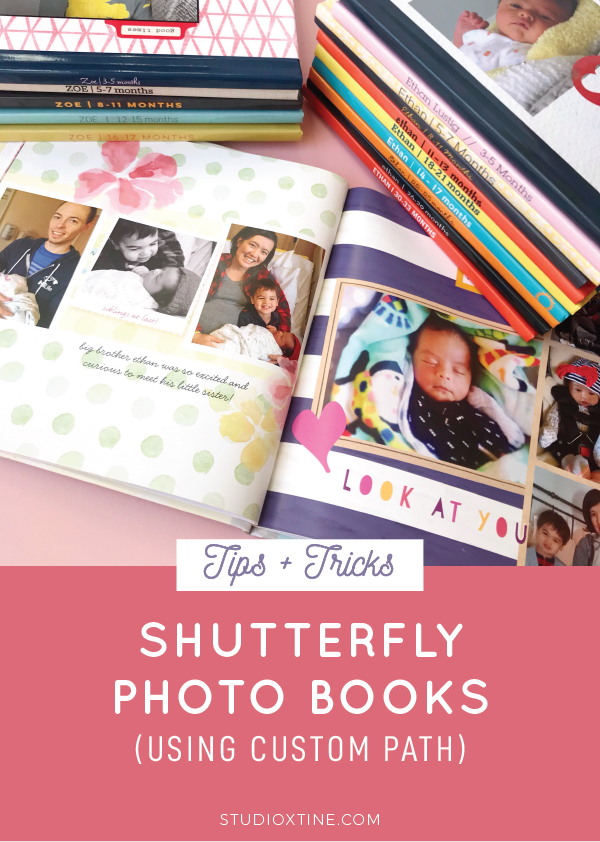
Since those photos were doing nothing sitting on my phone or backed up on a computer, I turned to Shutterfly to create my kids’ baby books. Time becomes such a hot commodity once you become a parent so there was no way I was going to create physical scrapbooks. Besides, Shutterfly’s online software comes with so many beautiful pre-designed idea pages and layouts that it feels personalized.
There are two ways to make your own Shutterfly photo book:
- Custom Path – total personalization where you can add, move, and resize pictures and text anywhere. If you’re a crafter/maker, you might prefer this method and be great at it!
- Simple Path – let Shutterfly do all the work by pre-arranging your photos. You can still re-arrange and add captions. This is great method if you’re short on time!
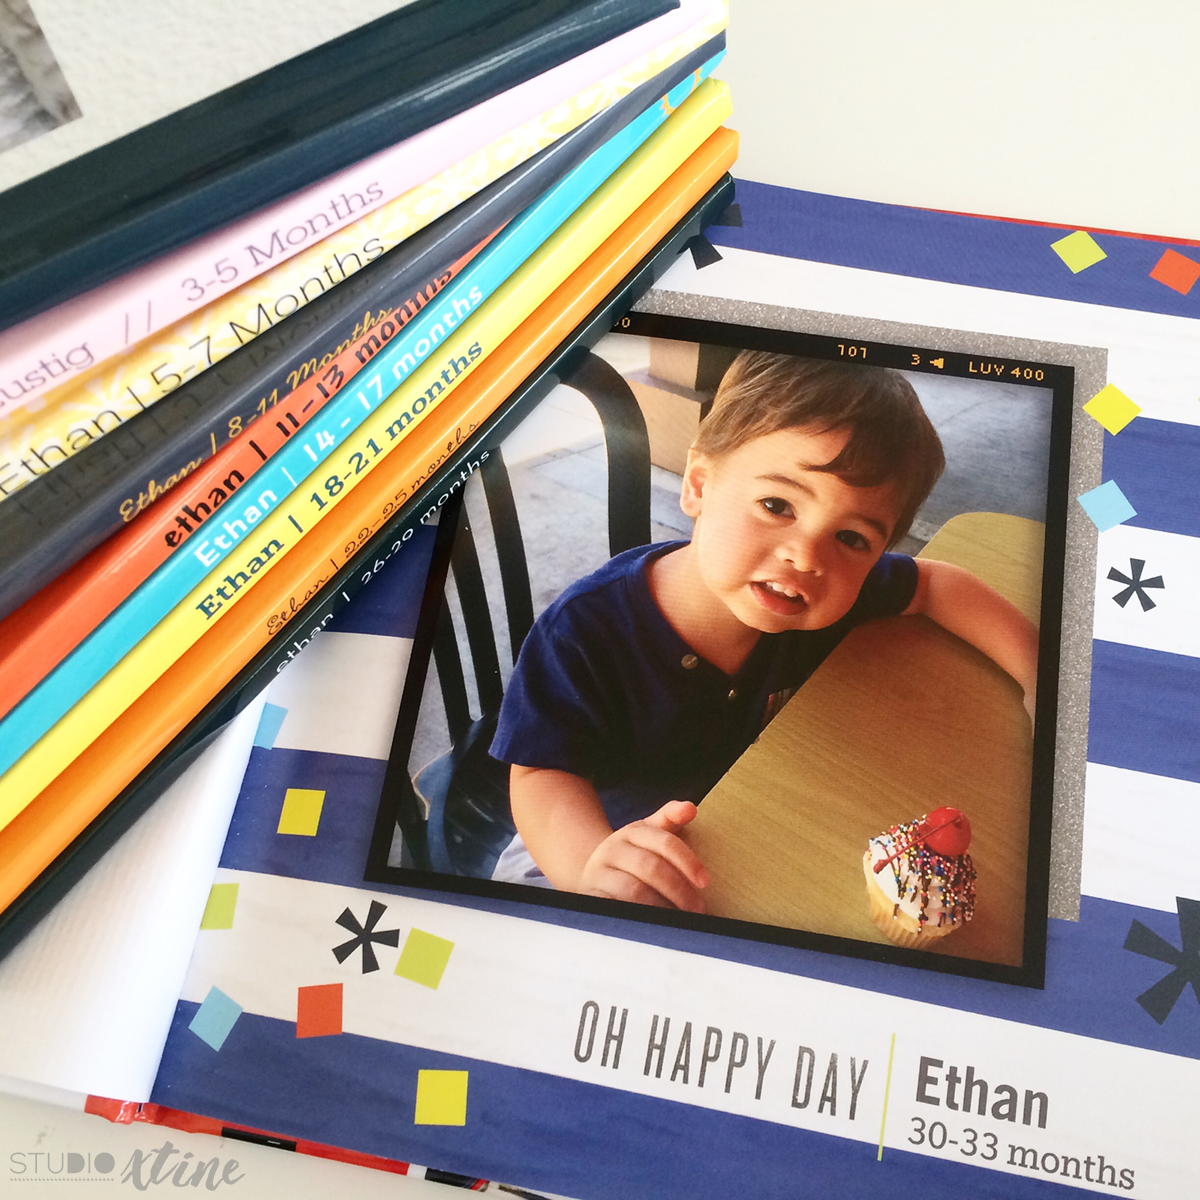
To date, I have made 17 photo books through Shutterfly’s Custom Path method. I make one that covers 3-4 months because I have so many photos I want to remember/use in the books but you could of course do a book per year too! Whatever floats your boat!
Want to make a photo book but want it to be painless process? You’re in luck! Here is the general process of how I create my photo books a la Custom Path:
Step One: Prepare Photos
Download the Shutterfly app on your smartphones. Note I used plural tense? I want to compile photos from both my husband’s and my smartphones.
Upload all the photos you want and put them in a new album. Title the new album something similar to what your project is. For example: “Jennifer (0-6months)” or “Jennifer (1 year old)”.
Step Two: Set up Your Shutterfly Project
From this page, choose your photo book size. I use the 8×8 because it’s a good size for my kids to flip through (they love looking at their baby photos) and because Shutterfly runs promos where the 8×8 photo book size is FREE. That’s right, I said F-R-E-E! All you have to pay is shipping. You won’t believe it but all 17 of my kids’ photo books were all made with this deal! So instead of paying over $640 for the 17 books, I only paid a little over $130!!!
But I digress! Hard to avoid talking about a good deal!
Next, choose a “Style” for your photo book. I typically choose “Standard Styles” because there is no extra fee. “Storytelling Styles” are stunning premium designs.
Once Shutterfly’s Custom Path program is loaded, the next step is to “add photos” from your recently titled album from Step One. Shutterfly will then ask if you want to automatically (“fill pages”) or manually (“photo tabs”) add the photos. In this tutorial, I use the manual “photo tab” method. I will explain in the next step.
Step Three: Storyboard
On the top of your browser, there is a project menu (Story / Storyboard / Edit / Arrange / Options). Click on “Storyboard” and make sure to turn on “Hide used” as well as Group by Month.
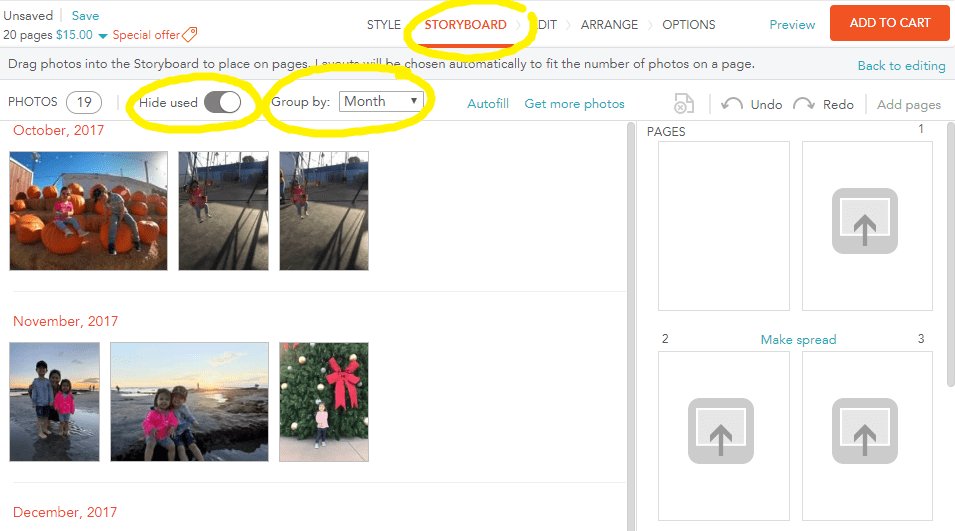
Now, look through your photos and begin the “Storyboard” process by dragging photos to the pages on the right. I try to group them by the activity/event.
- For example, I put all the pictures from the pumpkin patch on one page and all the pictures of friends from preschool on another page.
- Sometimes, I will make a themed sibling page (because I have so many of my kids together) and put all sibling photos on a Spread (two side-by-side pages). To do this, click on “Make spread” and the two pages will “connect”.
- I usually put 2-5 photos on individual pages and go up to 10 on spreads. Just a FYI.
Sometimes my Storyboard will have a page full of pictures that I want earlier in the photo book. If that’s the case, the easiest way to arrange the pages is to go to the “Arrange” option on the project menu. Simply click and drag the page to the new spot.
Step Four: Edit
This is the step where I spend the most time because it feels like I’m scrapbooking. I usually spend about 2 hours total but you certainly can do it much quicker with less detail, customization, and crafting OCD.
In my opinion, these next 3 sub-steps are the TIME-SAVING KEYS to making beautiful photo books.
First, click to the first page of your photo book. Then before I begin editing each page, I load up my “library” of design goodies!
Backgrounds
- On the left of the project, you will see Layouts, Backgrounds, Embellishments, and Idea Pages. Let’s start with Backgrounds.
- Click on Backgrounds and in the pop-up, under Collections, I select “Standard” to avoid paying the extra “Storytelling” fee. For premium backgrounds, they’re only $0.25 each so sometimes I will splurge (ha!) a little for that perfect background.
- NOTE: If you add premium items (backgrounds, embellishments, etc), you could get charged for it even if you don’t actually apply it to your project.
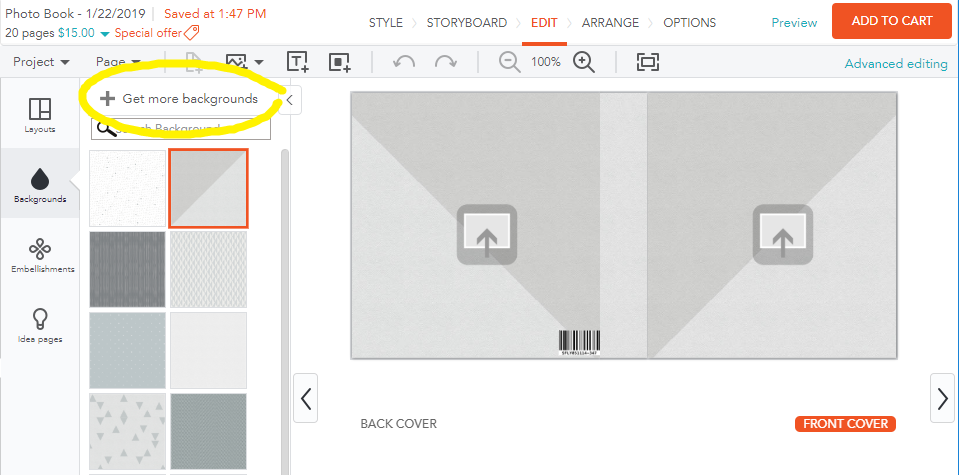
- I add all the backgrounds that I like and think would work well for my project.
- These added backgrounds will be loaded above the default backgrounds.
Idea Pages
- Click on Idea Pages and in the pop-up, under Collections, I select “Standard” to avoid paying the extra “Storytelling” fee.
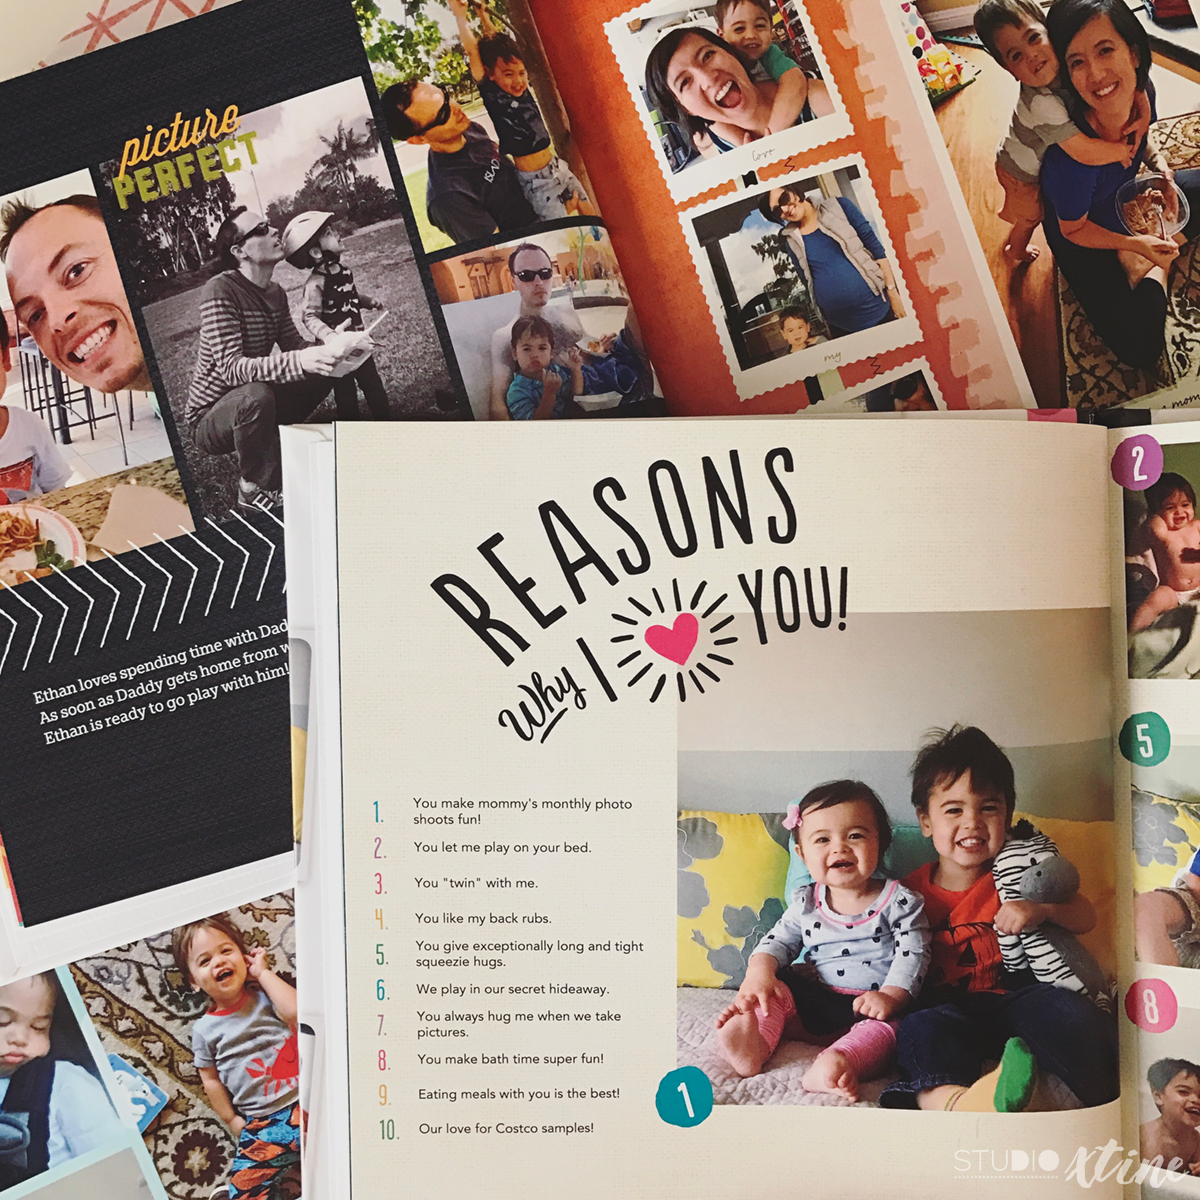
- These Idea Pages are pretty well-done so sometimes I just use these for my photo books and make a few tweaks to customize it. In my opinion, this is the ultimate shortcut in creating photo books! Why reinvent the wheel right??!!
- The library of Idea Pages are arranged by the # of pictures. I wish there was a way to filter by # of pictures versus scrolling through the entire library. So before you adding Idea Pages, I highly recommend looking at your Storyboard to see how many pictures are on each page.
- Fill up your library with your favorite Idea Pages!
- For my books, I typically add 5-7 Idea Pages with two picture slots, 5-7 Idea Pages with three picture slots, 7-9 Idea Pages with four picture slots, 5-7 Idea Pages with five picture slots. This way I have a full library to choose from.
- You can also add Idea Pages for Spreads. Super handy shortcut!
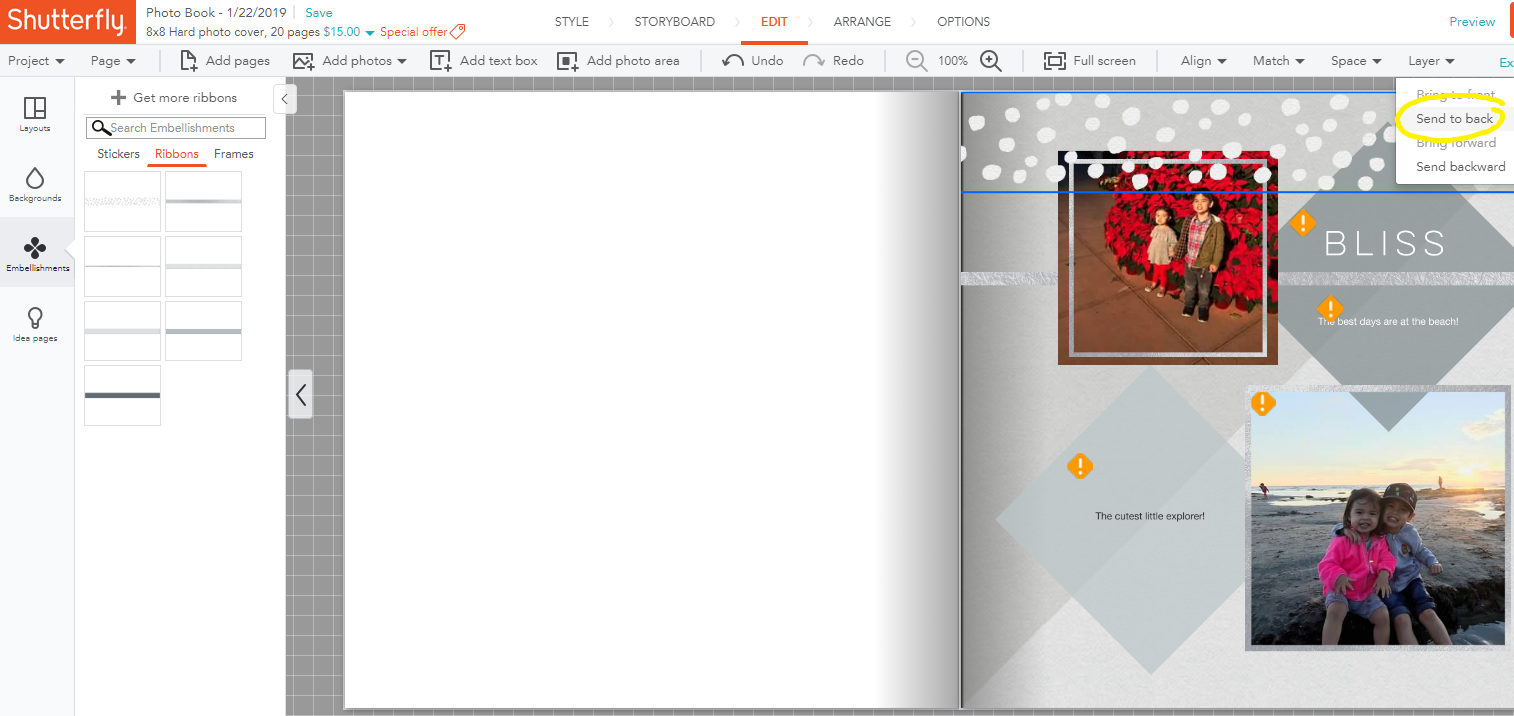
Embellishments
- Within Embellishments, there are three subsets of design goodies. These are: stickers, ribbons, and frames.
- Stickers: These are like scrapbooking embellishments. You can even type in what you’re looking to add. For example: Santa (for a Christmas page), books (for First Day of school), or balloons (for 1st Birthday).
- TIP: I also suggest typing in generic words to get cute little stickers to add to your pages. Examples: “fun”, “laughter”, “family”, “love”, etc.
- Ribbons: These are decorative “strips” that I usually add in the background. Some are solid-colored while some ribbons are semi-transparent (great for darker colored backgrounds).
- To layer these ribbons behind text and pictures, click on the ribbon and click on Layer>Send to Back.
- Stickers: These are like scrapbooking embellishments. You can even type in what you’re looking to add. For example: Santa (for a Christmas page), books (for First Day of school), or balloons (for 1st Birthday).
-
- Frames: These are colored frames you can add to the photos on the pages. There are three sizes: fine, medium, and heavy. You can add other colors that better match your background/style.
- NOTE: There are premium “Storytelling” embellishments that might be worth purchasing to give your page a complete look!
After you’ve loaded up your library of design goodies, start chipping away at each page and “decorate” it to your heart’s content!
TIP: I recommend adding short blurbs so that your photo choices have a story to tell. Some ideas: a fun memory, a milestone achievement like first lost tooth, or even stats from hospital birth. I don’t know about you but #mombrain is real and I realize my memory is sometimes fuzzy so the little blurbs are a great way to remember those special moments!
If you want to customize your work, click on “Advanced Editing” under the “Add To Cart” orange button in the top right. In “Advanced Editing”, you can
easily move, resize, and rotate items and create your desired layout.
Step Five: Finalize
When you’ve got your interior pages, front/back covers, and spine all set up, you can preview your hard and gorgeous work! Click on “Preview” next to the orange “Add to Cart” button.
TIP: I recommend asking your husband/friend to review it too because it’s always good to have another pair of eyes! My husband has caught a few mistakes or blanks I forgot to come back to fill out. Whew!
And…that’s it folks! I know this post seems lengthy but hopefully these time-saving tips and tricks are helpful! Once you get the hang of Shutterfly’s Custom Path software, you will be so stoked to have finally made your photo books! What a beautiful, heartfelt, and thoughtful gift to pass down to your children or whomever your recipient is!