As of last week, my kiddo is back to school, which means YAY, my #momtaxi services are not as crazy as they were during the summer but it also means AHH, I’ve got to pack lunches on a daily basis except for those days I raise the white flag and it’s a hot lunch day! I mean, it’s a win-win, right?
I’ve been a little MIA. Late spring is my busy work season which then flowed into our first “real” summer (aka no year-round preschool). Plus, I got a little sidetracked with other hobbies. See next paragraph. #lifeofacreative
If you’ve been following me on Instagram, you might have seen my Stories where I’ve been baking more than crafting. It all started with watching an episode of MasterChef where a contestant made a hummingbird cake. My #innermarthastewart took over and I wanted to do nothing but bake that dang cake. I didn’t even have round cake pans! Thanks to Sally’s perfect recipe and Amazon Prime’s fast shipping, I was able to feed the crazy urge figuratively and literally, and baked myself a delicious three-layer hummingbird cake. It was decadent and as much as I tried, I could not finish it. Thank goodness for friends who love cake as much as I do and helped me not waste a delicious dessert! 🙌
So, what was I to make next? If you know me, you know I A) hate working out and B) love eating so the only way I get my butt to the gym is to watch The Pioneer Woman on the exercise machines. On her Care Package episode, she made homemade fruit roll-ups and as a 90s kid, I knew I had to try it at home! And so…here we are with today’s post!
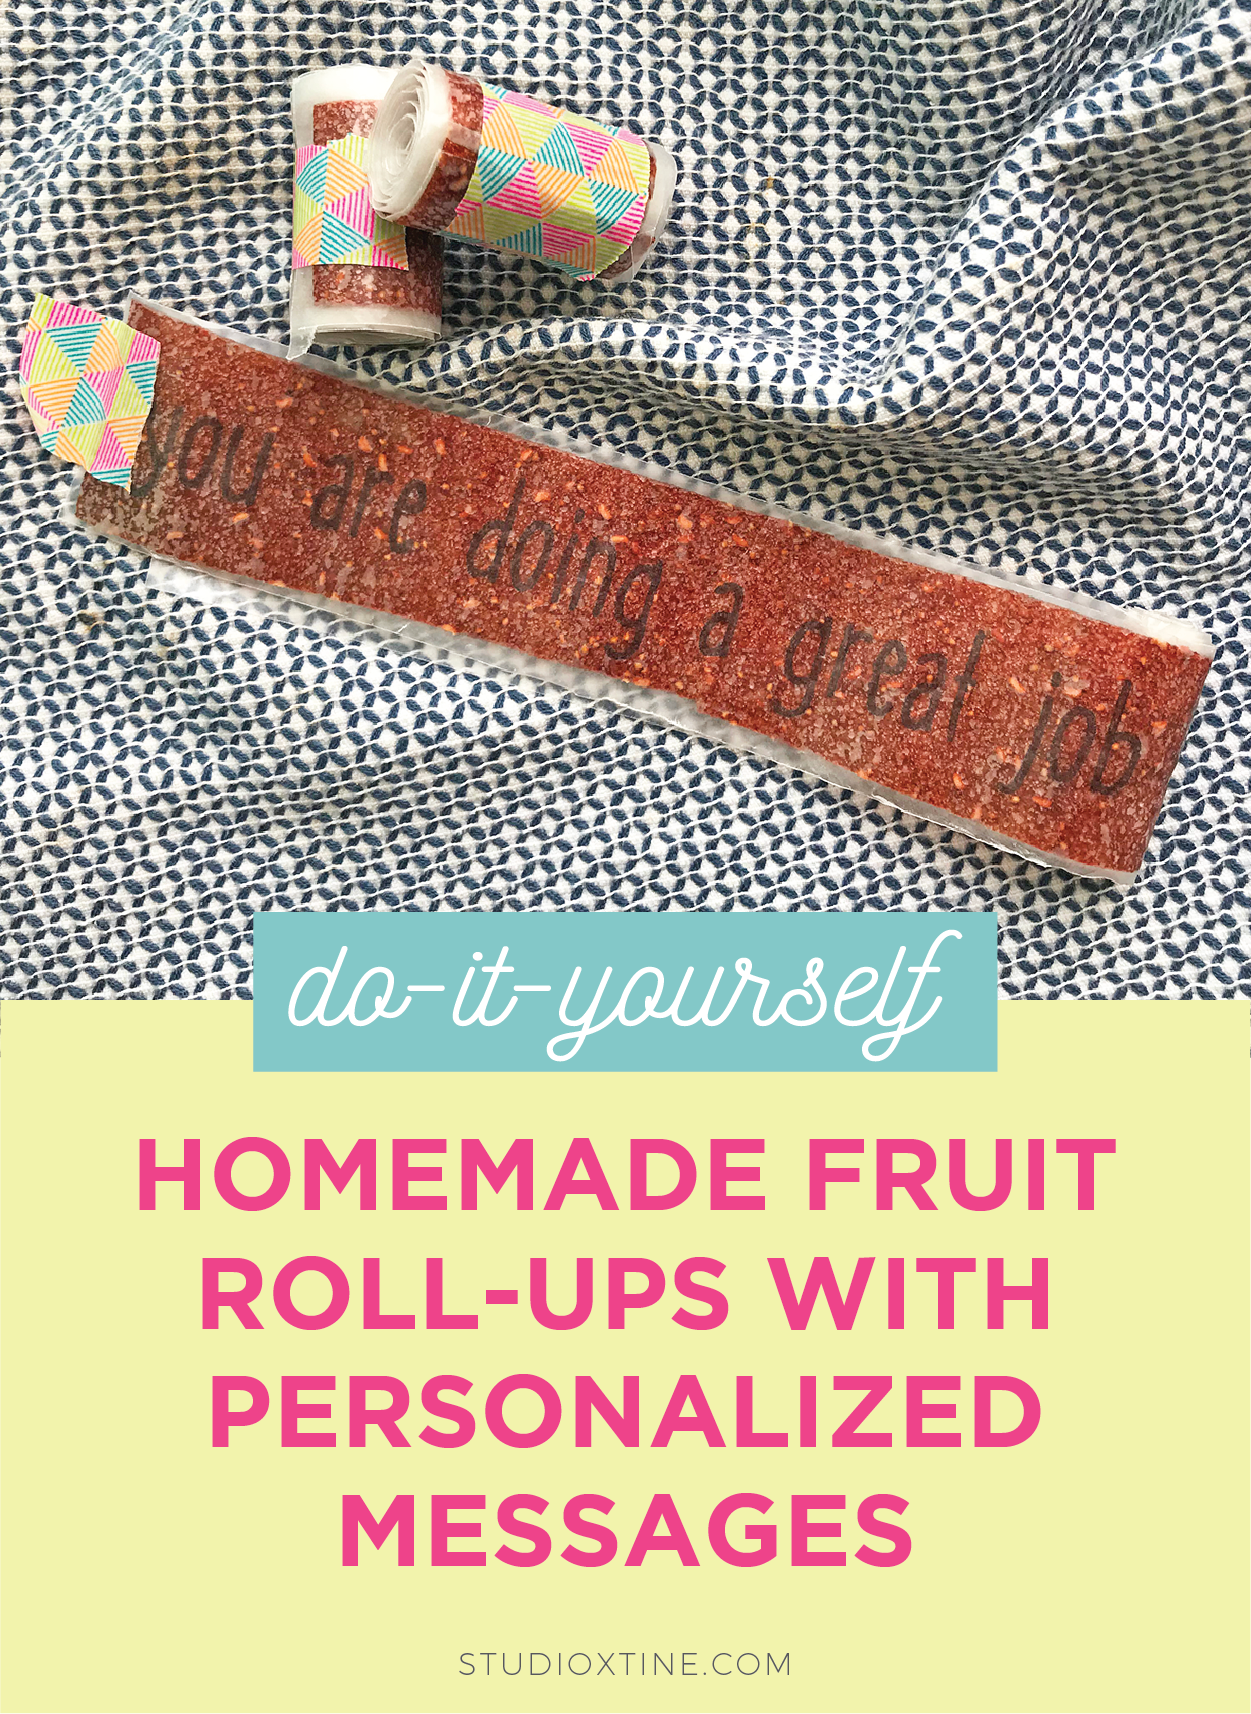
Of course I can’t just be normal and follow the KISS principle (“Keep It Simple, Stupid”). I wanted MORE and thought of a way to incorporate using my Silhouette CAMEO to leave a personalized message in the wrapper. 🤯🤯🤯
If you’re a #crazycraftlady like me and want to learn how, follow along!
Step 1: Make homemade fruit roll-ups
I followed this recipe from none other than Ree Drummond. Making the fruit “batter” is the easiest…just blend three ingredients. I used strawberries and a few raspberries, honey, and lemon juice from the lemons in my backyard.
My biggest heads up warning is that you have to be prepared to be stuck at home for a while to make these. I did have to leave the house a couple times so I just left them in the oven but turned the oven off. My batch must have had uber high moisture content so mine took nearly 8-9 hours!
When your fruit roll-up is done baking, don’t cut it yet. Jump to mid-way of Step 4 to see what to do next.
Step 2: Create design in Silhouette Studio
In Silhouette Studio, set up a 12in by 12in design space and draw a 12in wide line. Continue to draw more lines of the same width and set them 1.5in apart from top to bottom. In the Send panel, under Action, set the action for these (red) lines to “Cut”.
Within each space, write a cute message and turned the line color to black. Mirror image the messages. This way the message is revealed as the fruit roll-up is unraveled. Super cool, right?
FYI, I used Rainy Day Sketch font for mine. And TIP: if you are stuck on what to write, turn to our good friend Daniel Tiger…I used a few of his little positive sayings that my kids love to sing. Yay PBS!
Next, in the Send panel, under Action, change the action for these messages to “Sketch”. Then, move the message layer to the top so that my Silhouette would perform the sketch action/step first.
Step 3: Set up cutting mat with materials
I experimented with parchment paper and wax paper as well as a variety of markers. The Sharpie fine point marker worked best with wax paper.
First, cut out two sheets of wax paper that were 12in by 12 in. Adhere one directly onto the cutting mat and its only job is to protect/keep the other sheet sanitary. You know, just in case there’s yucky stuff on the mat. The Silhouette will write the messages on the second sheet that is on top.
In order to keep the second sheet secured to the mat, use scotch tape on the corners and along the sides.
Step 4: Send to Silhouette and assemble
Before sending to Silhouette, insert a Sharpie fine point marker in the holder. And if you have a dual-holder Silhouette CAMEO, put your blade in the other holder. Send to Silhouette to have your messages first written out and then the wrappers cut.
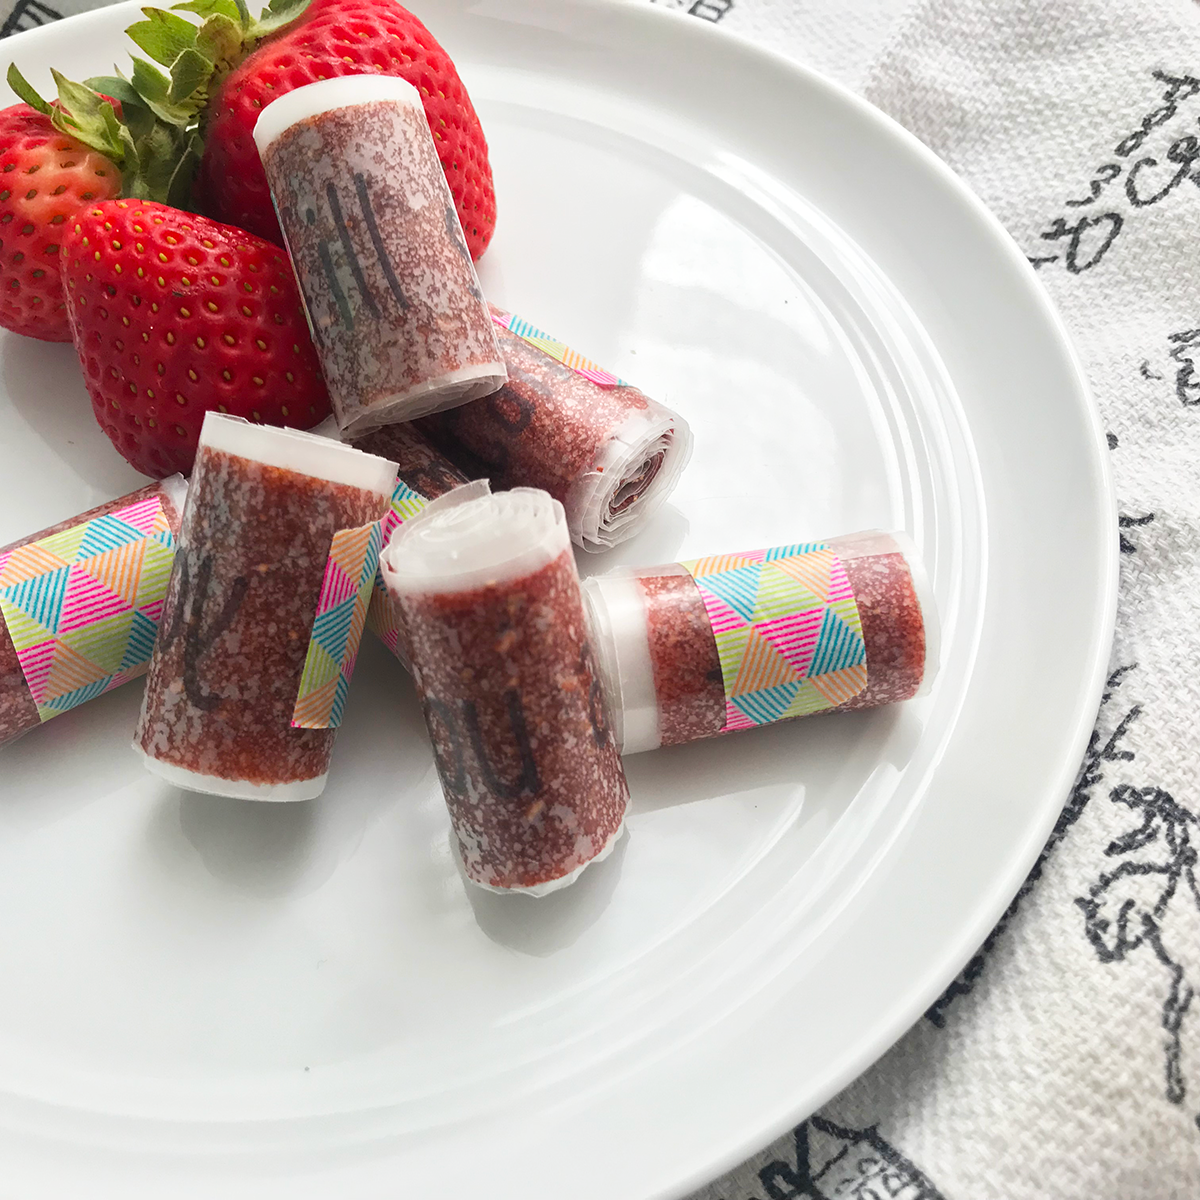
Now it’s time to assemble! With your homemade fruit roll-up, use a pizza cutter to slice them into 1.25in by 12in strips.
Cut out 1.5in x 12in strips of wax paper. Sandwich your sliced fruit roll-up between the message wrapper (on the bottom) and the blank wrapper (on top). Start rolling from one end and secure with fun washi tape.

The reason why I add the second layer of wax paper on top is so that the Sharpie marker doesn’t touch the fruit roll-up as I roll them up. I’m paranoid that the marker will rub off onto the fruit roll-up that I slaved over! 😂

To be honest, I’m not sure if I will make these again. 9 hours was a long time to wait for something that will be gobbled up in minutes! Nevertheless, I do like that I know the ingredients going in and that my kiddo will have a smile reading a special message from his mommy! 💗