Halloween is a couple weeks away but this mama got a head start on this year’s DIY costumes because life is moving 3642 times faster this time of year for our family. Last year’s costumes were ~90% made with paper but this year, I shifted gears and worked with felt. That said, there was a lot of sewing…a lot…and by hand. Thank goodness for a comfy couch and Netflix!
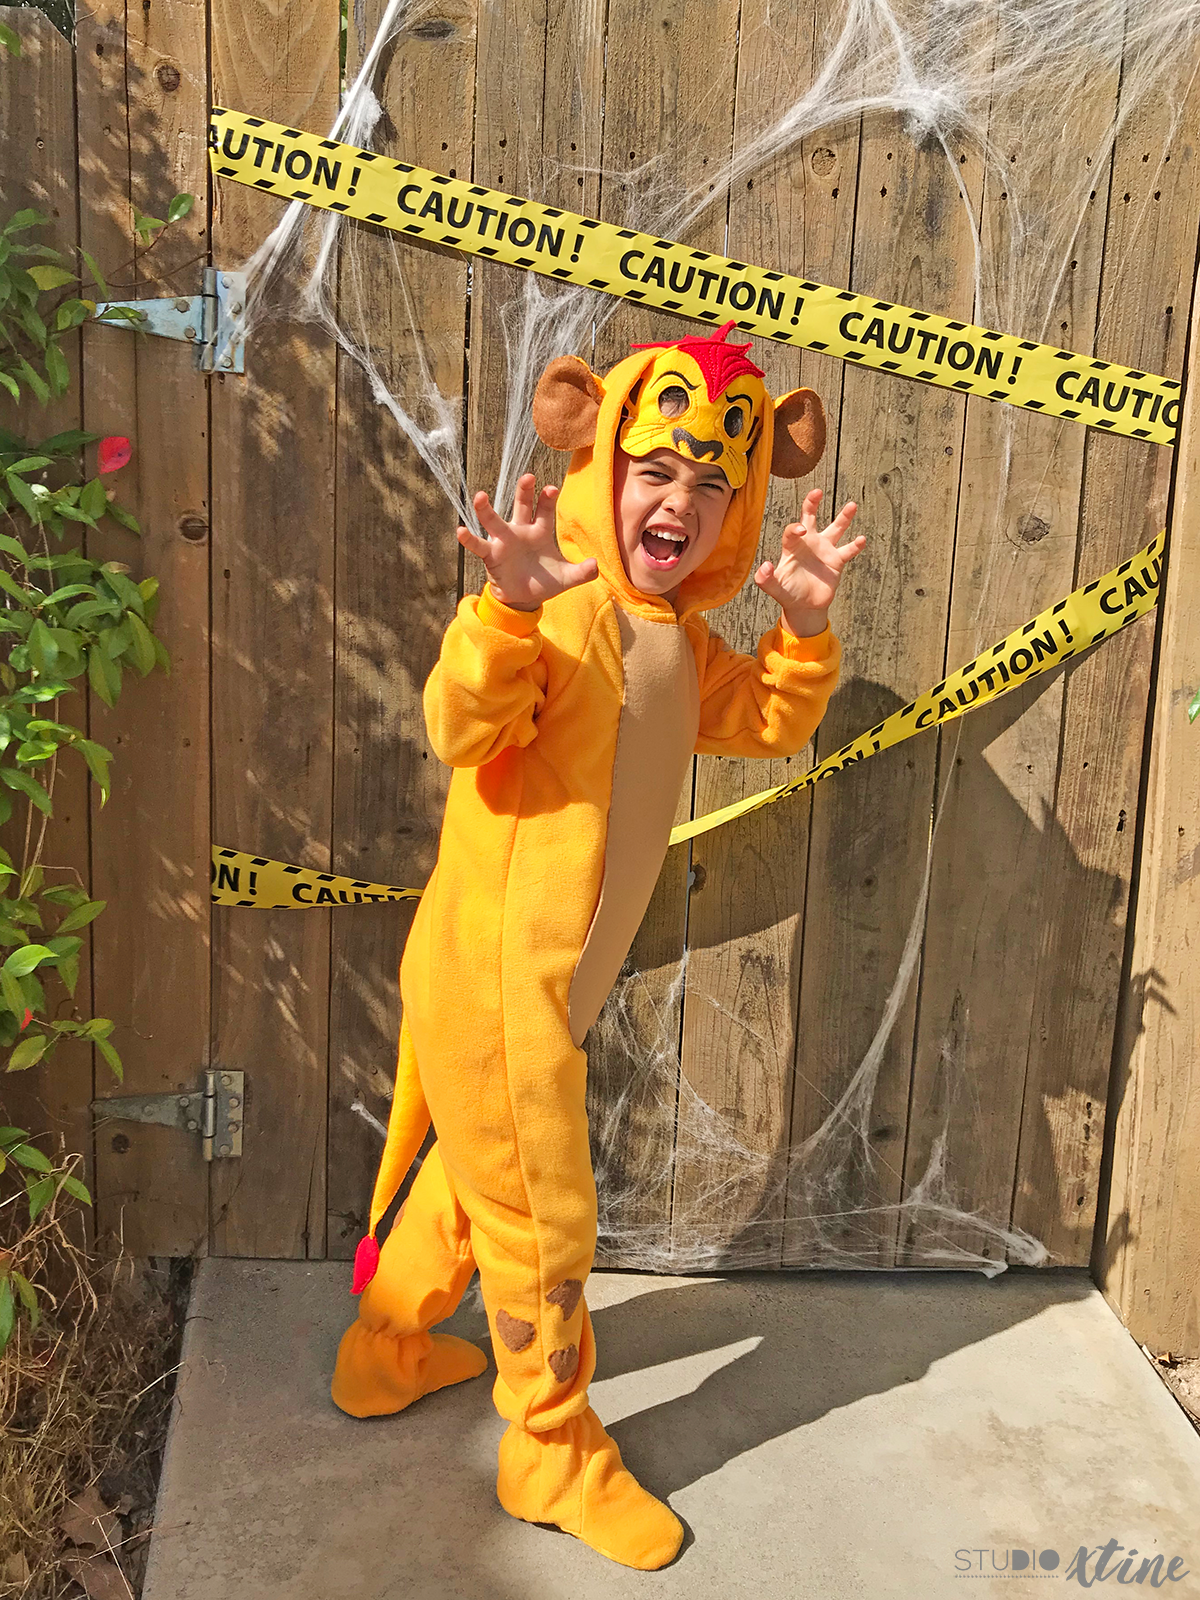
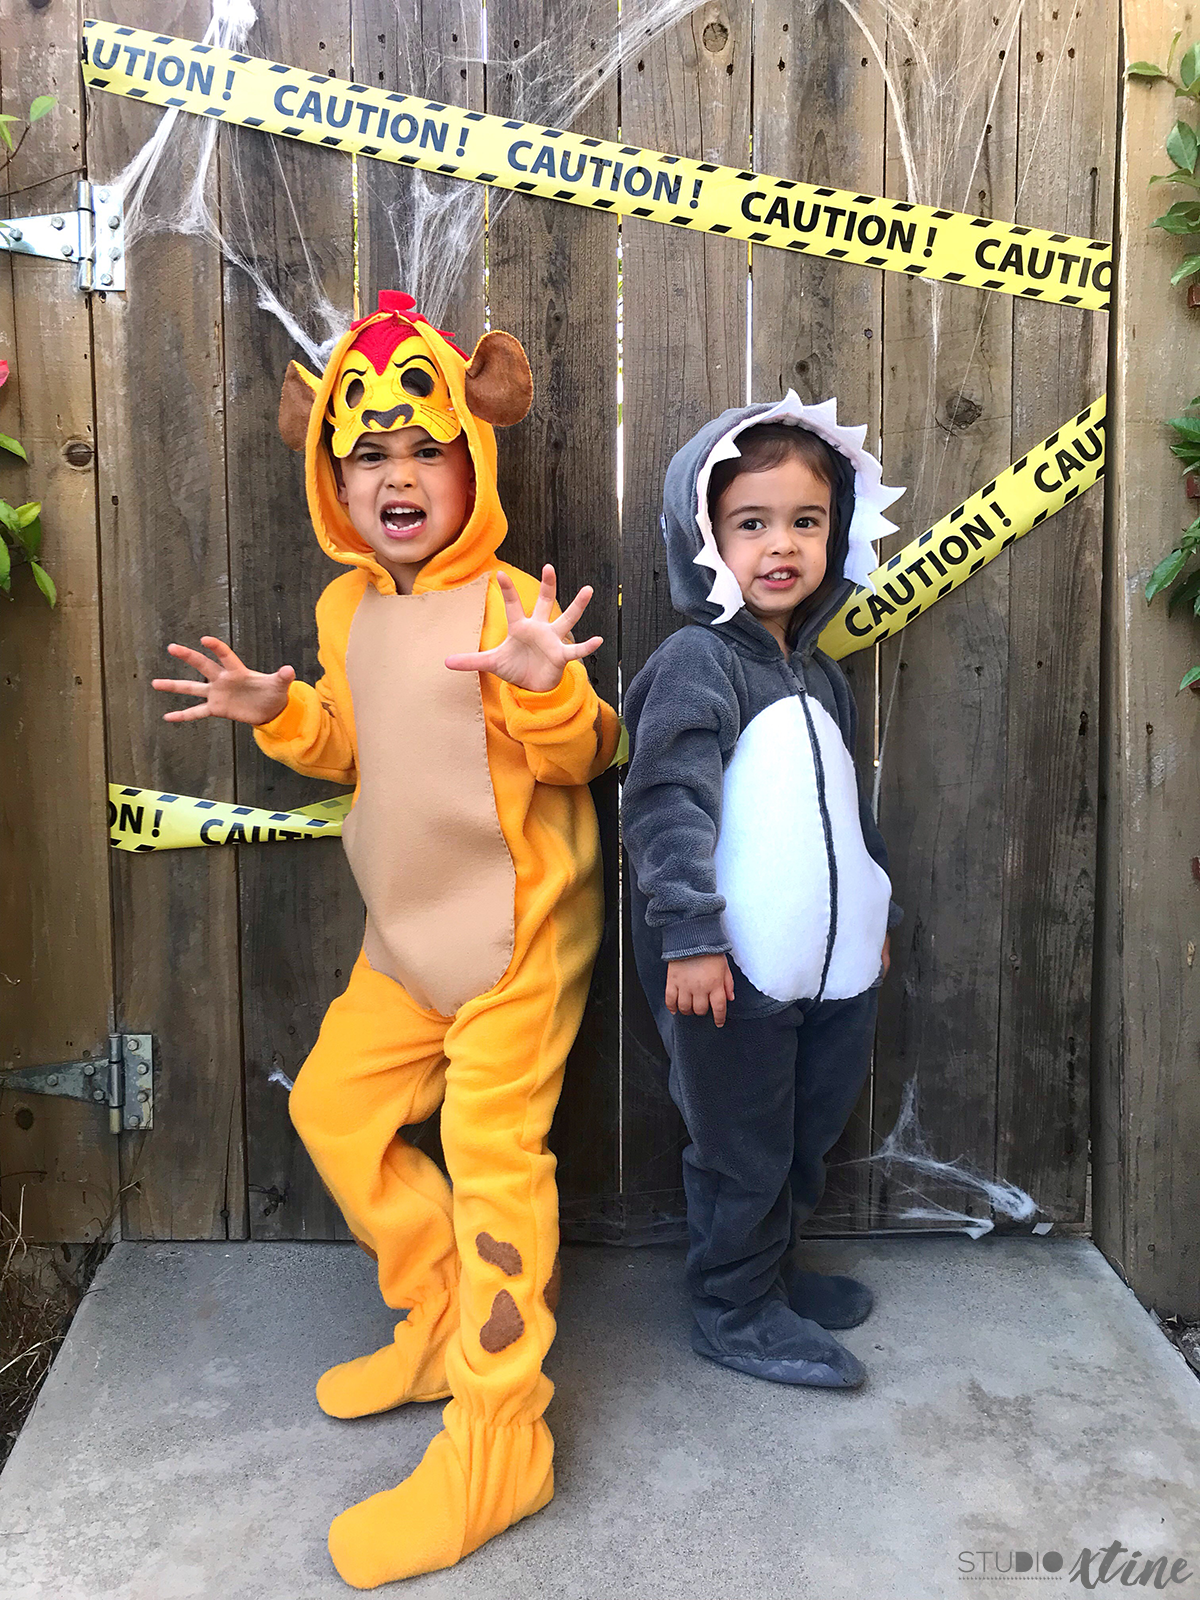
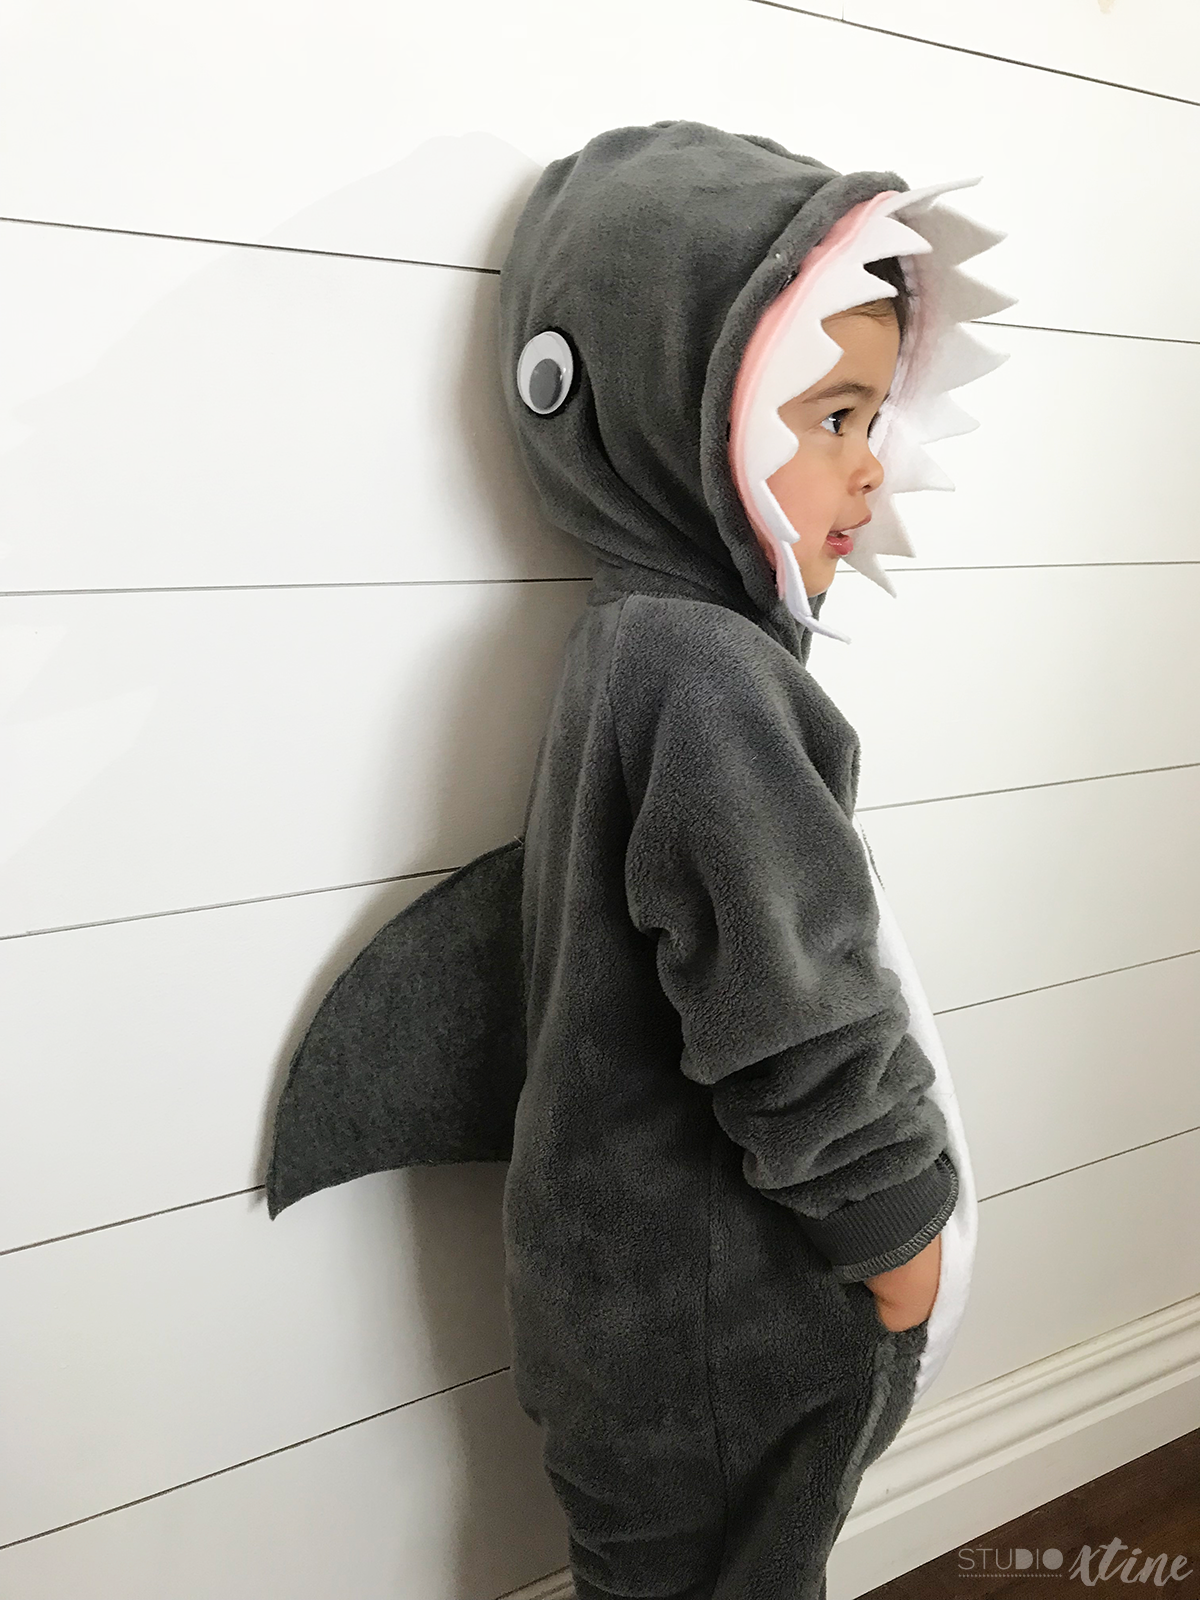
Also thank goodness my oldest is steadfast in his Halloween costume choice (Kion from Disney’s Lion Guard). *Praise hands!* However, a little reverse psychology became necessary to get my littlest to pick and stick with her costume choice (Baby Shark). Yup, that Baby Shark. Are you hearing the catchy tune in your head? #sorrynotsorry
Both costumes started with the same base…super soft and fuzzy footed sleepers generously provided by Footed Pajamas. These solid-colored footed pajamas are a great starting point for DIY Halloween costumes. They come in all sizes, from infants to adults, so get the whole family in costumes! I also have to add that these run true to size. TIP: Use code JACK18 to get 20% off your order (offer expires Oct 31).
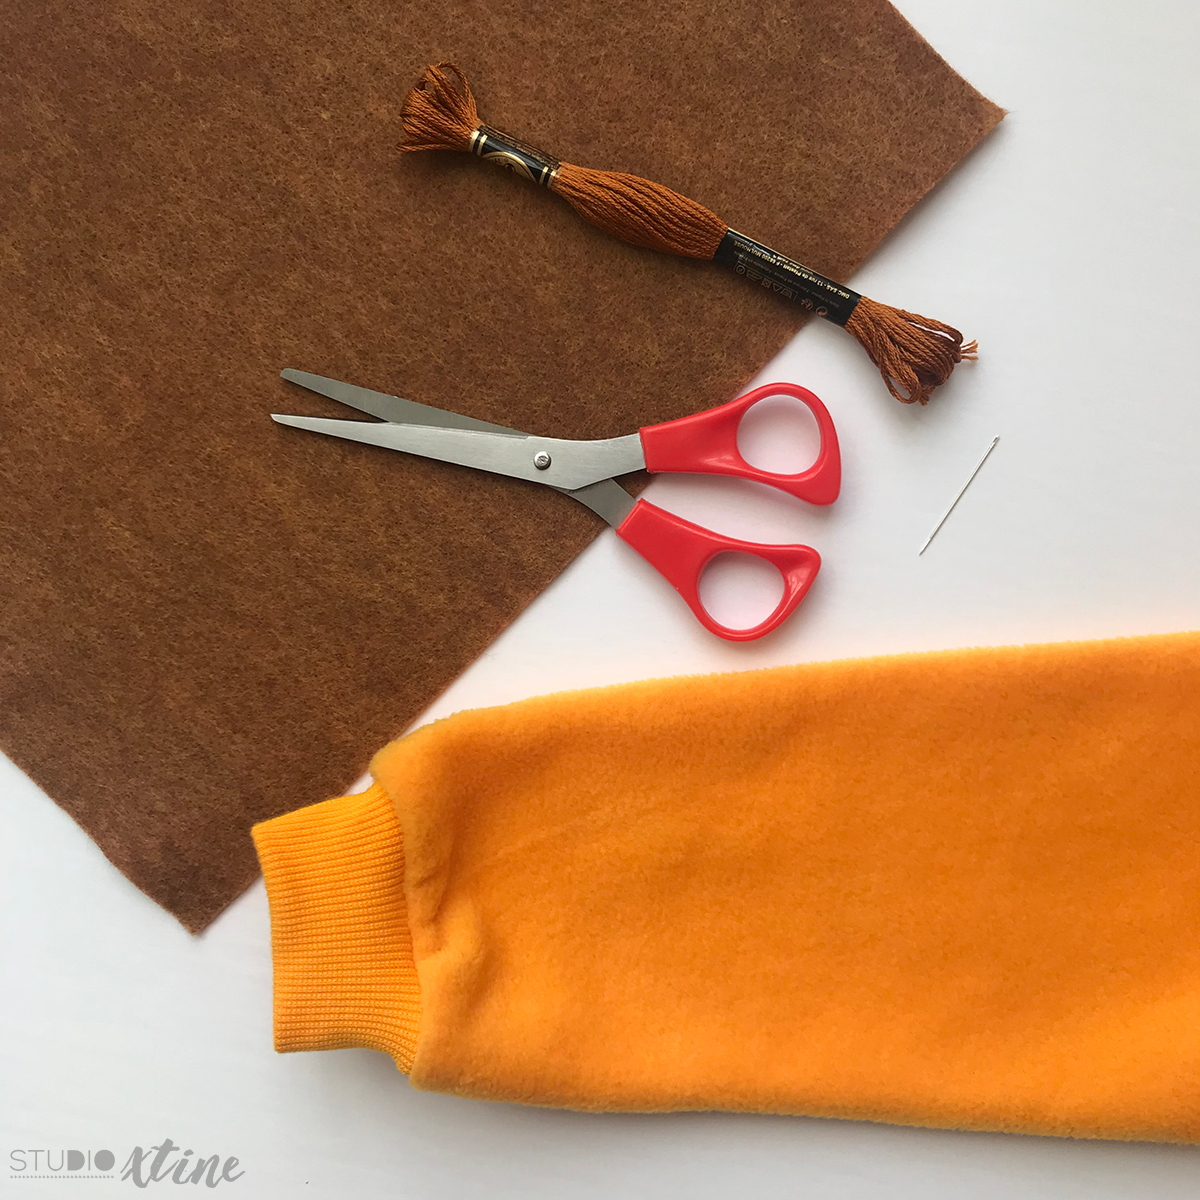
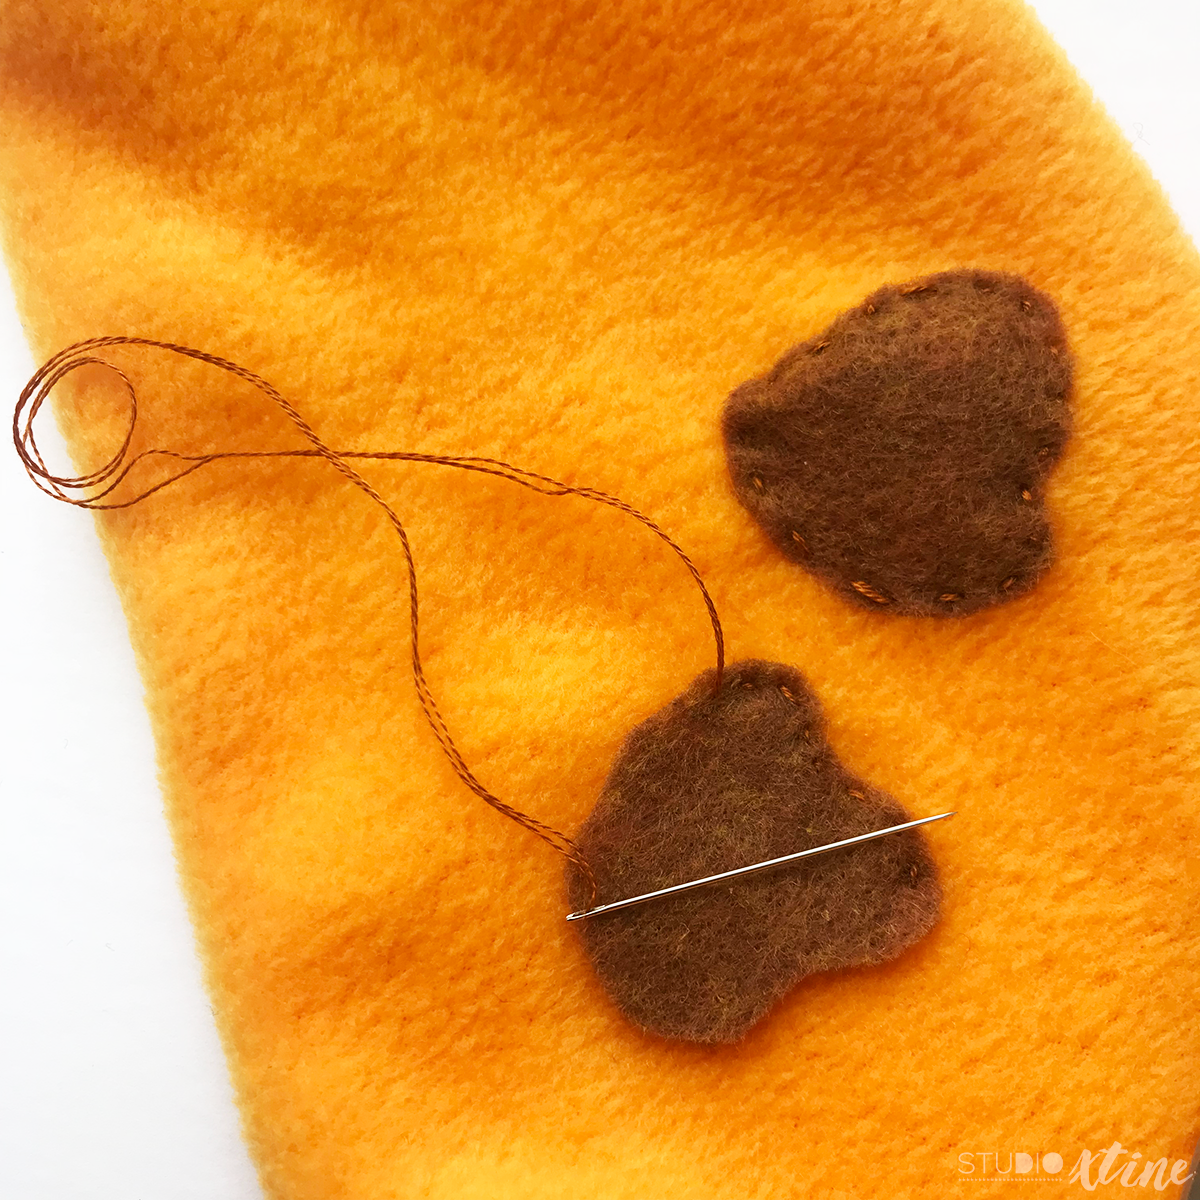
My son’s Kion costume was sewn 100% by hand, starting with the medium brown spots on the arms/legs. Did you know that DMC embroidery floss comes in over 480 colors? I was able to color match my felt to their floss without trouble!
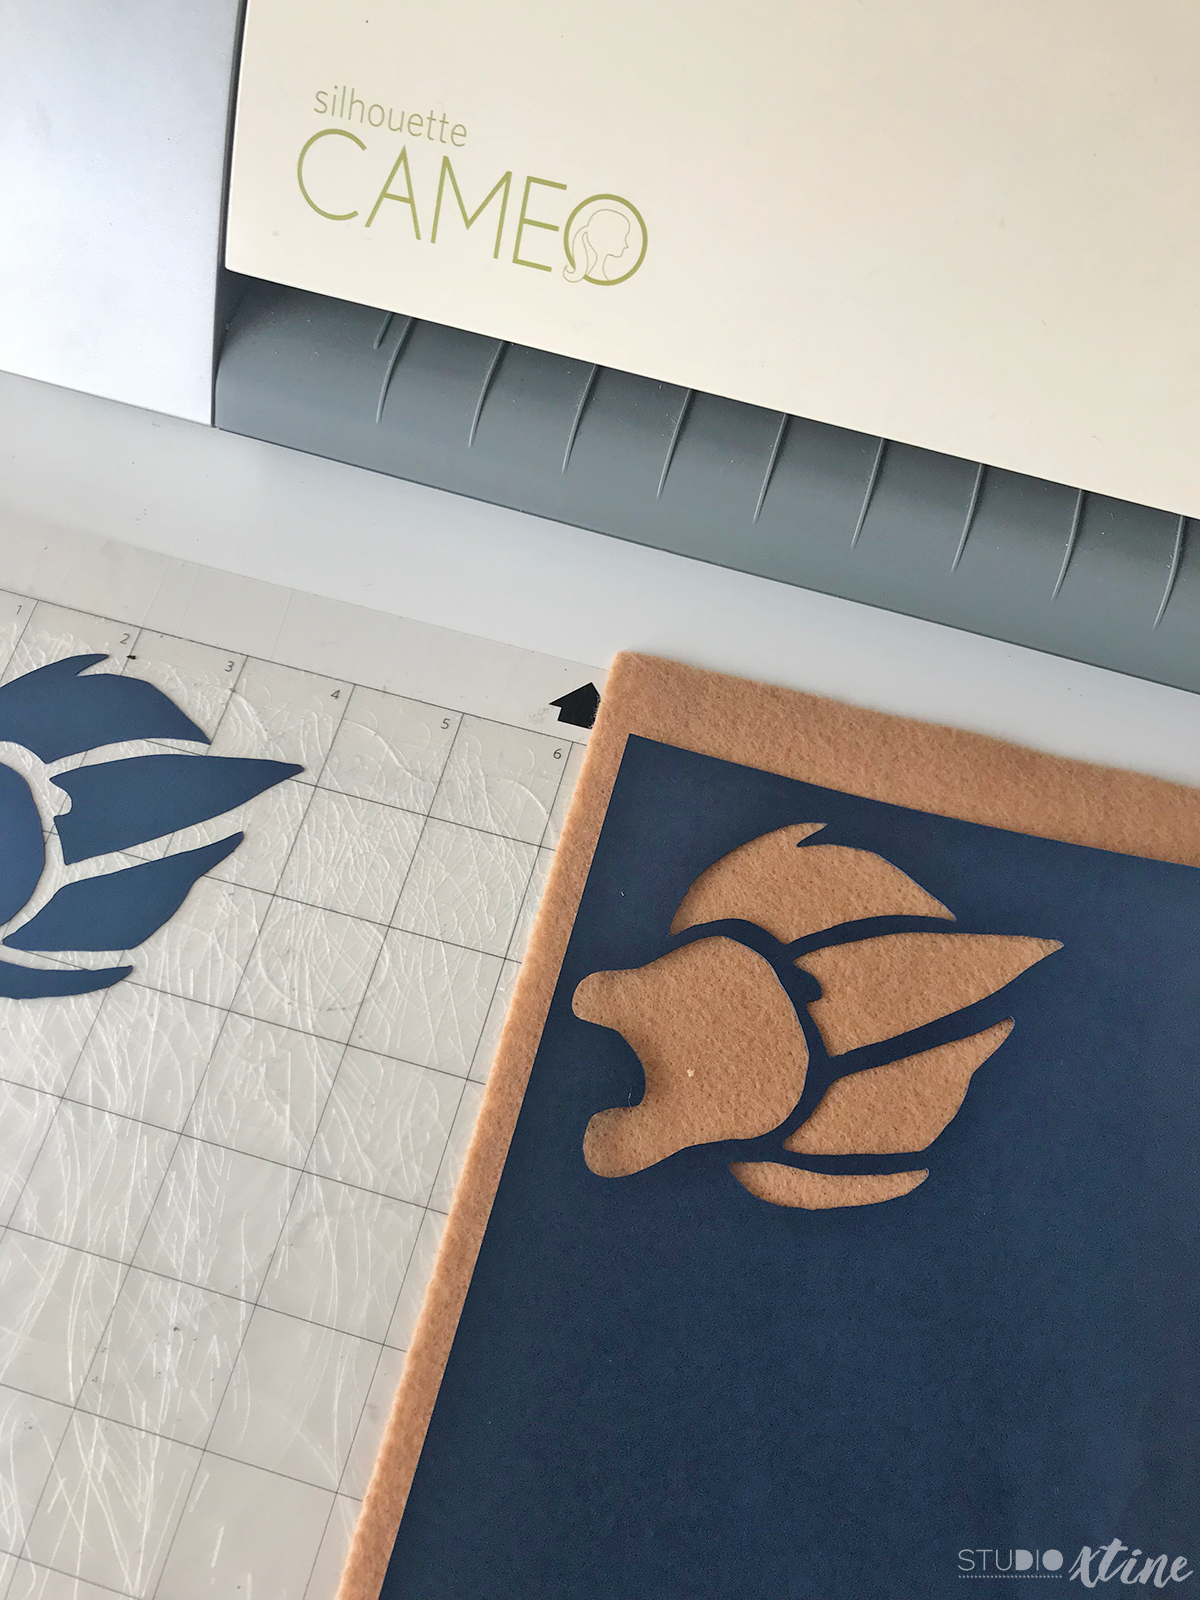
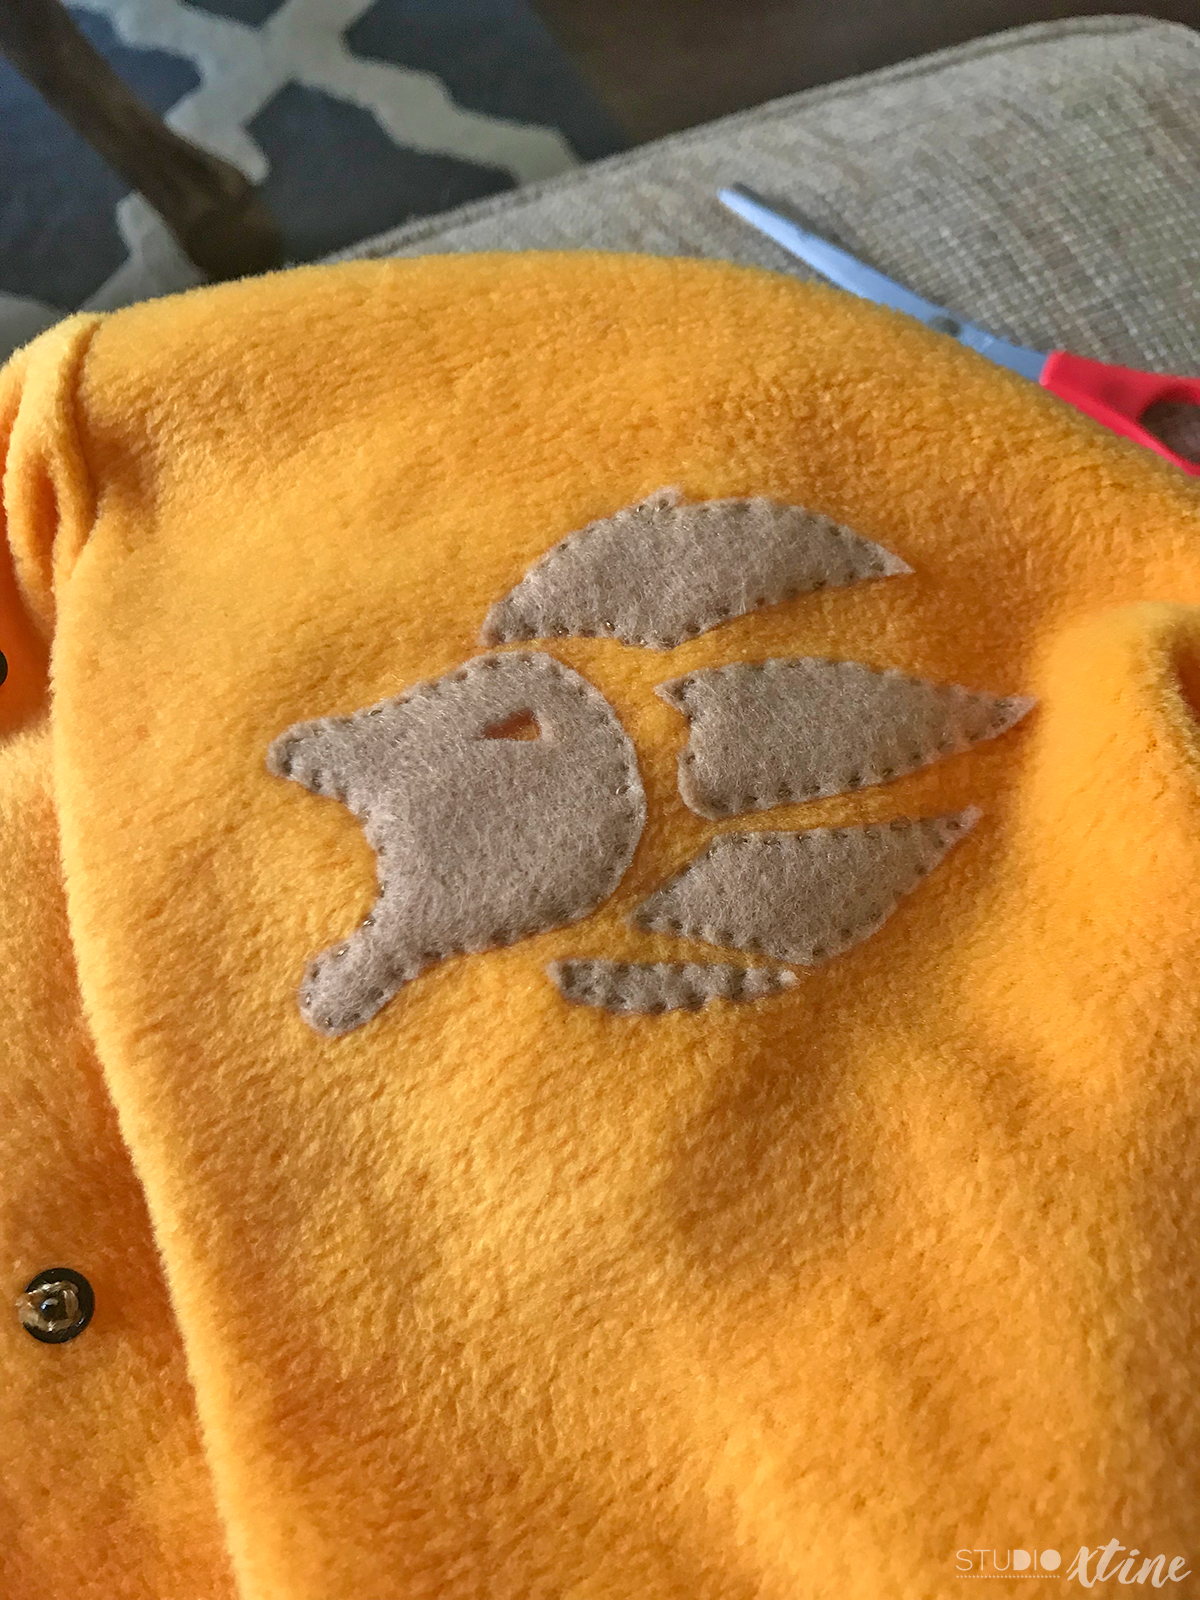
To create the “Mark of the Guard” (you know, the Lion Guard emblem on Kion’s left shoulder. I’m kidding, I didn’t know it had an official term. Thanks Google!), I found a high-res image online and used the Trace Function in Silhouette Studio to create a stencil. If you don’t have a Silhouette or Cricut cutting machine, you can easily print out the Mark and create your own stencil with an Xacto knife or scissors. I prefer using the Silhouette machine because it saves me a ton of time!
For the spots and the “Mark of the Guard” I used a running stitch to attach the felt cutouts to the footed pajama.
The front of Kion’s body has a lighter colored “fur” so I cut out a large panel out of premium felt in Cashmere color. At my local Michael’s store, premium felt comes at a larger size compared to basic felt. Since this piece was to go over the zippered part of the footed pajama, I needed a way to make sure my son can still go in and out of his costume. So, I came up with the idea to sew one half of the panel together with pajamas using a running stitch and the other half loose but still with a running stitch to give the appearance that it’s completely sown to the pajamas. The other half is actually secured to the pajamas with sew-on snaps!

Originally, I was planning on having my son wear the Kion mask (from Etsy); however, the nose part presses down and it hurts his nose. So, we decided to put it on his forehead which was a better decision anyway because it “connected” better to the costume’s hoodie and made it easier for him to see. I definitely don’t need a clumsy kid tripping over people’s landscaping in the dark. No thank you!
Supplies Used for Kion Lion Guard Costume:
- Toddler Footed Pajamas in Creamsicle (size XL)
- DMC Embroidery Floss in Medium Brown (780), Light Brown (3828), Yellow Gold (972), and Bright Red (666)
- Basic Felt in:
- Copper Canyon (for spots on arms/legs)
- Sandstone (for “Mark of the Guard” emblem on shoulder)
- Gold (for tail)
- Premium Felt in:
- Cashmere (for front panel)
- Red (for hair and tail)
- Loops & Threads Sew-on Snaps
- Needle
- Scissors
- Toilet Paper (for stuffing)
- Kion Mask from Etsy
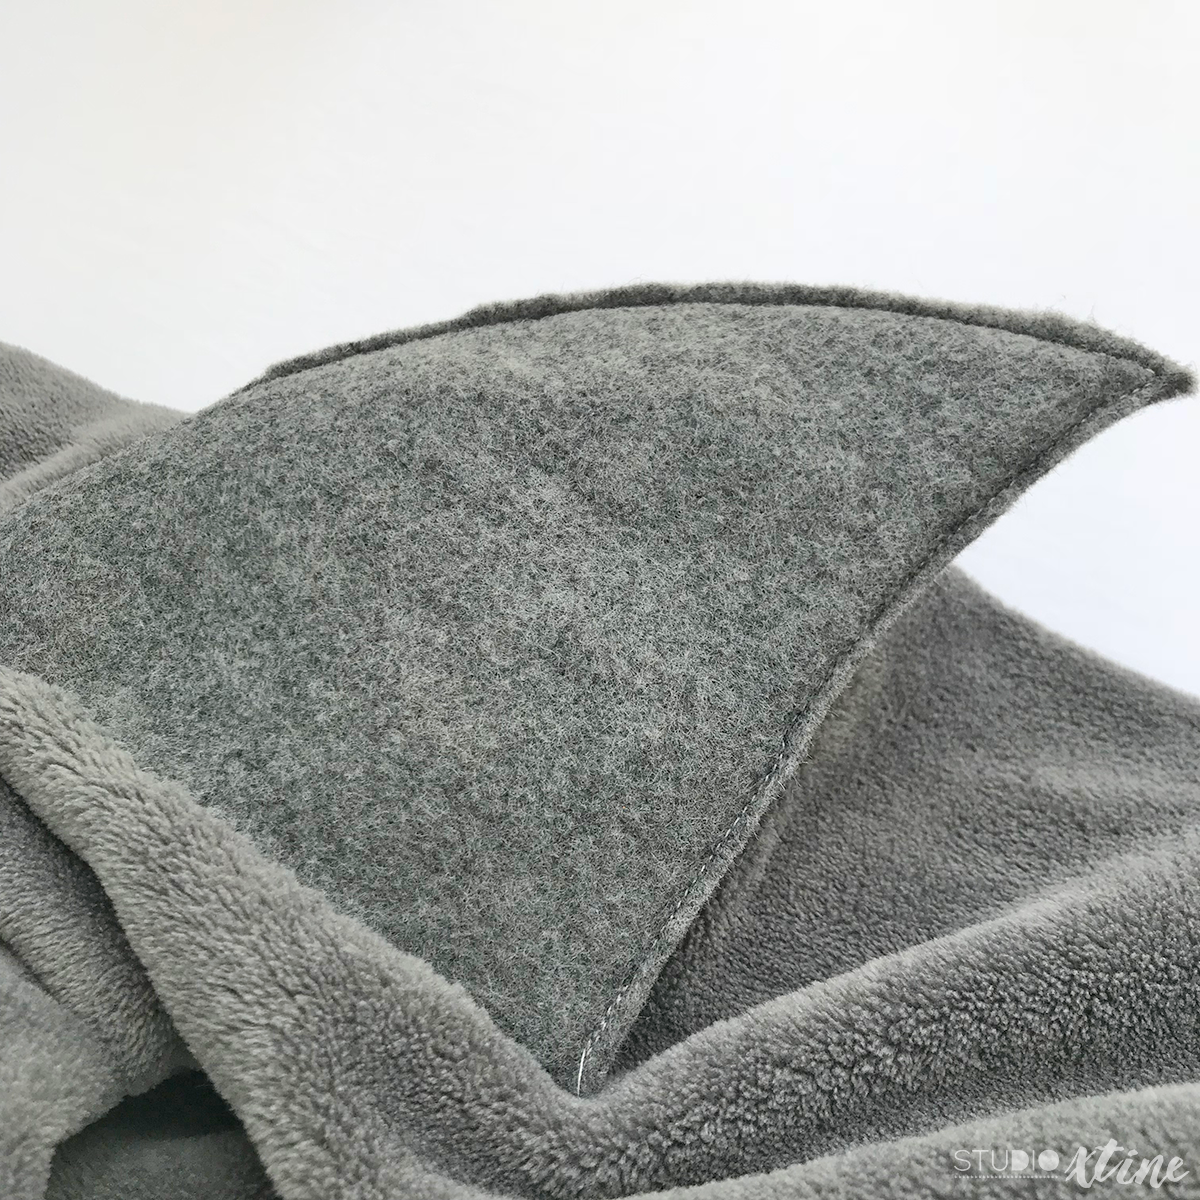
NEXT! My daughter’s costume was much more straightforward and involved less hand-sewing. Hooray!! In fact, I even got out my Janome Sew-Mini machine to help me with a few components, like sewing the pink gums to the white teeth as well as the back fin piece.
To help keep the back fin upright instead of flopping over to one side, I put a piece of cardboard that was also same shape as the fin but a tad smaller so that it would fit snug inside. Then, I stuffed both sides of the board with tissue paper. You can, of course, use any other stuffing material. I just didn’t want to make my 785th run to Michael’s!
I thought I would have a little fun with Baby Shark’s eyes by using googly eyes. Who doesn’t love googly eyes?! While these were self-adhesive, I still used my hot glue gun to get it to really stick to the black felt material that I sewed onto the footed pajamas. Felt is a tricky material but hot glue gun for the win!
Supplies Used for Baby Shark Costume:
- Toddler Footed Pajamas in Howling Moon (size M)
- DMC Embroidery Floss in White (B5200), Medium Dark Gray (535), and Pink (3716)
- Basic Felt in:
- Baby Pink (for gums)
- Smoke (for fin)
- Black (for eyes)
- Premium Felt in White (for teeth and front panel)
- Cardboard
- Loops & Threads Sew-on Snaps
- Needle
- Scissors
- Googly Eyes
- Hot Glue Gun
- Toilet Paper (for stuffing)
- Sewing Machine (optional)
Not featured are my and my husband’s costumes. They’re nothing fancy compared to the kids’…just cardboard Mommy and Daddy Sharks because I can’t help myself if a family costume idea is possible. And don’t worry, my son was not sad one bit about not being a part of the Shark Family. He is beyond stoked about his costume (if you can’t tell in the picture below) and I’m beyond exhausted happy for him! 😉