As my firstborn Ethan gets older, his birthday party guest list grows especially now that he’s in Kindergarten. So, unless I win the lottery and can buy a house with a gigantic yard, it looks like parties will be held outside of the home.
Pros: no need to worry about our home getting flipped upside down from energetic and hyper 6-year-olds.
Cons: harder to create DIY party decorations because of space/venue limitations and early access.
So! What’s a crafty mama to do? I decided to spend most of DIY efforts on the party favors, which is probably my favorite part of party planning. You can read my thoughts on giving quality party favors.
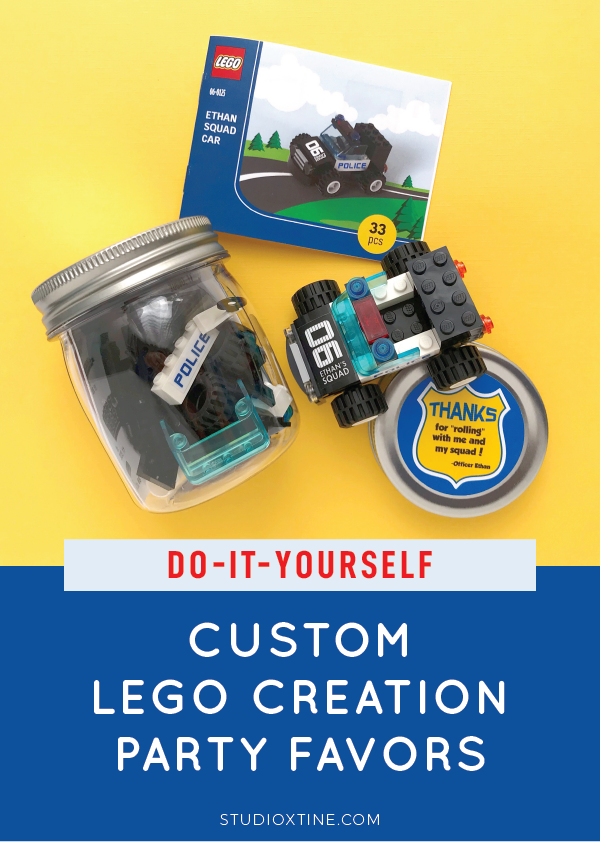
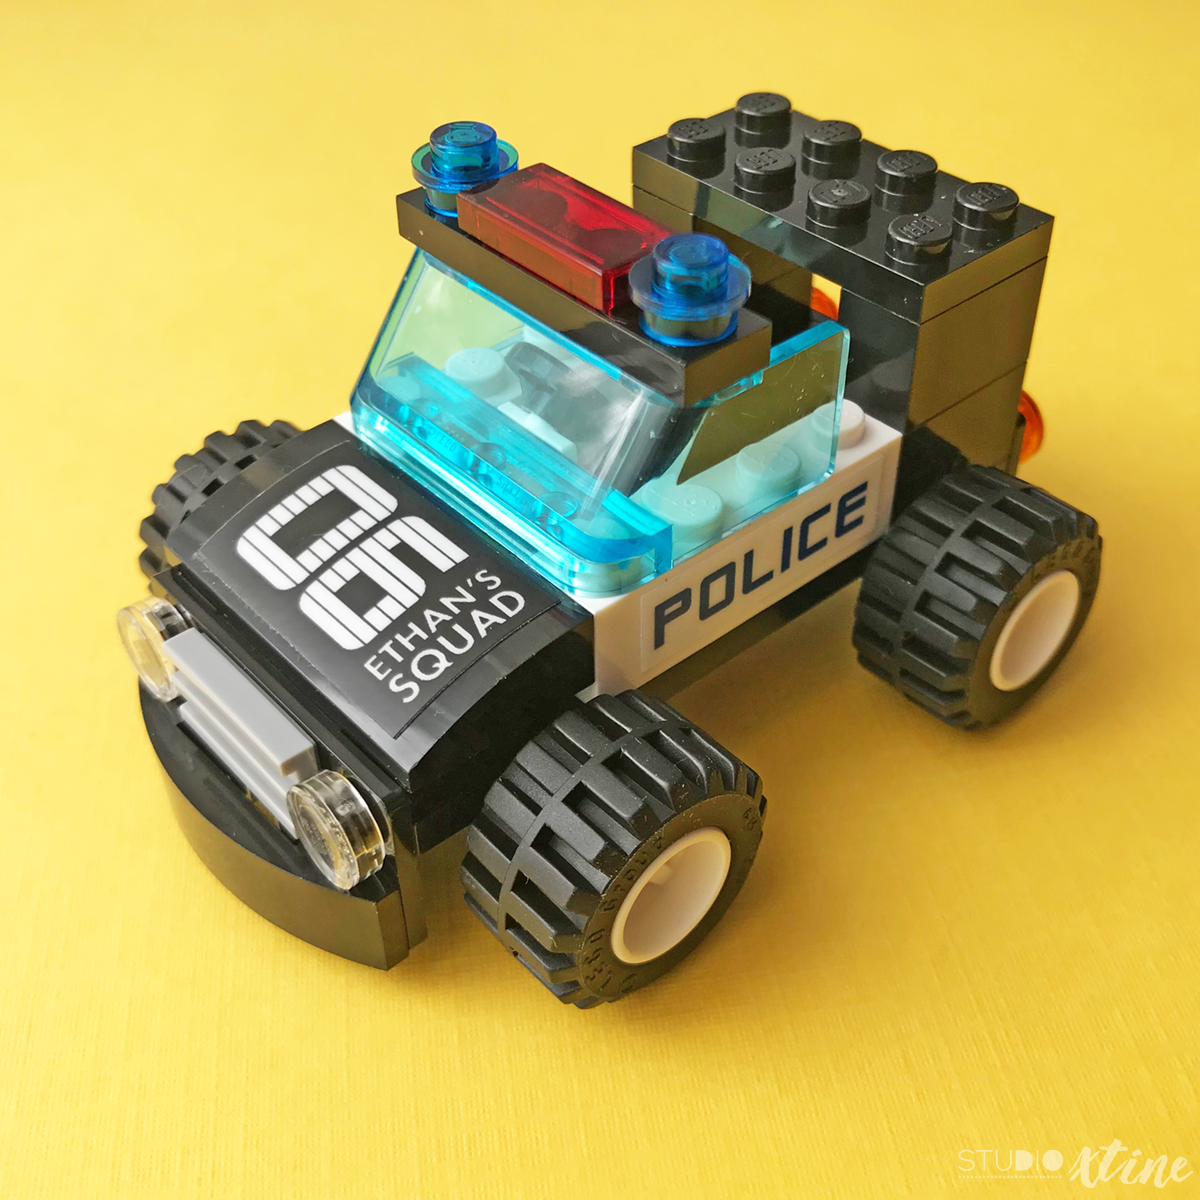
Lately, Ethan has been getting into LEGOs and I know kids his age are just discovering the wonderful (unless you step on it!) world of these colorful bricks. So why not send each party guest home with a little LEGO police car that will (hopefully) remind them of their pal Ethan and be played with for a couple years?!
After searching online for some sort of mini police-related LEGO creation and having sticker shock, I thought I could create a custom Lego creation by buying individual brick pieces.
So naturally, I went down the Google Search rabbit hole and found myself at BrickLink.com, the world’s largest online marketplace to buy and sell LEGO parts, Minifigs and sets, both new or used. You guys, my head was swirling 500 miles per hour, my heart was racing, and my palms were getting sweaty as I thought about the amount of work I was getting myself into.
So…how did I create a custom LEGO creation party favor?
I channeled my 6-year-old self and created a prototype with pieces my son had in his LEGO boxes. This step took awhile because I wanted to use the least amount of pieces but still create something that looked like a police car.
Once I liked what I made, I got nerdy and cranked out an Excel spreadsheet to catalog each LEGO piece, its part number, the quantity needed, and price per part (unit cost).
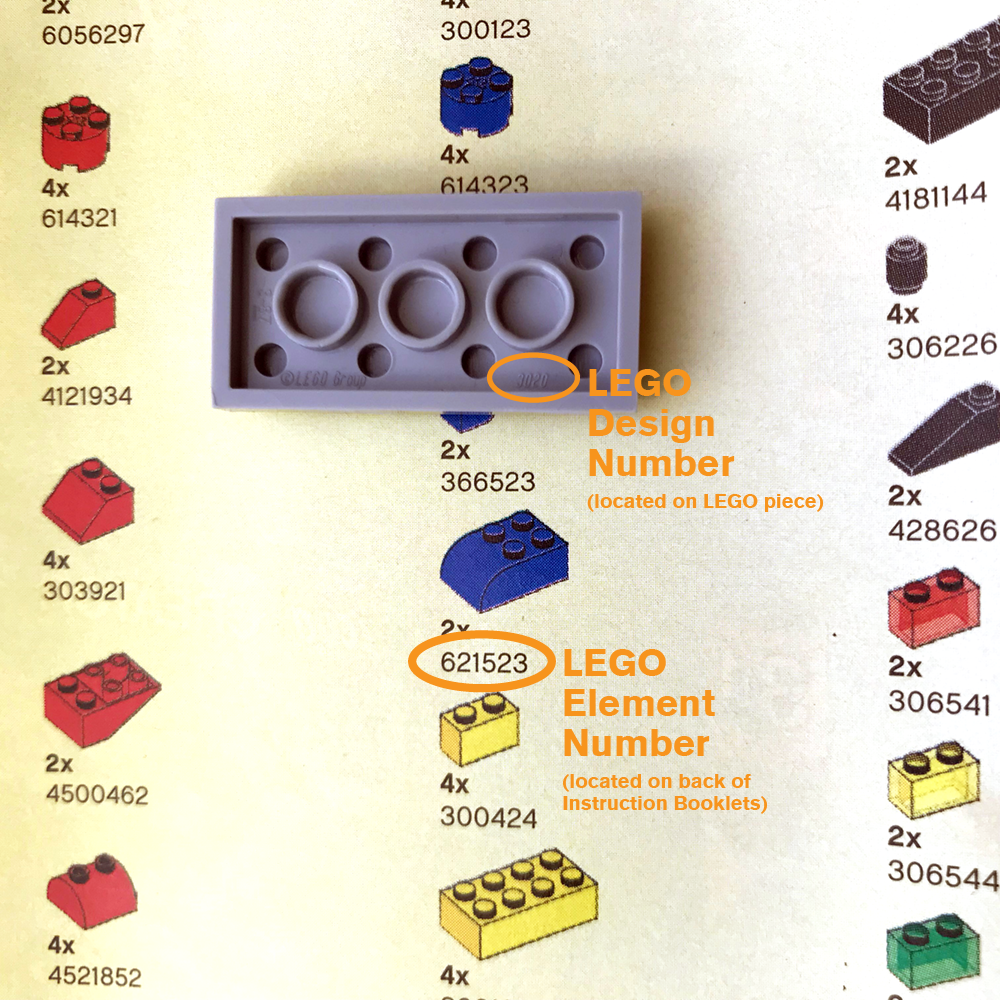
- NOTE: LEGO uses the terms “element number” (the number of the part on the back page of an instruction booklet) and “design number” (the super tiny number molded on the individual brick).

- TIP: If you use BrickLink.com, you can type in either number in the search box and it will find the piece for you. Personally, I found it easier to type in the “design number” because I could just read the number on the brick versus going through the bajillion instruction booklets we have to find the one piece’s “element number”.
On the BrickLink website, you will likely find a bunch of sellers who are selling the piece you need but something to consider is: A) do they have enough pieces that you need? and B) do they also sell the other pieces you need?
After a bit of sifting through the search results, I found two sellers that each had about 40% of the parts needed for Ethan’s custom police car. The third seller luckily didn’t have a minimum buy amount and was the only seller who had enough of a particular piece that not many other sellers had.
- TIP: By keeping the number sellers down to a few, you will save on shipping costs.
- TIP: Double-check your quantities and brick colors before completing purchases.
While I waited for 363 LEGO parts to be delivered, I searched for favor containers. The best value were these 8oz plastic mason jar sets from Michaels. For a finished look, I added a 2in circle label to thank our party guests for celebrating with the birthday boy!
Great! LEGO pieces…check! Favor container…check! And then…*insert dramatic sound* Hubs asked me how the kids were going to know how to assemble the pieces and I just gave a poker face smile 😬 because I didn’t have a real plan but didn’t want him to know that.
Fret not! I’m a total troubleshooter and as I mentioned above, a fanatical Google Searcher, so down the rabbit hole I go again! I found myself back at BrickLink.com and downloaded Studio 2.0 to build, render, and create instructions. Oh my gravy friends, I had so much fun on this site!!
- Build: First step was building the custom LEGO police car creation.
- Render: This is optional but I used the rendering to put on the cover of our instruction booklet.
- Create Instructions: Simply pick the pieces you want for each step and a beautiful booklet that looks like the real deal is created! I added a blank first page for the custom cover I was going to create later in Adobe Illustrator.
I designed the booklet small so that it could fit inside the favor container. Mine measured about 3in tall by 4in wide when folded. It fit nicely along half of the inside wall of the plastic jar, leaving the other half open so you could see the LEGO pieces.
To make the booklet cover image, I used Adobe Illustator and placed my transparent LEGO creation rendering on top of a cartoon-ish background. Then, I mimicked the LEGO instruction booklet design and added the LEGO logo, a fake set number, set name, and a little emblem showing the number of pieces.
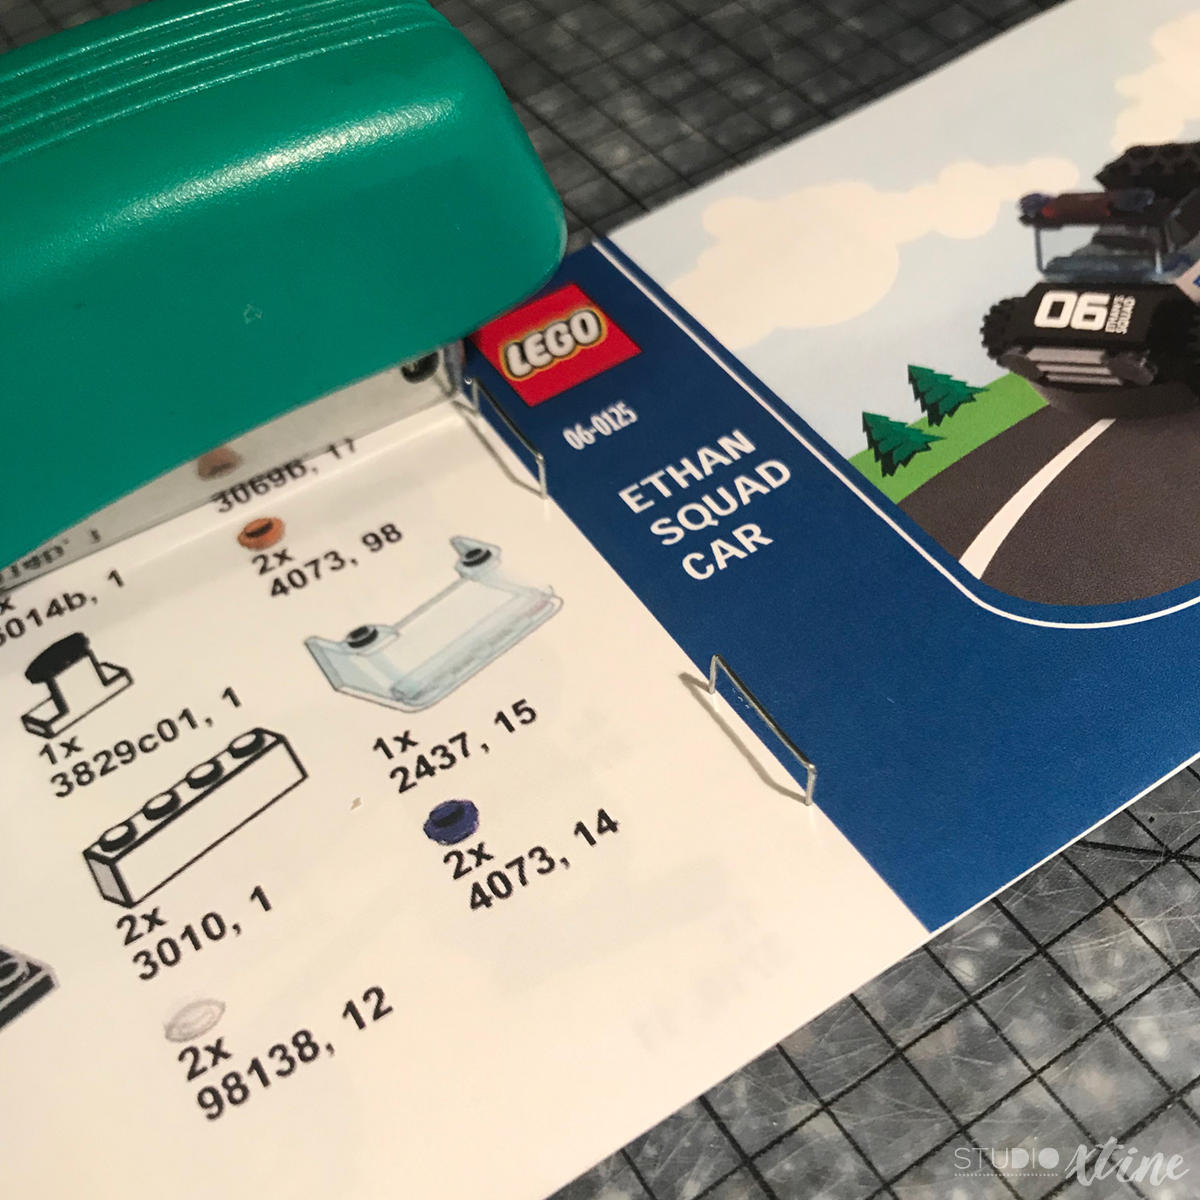
I sent the booklet images to print at my local print shop, trimmed them to size with my paper slicer, and staple bound the finished booklet.
- TIP: If you’re using a super basic stapler like me and it isn’t long enough to staple bind, you still can! You need just a cutting mat and your stapler! Over the cutting mat, simply open up your stapler flat, make sure the edges of your sheets are straight, and then gently press the stapler down on the binding until the staple pokes through your paper all the way BUT not “crunching” the staple closed. Release your stapler and gently lift your booklet off the cutting mat. Push through the staple so that the prongs are sticking out and then manually push them down with your fingers.

One thing I added to personalize this favor even more was to create stickers that I stuck onto certain pieces. One said “06 Ethan’s Squad” with the “06” representing his birthday age, and I added “Police” stickers to the side of the LEGO vehicle so that it looked more like a police car. I created the sticker graphic while StickerMule printed it for me and they were delivered within 5 days. Easy peasy!

Now that I figured out how to make custom LEGO creations party favors, I’m hooked and may need to do this for all future parties. I have a good feeling my kiddo won’t mind! 🙂