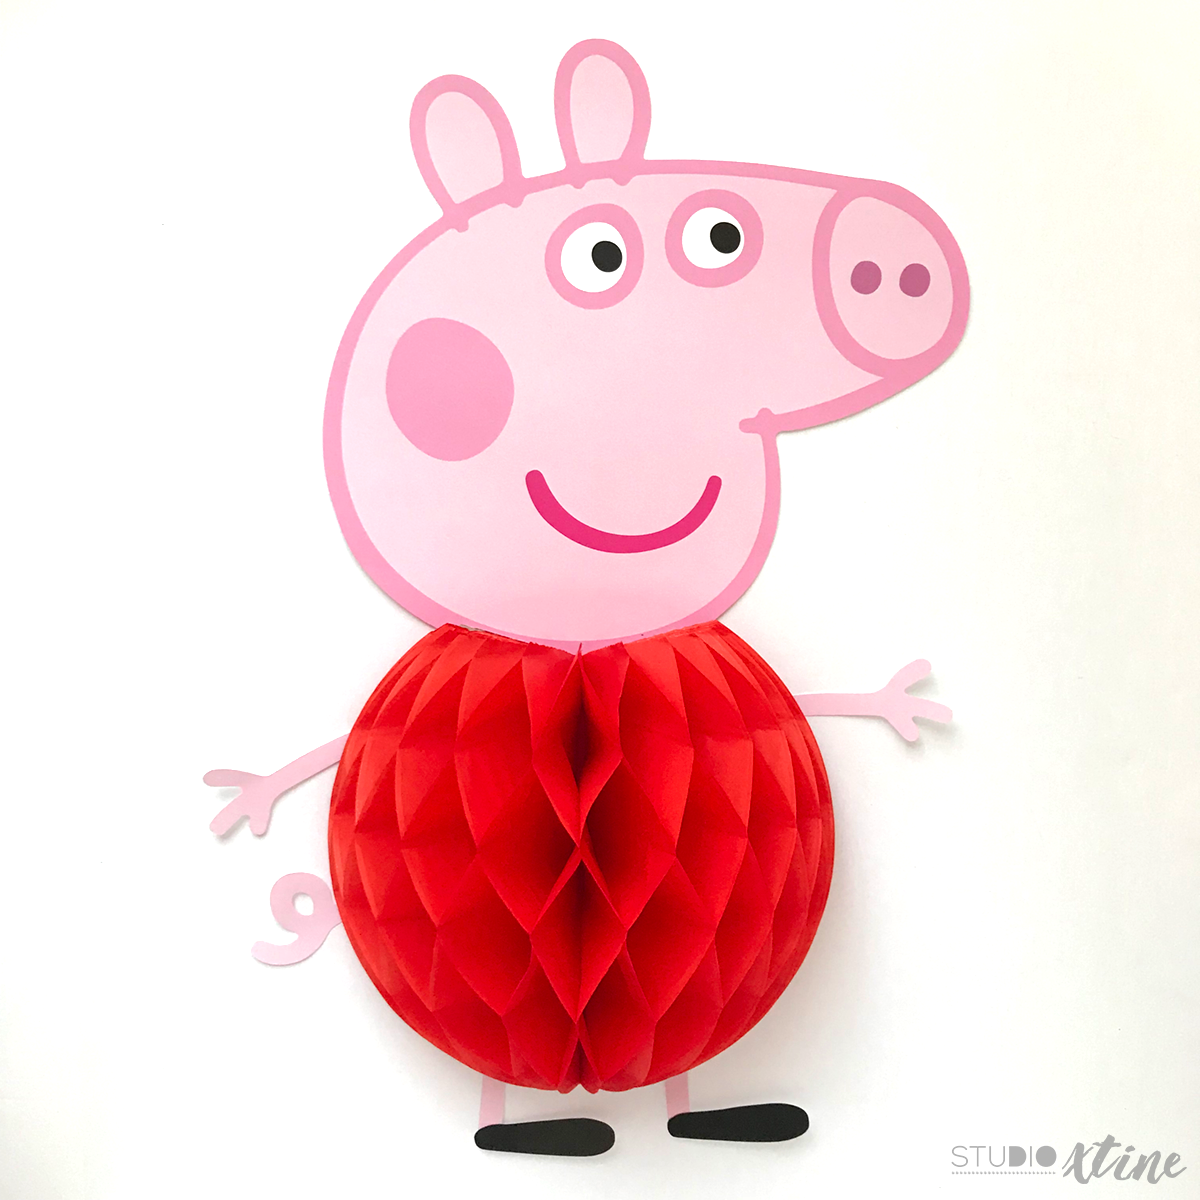
One of my favorite DIYs for my daughter’s Peppa Pig birthday party was creating these supersized Peppa Pigs using red honeycomb balls. It was one of those in-your-head crazy ideas so you could imagine how thrilled I was when it actually worked!
During one of my many Target shopping trips, I came across a pack of 8in honeycomb balls in their dollar section and the first thing I envisioned was Peppa Pig’s red dress! #toddlermomlife
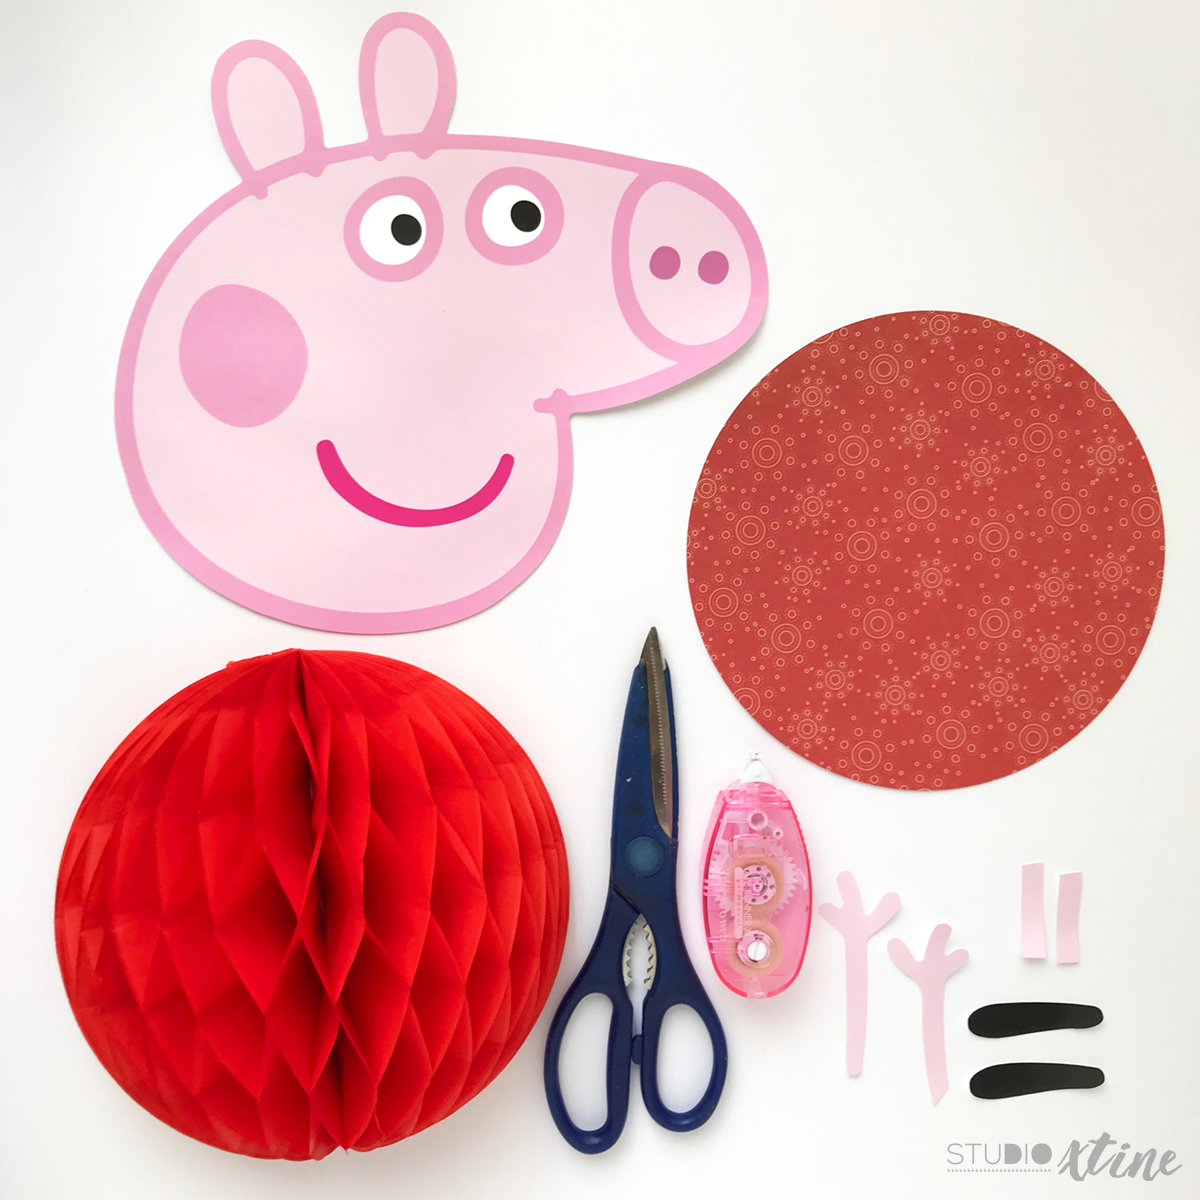
To create this supersized Peppa Pig, you will need the following supplies:
- Silhouette Cameo (or you could totally cut out by hand)
- Silhouette 12in x 24in cutting mat (link)
- 8in red honeycomb balls (link)
- Scissors
- Double-sided adhesive or my go-to Thermoweb scrapbooking adhesive (link)
- 8in circle cut from red cardstock/scrapbook paper
- Cutout Peppa Pig body parts (details below on how I got these pieces)
For this particular project, the cutout Peppa Pig body parts were first created in Silhouette Studio design software.
- I imported a high-resolution image of Peppa Pig and used the Trace Function to create the individual pieces of Peppa Pig.
- Next, I resized Peppa’s head, arms, curly tail, and feet so that it was proportionate to her 8in red dress. As such, I needed to increase the page size to 11in x 17in.
- After adding the appropriate colors, I changed the Action (within the Send tab) on everything but the outer outline of Peppa Pig to “No Cut” and kept the outer outline to “Cut”.
- Since I planned to use the Print & Cut feature on the Silhouette, I added Registration Marks to the design file and adjusted the Registration Mark Position Insets so that all the body parts fit. For me, that was 0.394in.
- Then, I created a PDF of the file to send to my local print shop. Unfortunately, my home color printer cannot print the 11in x 17in paper size nor on 80lb cardstock. The plus side of print shops is that their laserjet machines produce better color quality prints than most home inkjet printers. Also, it only cost me $2 per print!
- Loaded the 11in x 17in print onto my 12in x 24in cutting mat and my Silhouette Cameo did the rest! If you don’t have this magical tool, no worries! You can certainly cut out the pieces by hand.
Now that I have all the pieces, it was assembly time!
- I took my scissors to cut off a curved piece from the top so that the honeycomb ball would frame Peppa’s chin.
- Using the adhesive, I fanned open the honeycomb ball and secured it to the 8in cardstock/scrapbook paper circle.
- Again using the adhesive, I added the body pieces to their appropriate spots around the honeycomb ball.
That’s it! I love the idea of making decorations dimensional so that they’re visually interesting and honeycomb balls are a great way to do that!