
Last Friday was our 50th day of homeschool. There have been good days and not-so-good days but I think we’ve now found our groove! Although there’s only three more weeks left of this school year and with summer camps cancelled, I might have to implement some sort of summer school. Poor kids…they get to relive my childhood where I was enrolled in summer school every summer from 4th or 5th grade until high school. 🤓
For a couple weeks, I promised my kids that we would go a “field trip” to Paris for good classroom behavior. So, finally we went last Friday and they had a blast! I’m recapping our activities should you want to do the same with your kids. FYI, my kids are 7 (first grader) and 4 (preschooler). Bon voyage!
Getting Ready for Our Trip
The first thing we did was “pack” for our trip. We kept it simple and each child packed a book in their backpacks along with their loveys and water bottles. My son packed his Paris Hide-and-Seek book, which I bought in 2017 when my husband and I went to Paris for our 10-year anniversary. By the way, I LOVE this book. It showcases all the monuments with digestible fun facts for a young child and the illustrations are so beautiful! My daughter brought the classic Madeline book on our trip!
Of course I gave my daughter French braids and added tiny French flags on their cheeks with a little red-white-and-blue face paint stick. Ooh la la!
Eat
We were starving after that long flight so we decided to make crepes of course! Here’s the recipe I used (scroll all the way down). We made two types of sweet crepes: one filled with Nutella and topped with bananas, and the other filled with strawberry jam and light spread of cream cheese and topped with cut-up strawberries. It was delicious!
Read/Watch
Since this was a homeschool day after all, we spent some time learning about France and the French culture. Below are a list of videos we watched and books we read.
- All Around the World – France (link). We were able to read this book online via the Epic app that my son’s teacher signed up for due to distance learning.
- Eiffel Tower
- This YouTube video by Free School provided a great intro and history on the iconic landmark.
- Then, we watched and played with the VR feature of this YouTube video. It felt like we were actually right there!
- Notre Dame Cathedral. This quick video was a great way to introduce the kids to the beautiful structure.
Learn
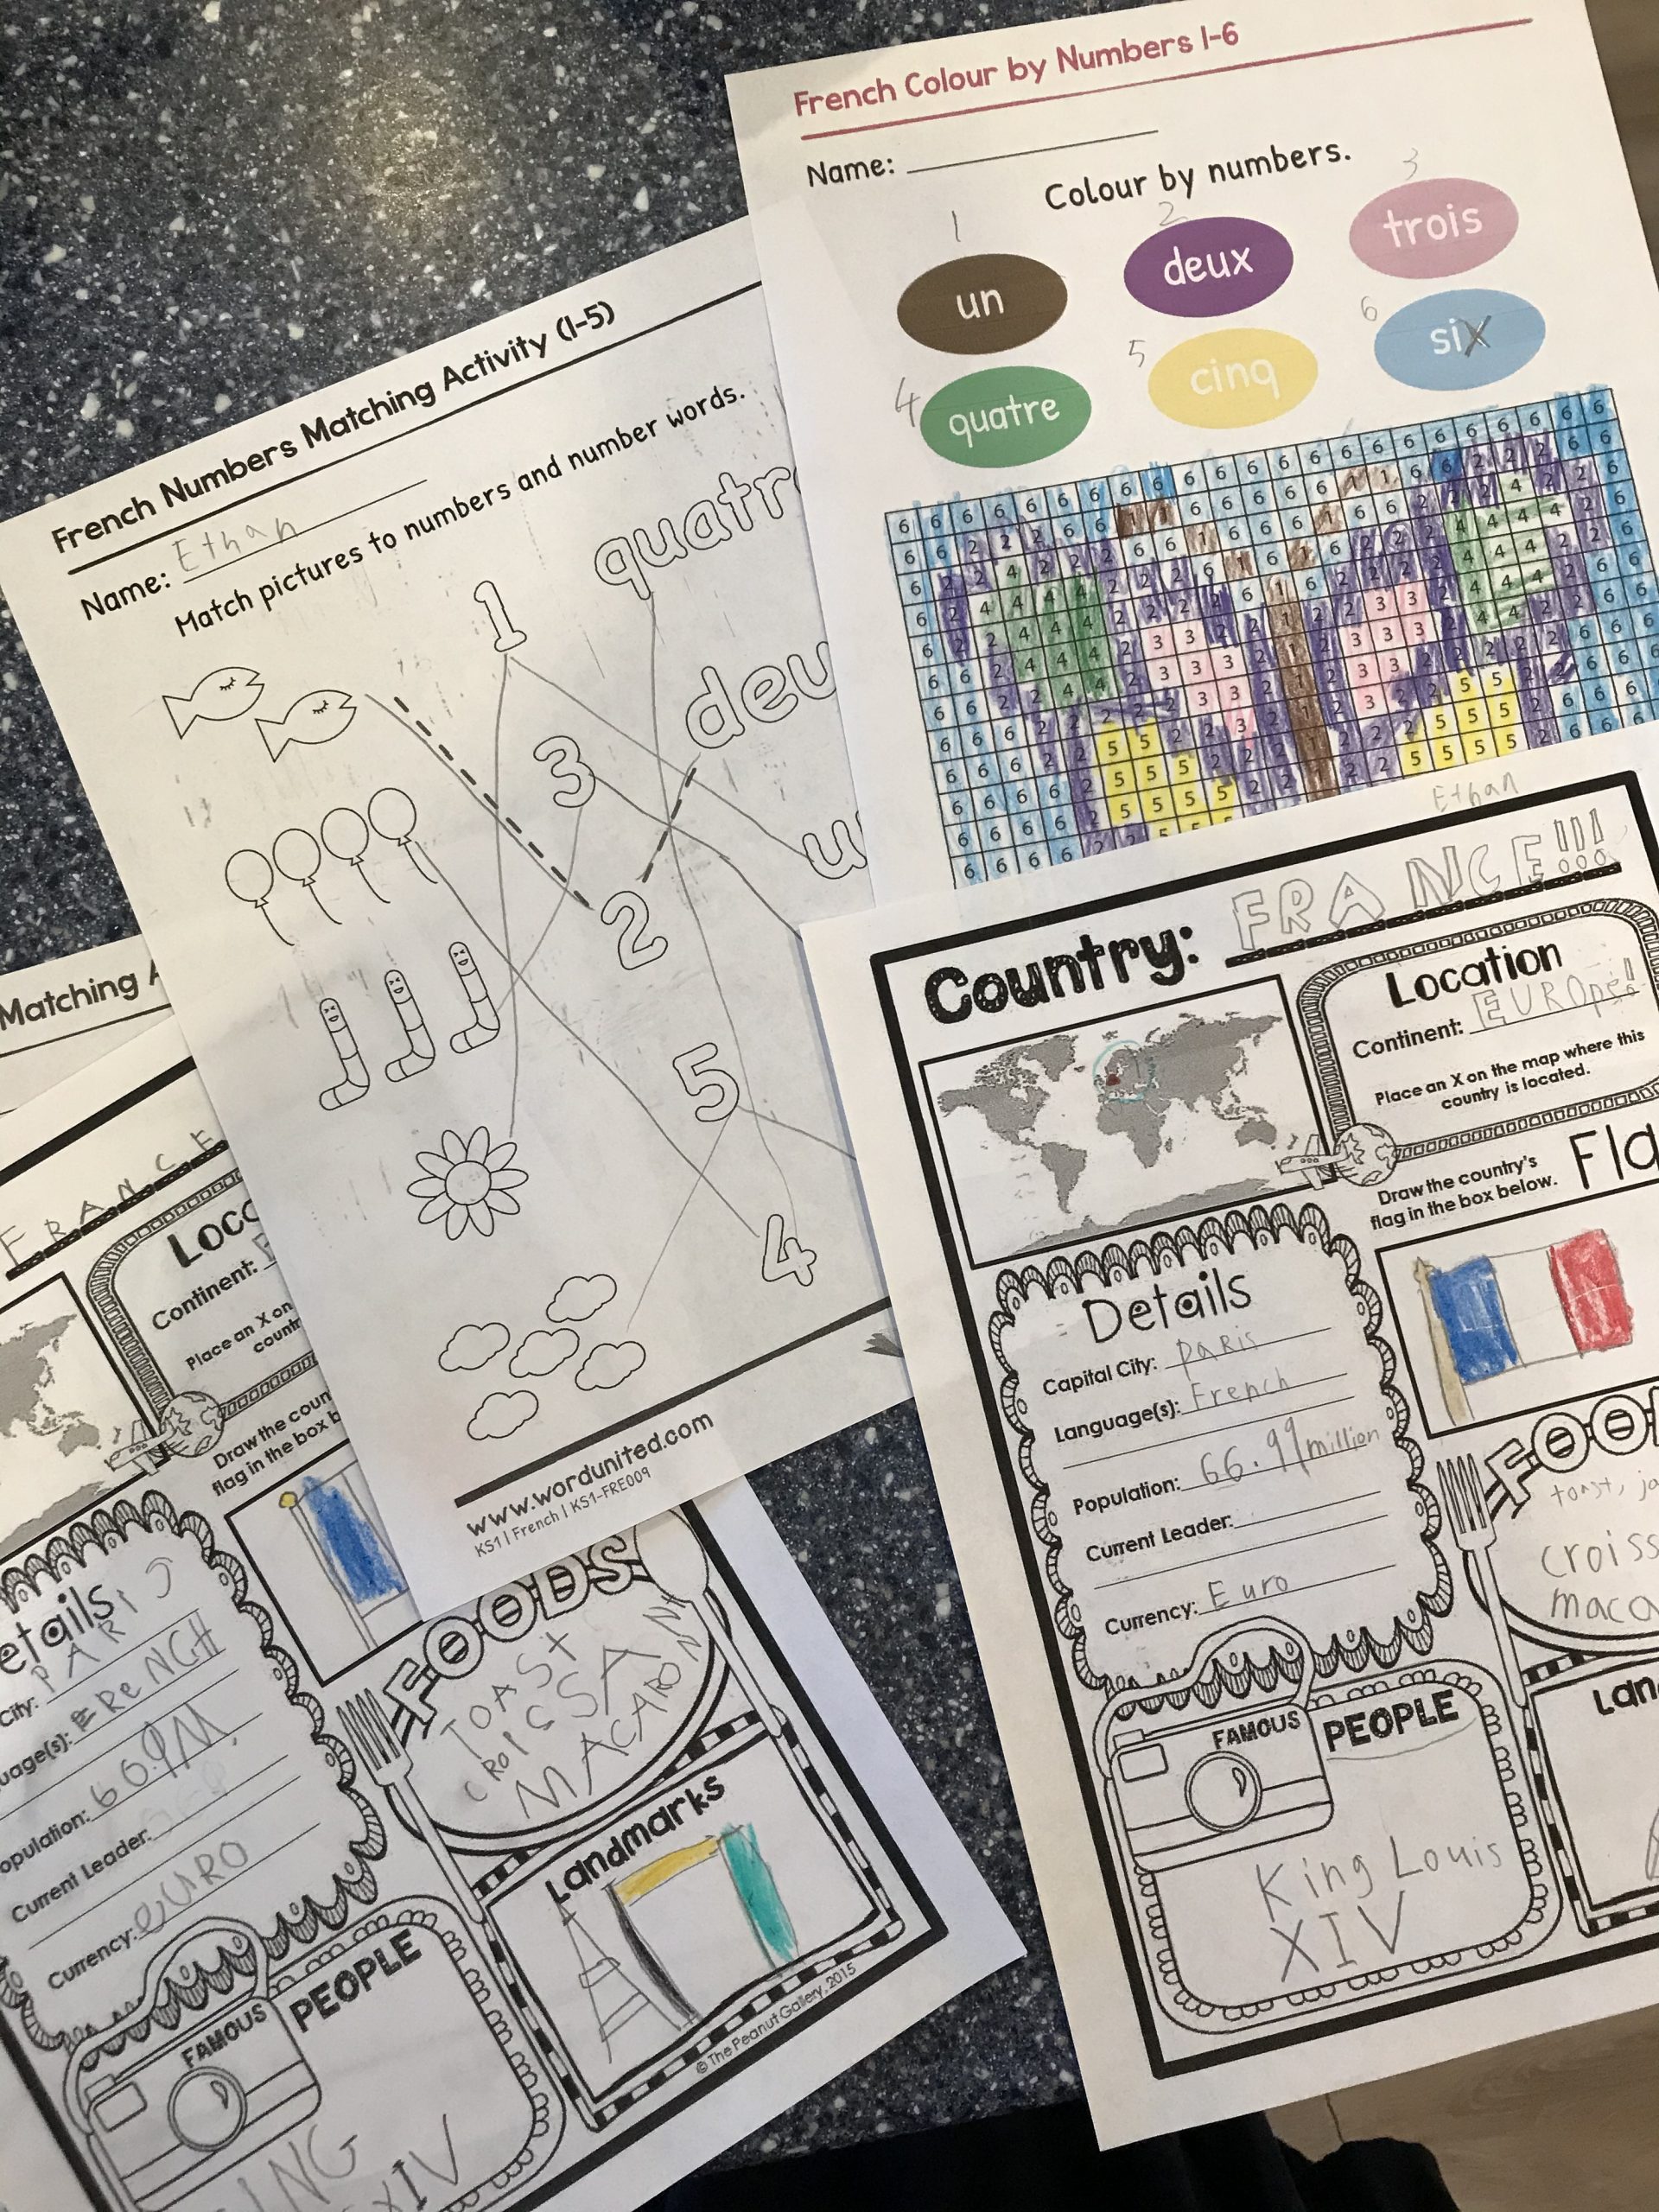
While reading the All Around the World book, my kids filled out a “Explore the World” worksheet. This was a great activity for my first grader.
Next, we learned a little French with these worksheets: French Numbers 1-5 and French Colors (Coloring Sheet and Color By Number). My preschooler who loves to color was a fan of these worksheets!
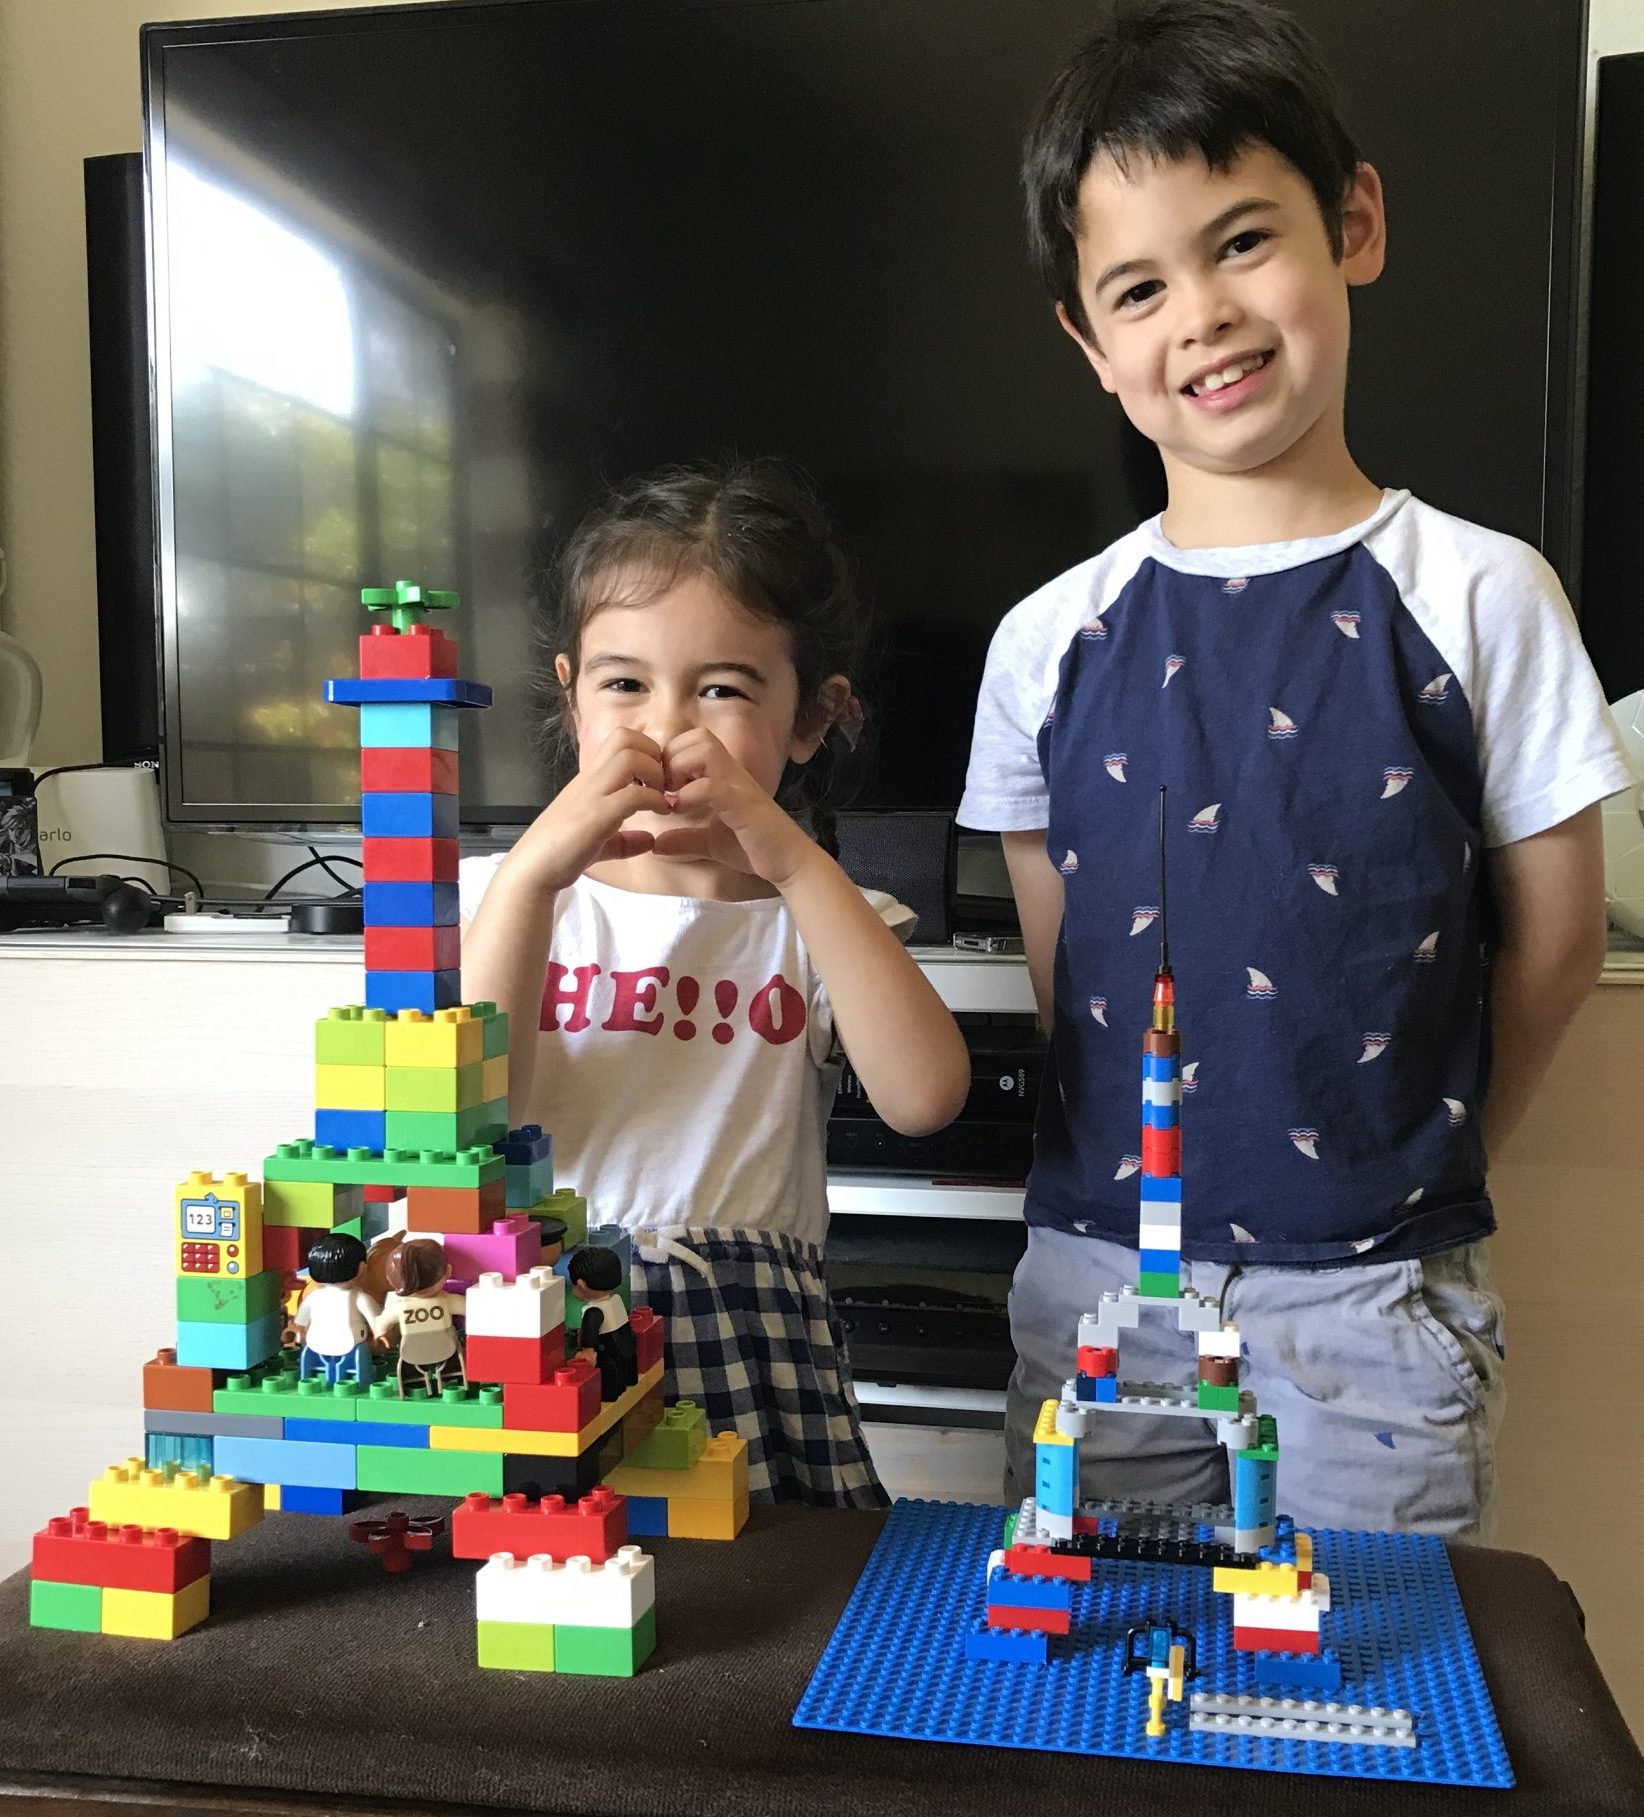
Lastly, we did a little STEM learning by building our own Eiffel Towers using Duplos and Legos.
Craft
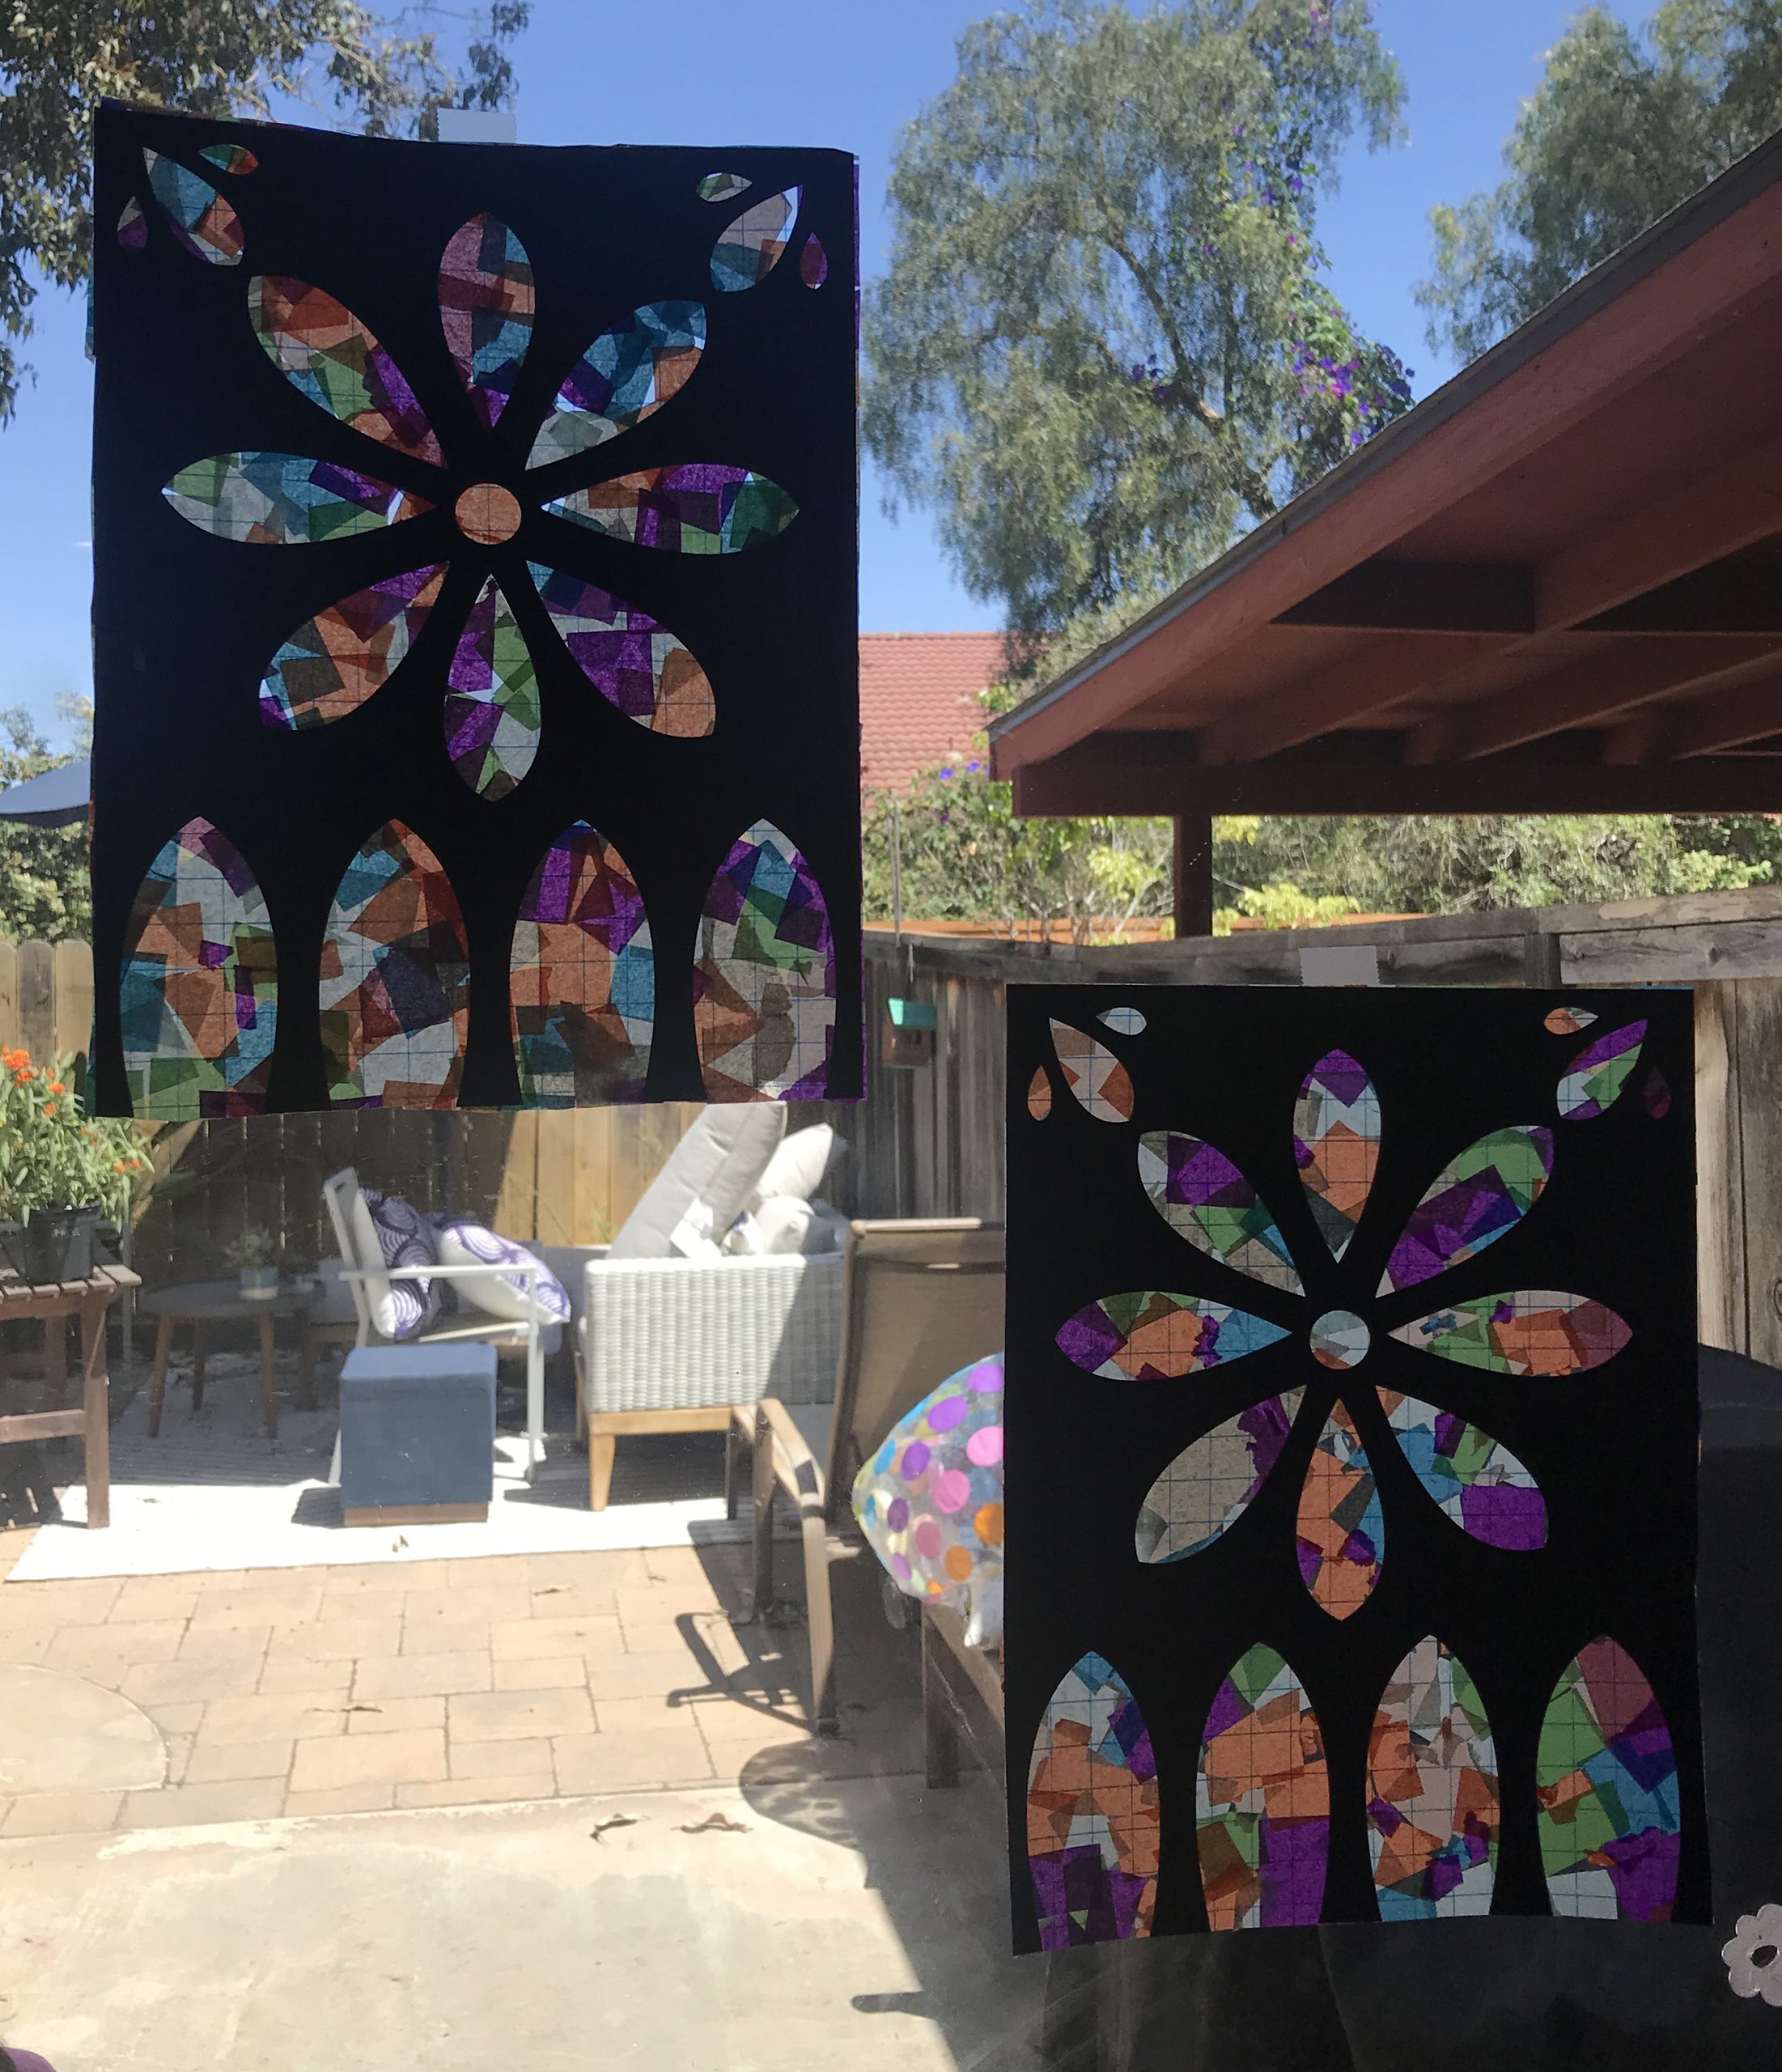
Tissue Paper Rose Window: After watching the Notre Dame Cathedral video, we re-created the Rose Window using tissue paper and a cutout design made with my Silhouette die-cutting machine. Original inspiration came from Pinterest (where else?!). You can download this FREEBIE below as a PDF (simply print and cut using scissors or X-acto knife) or SVG (for die-cutting machines).
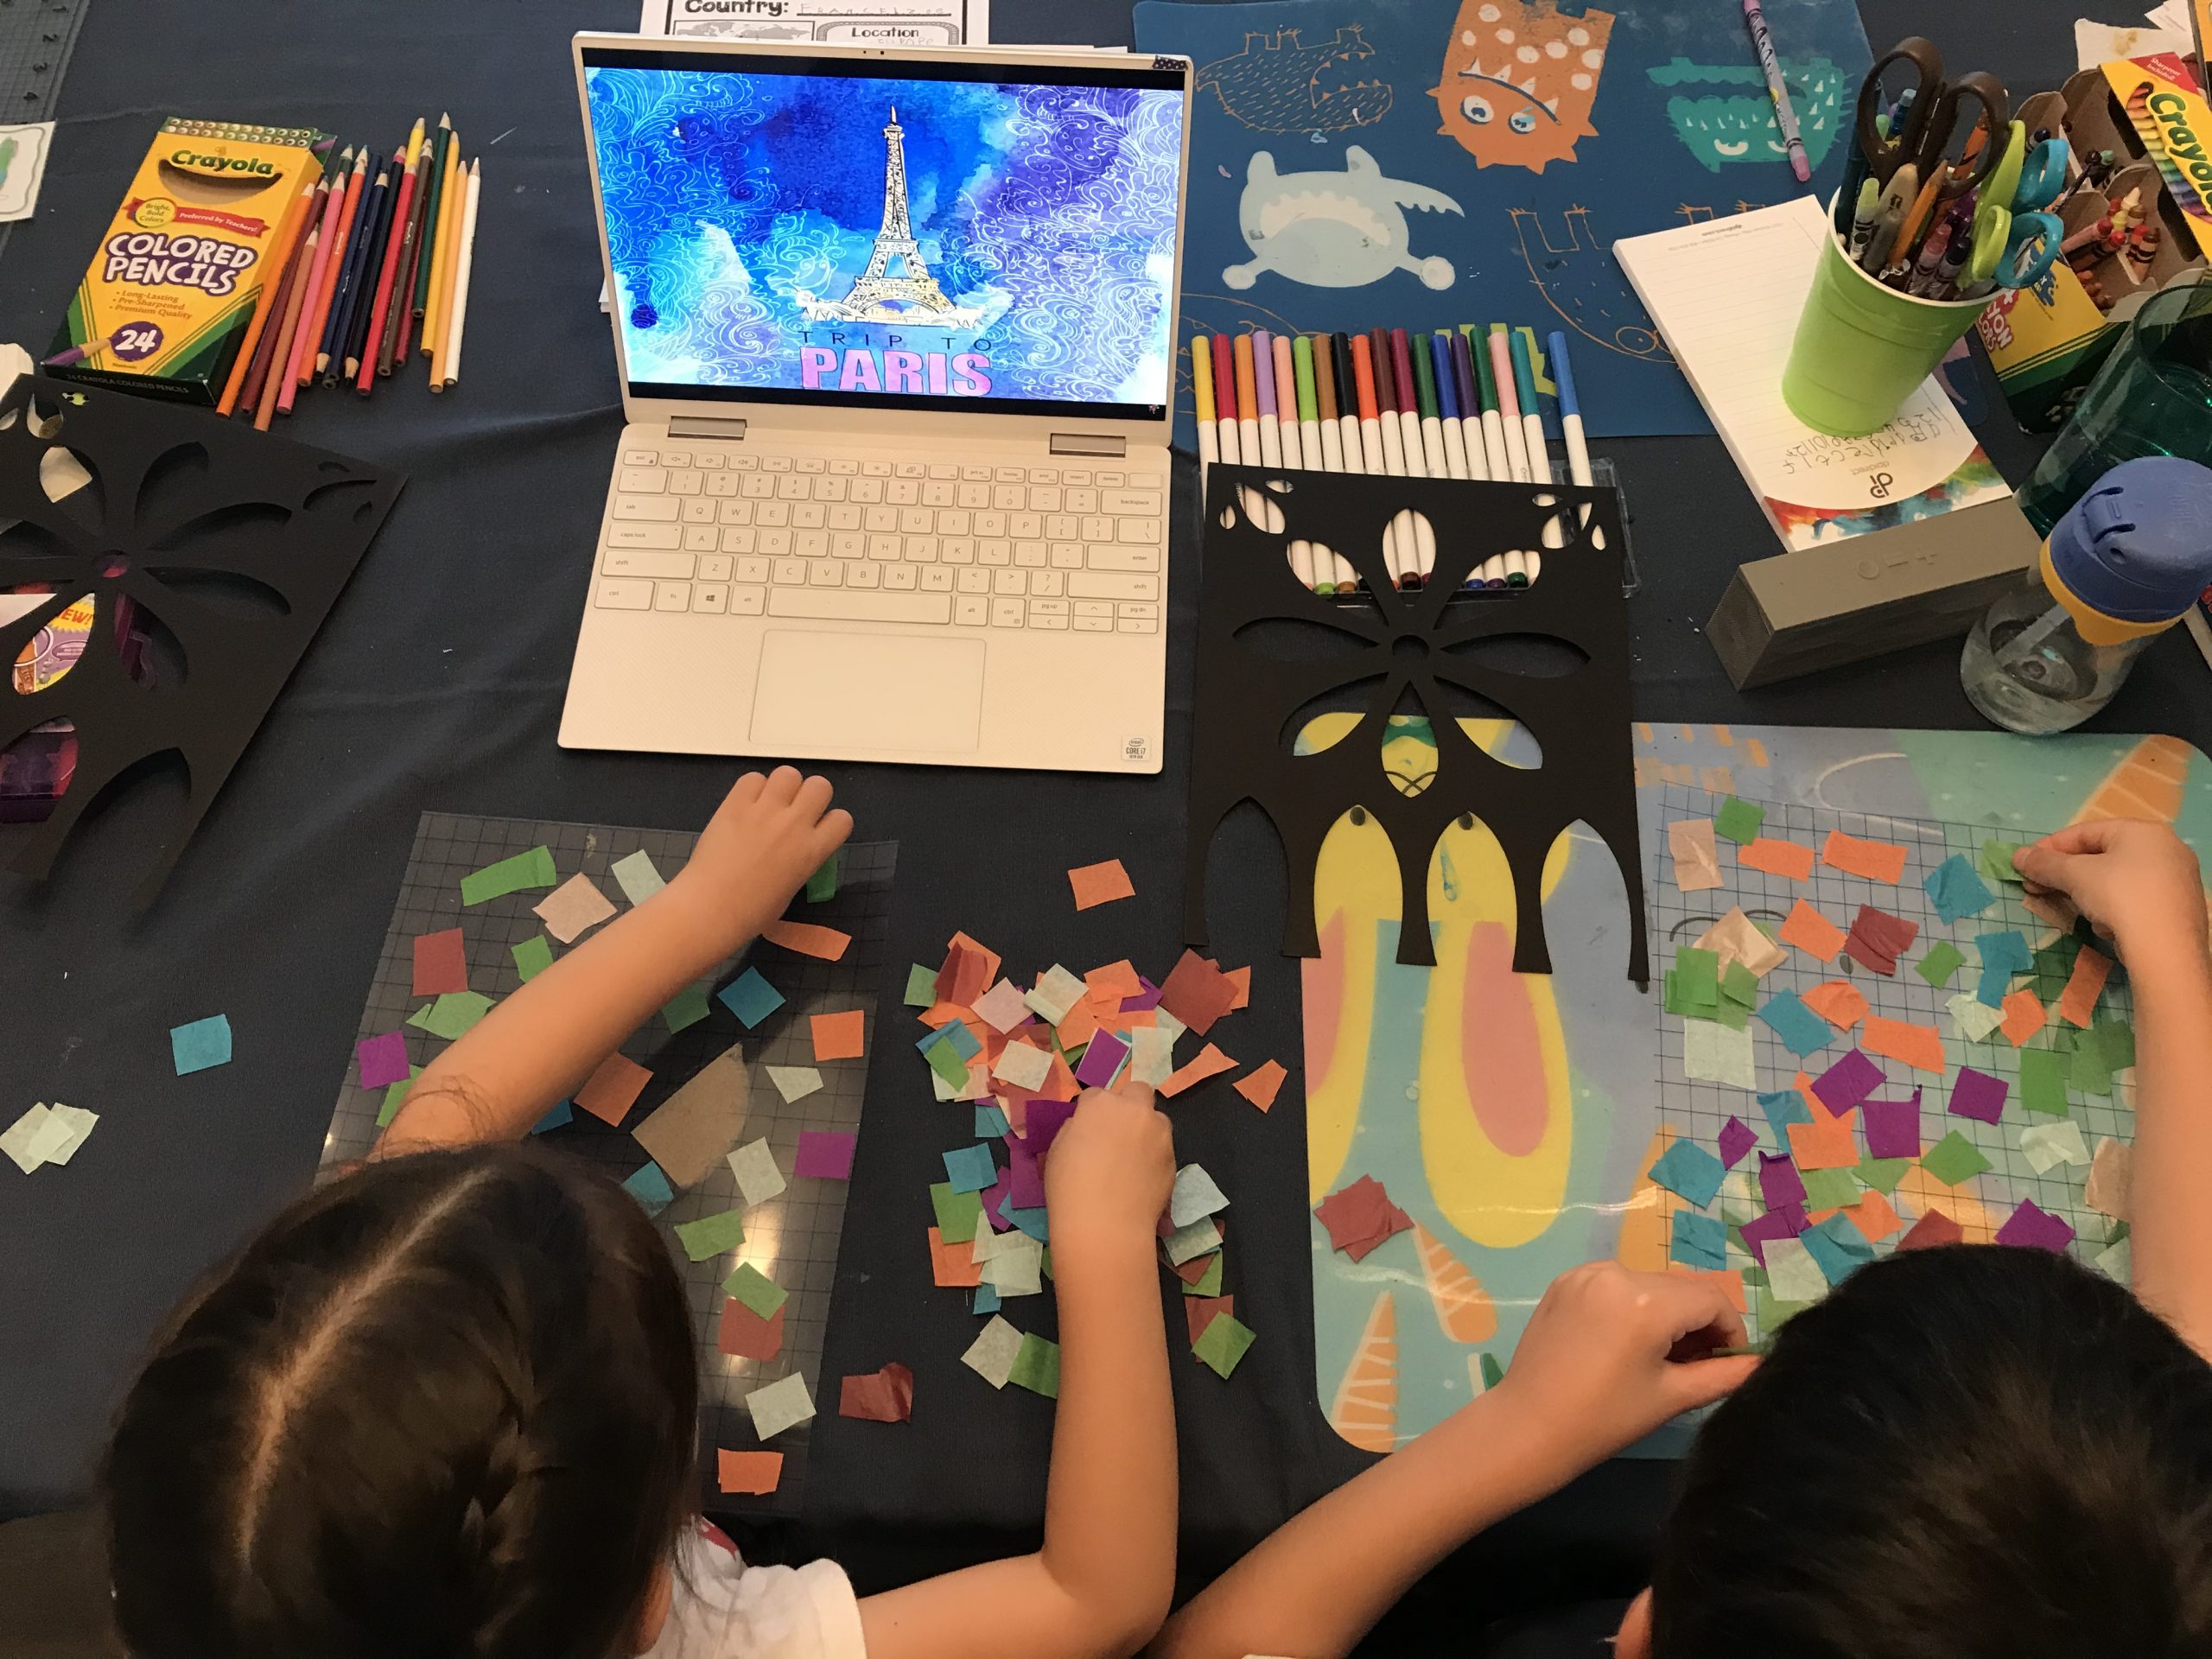
We played French music in the background while cutting little squares of different colored tissue paper. Then, I cut transfer tape vinyl (a supply I already had at home) about the same size as the Rose Window cutout sheet. If you prefer something less sticky, you can also use clear contact paper. The kids laid cut up tissue paper on the sticky surface until it was covered. Finally, we squeezed glue on the cutout, placed the tissue paper layer on top, and pressed down to make sure the two layers adhered. We hung it on our slider to mimic the glass-stained Rose Window of the Notre Dame Cathedral. Love all the colors!
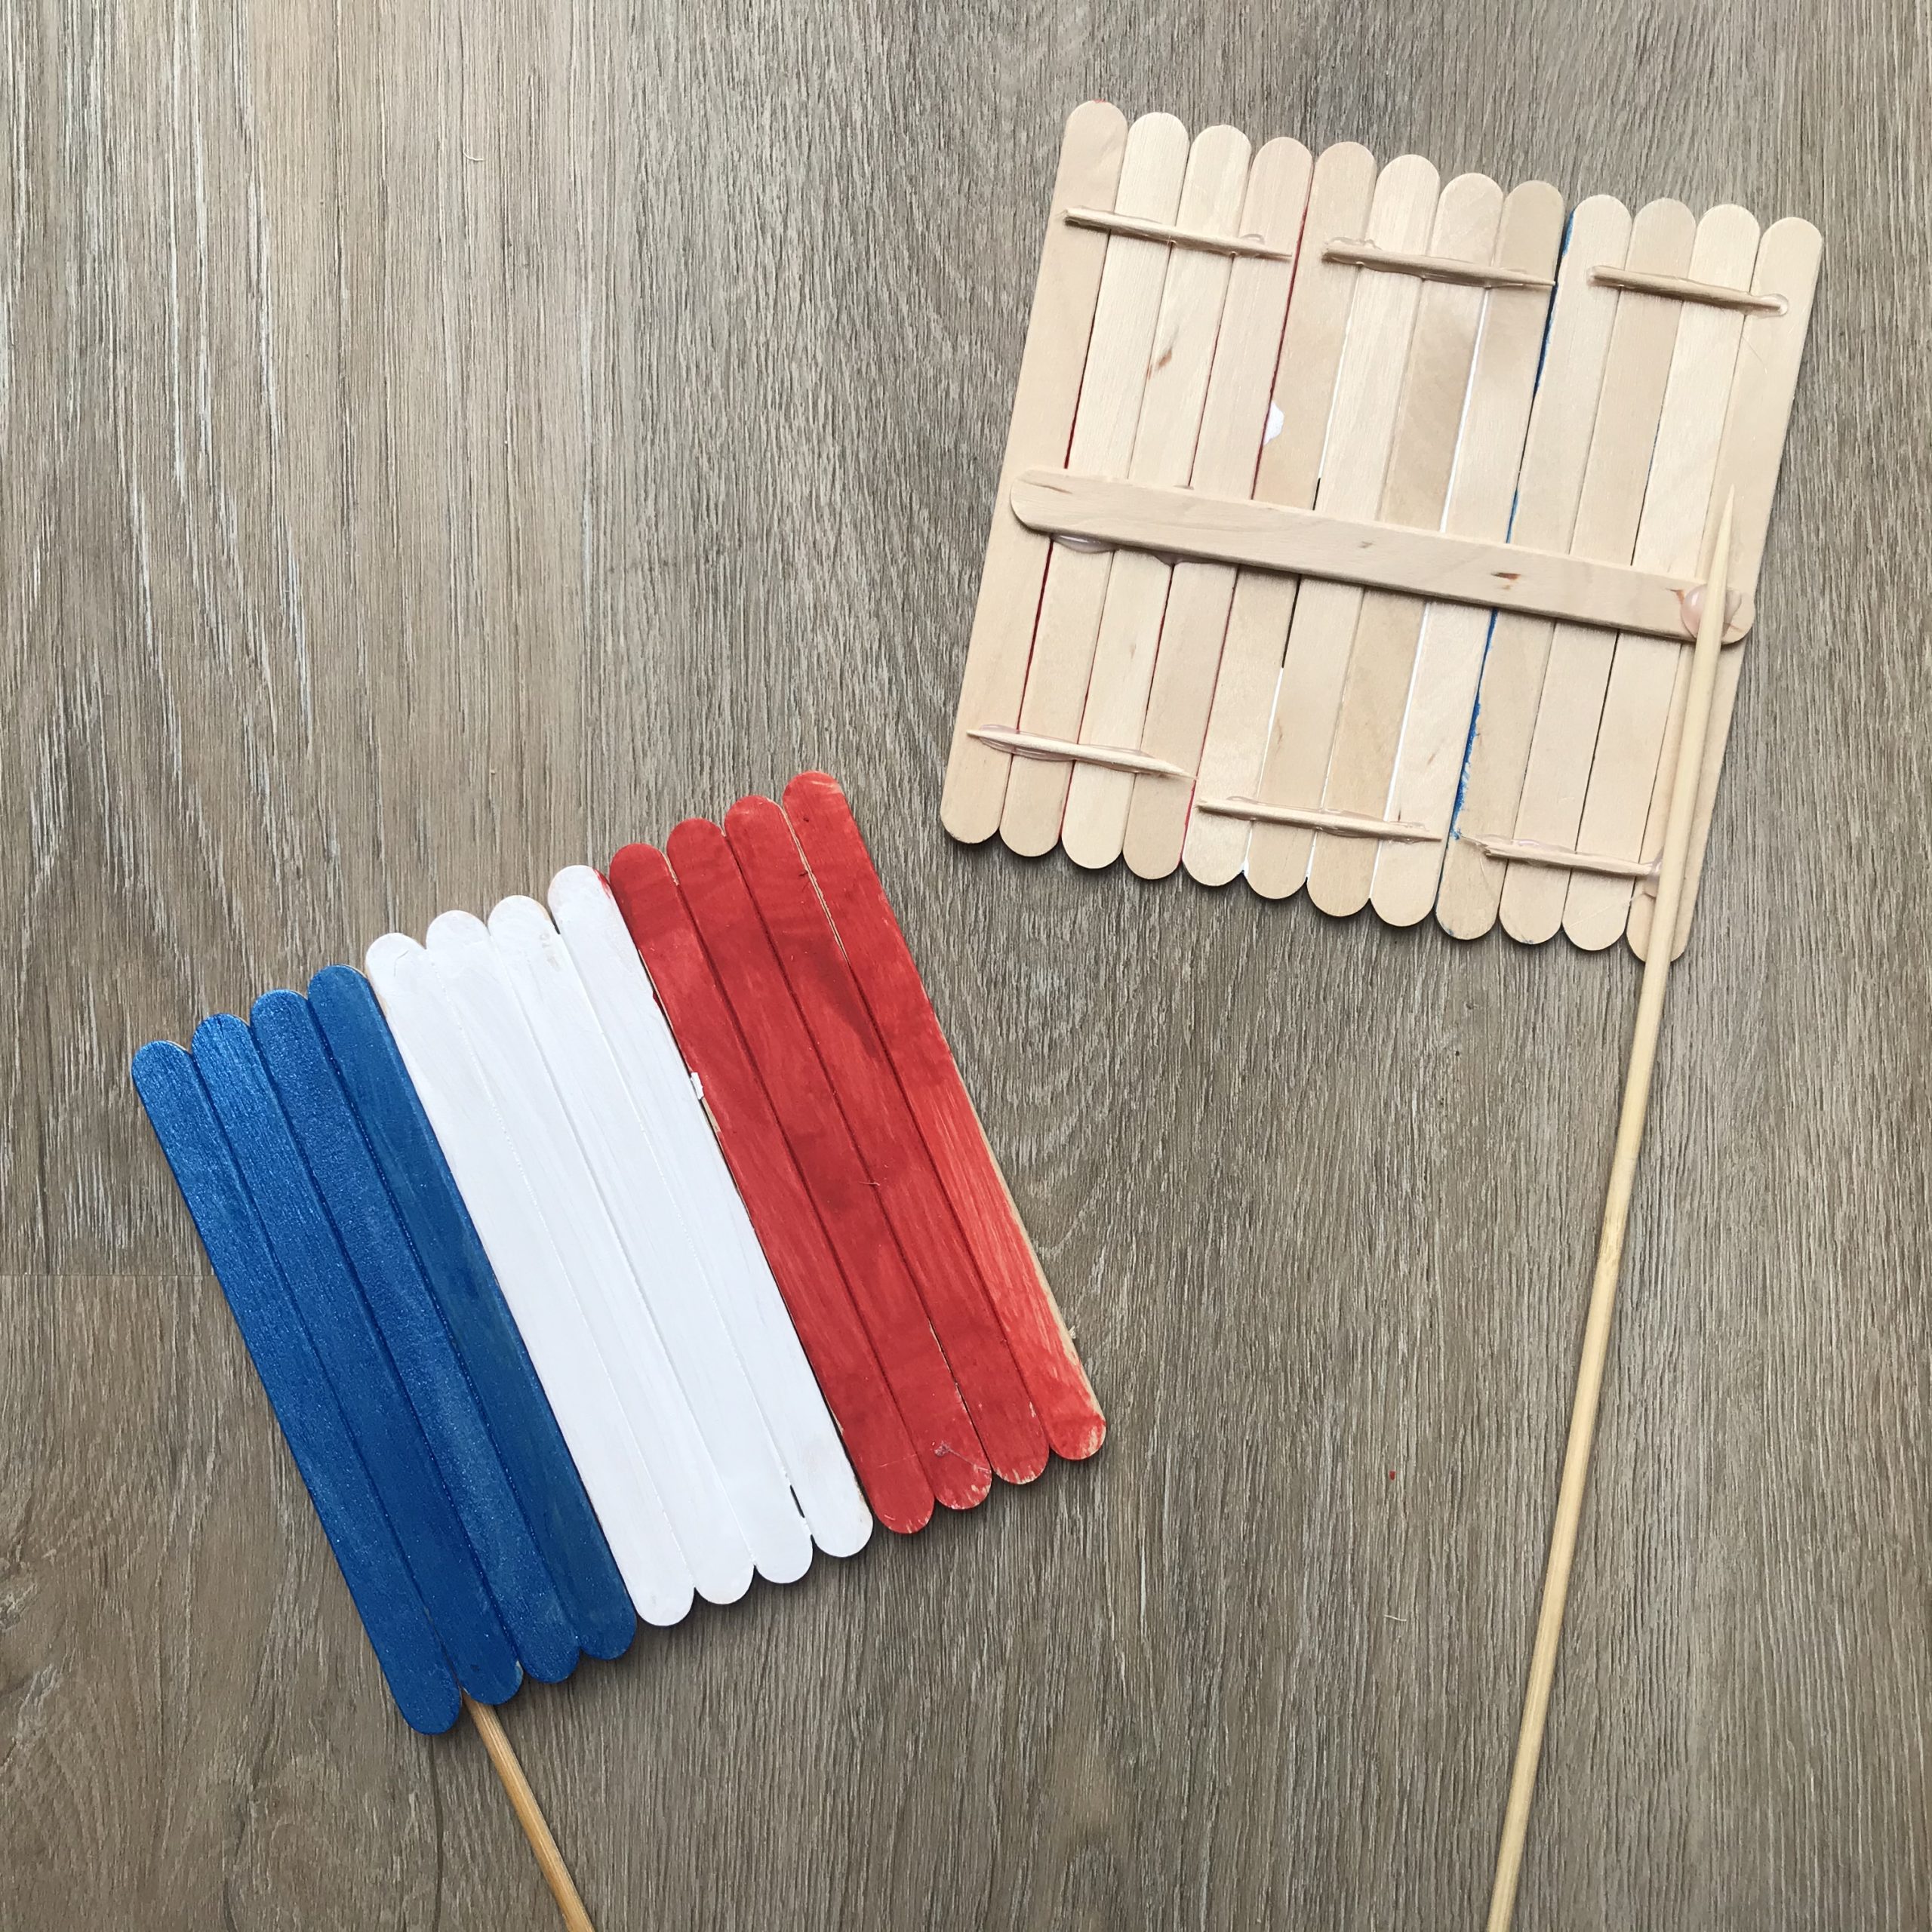
Popsicle Stick French Flag: Next, the kids channeled their inner Monet and painted the French flag while wearing handmade no-sew berets that I made for them earlier that morning. They looked like little Parisians!
Supplies needed to make the French flags include:
- 26 wooden popsicle sticks
- 6 toothpicks
- acrylic paint in red, white, and blue
- 2 dowels (or you could even use wooden BBQ skewers)
- hot glue gun
Each flag uses 13 popsicle sticks. Four sticks per color for a total of 12 sticks. The 13th stick is used to hold the 12 sticks together on the back.
First step is to simply break six toothpicks in half. Separate the popsicle sticks into three groups. You should have four popsicle sticks per group. Then, hot glue the halved toothpicks to the back of each group, one half toothpick on top and the other half toothpick on bottom. It kinda resembles a fence if that visual comparison helps.
Once the glue has dried, paint just the front side of each popsicle group in red, white, and blue paint. After the paint has dried, place them side-by-side in the order of the French flag colors and flip them over. Hot glue the last popsicle stick across the middle. Finally, hot glue one dowel on the backside of the blue popsicle sticks for the flag pole. Voila, a French flag!
This trip to Paris was absolutely a fun and memorable one! I can’t wait to take them there one day…maybe for the Olympics in 2024! My kiddos enjoyed it as much as I did preparing for the field trip. In fact, at dinnertime, my son asked if we could go to Mexico next! 😲😁🌮
If your kids are curious about traveling and visiting different countries, you might want to check out Nat Geo Kids’ “Are We There Yet?” YouTube series. They’re short 7-min video “diaries” of young siblings traveling to different countries to learn about their culture/food/history. My kids love watching these!