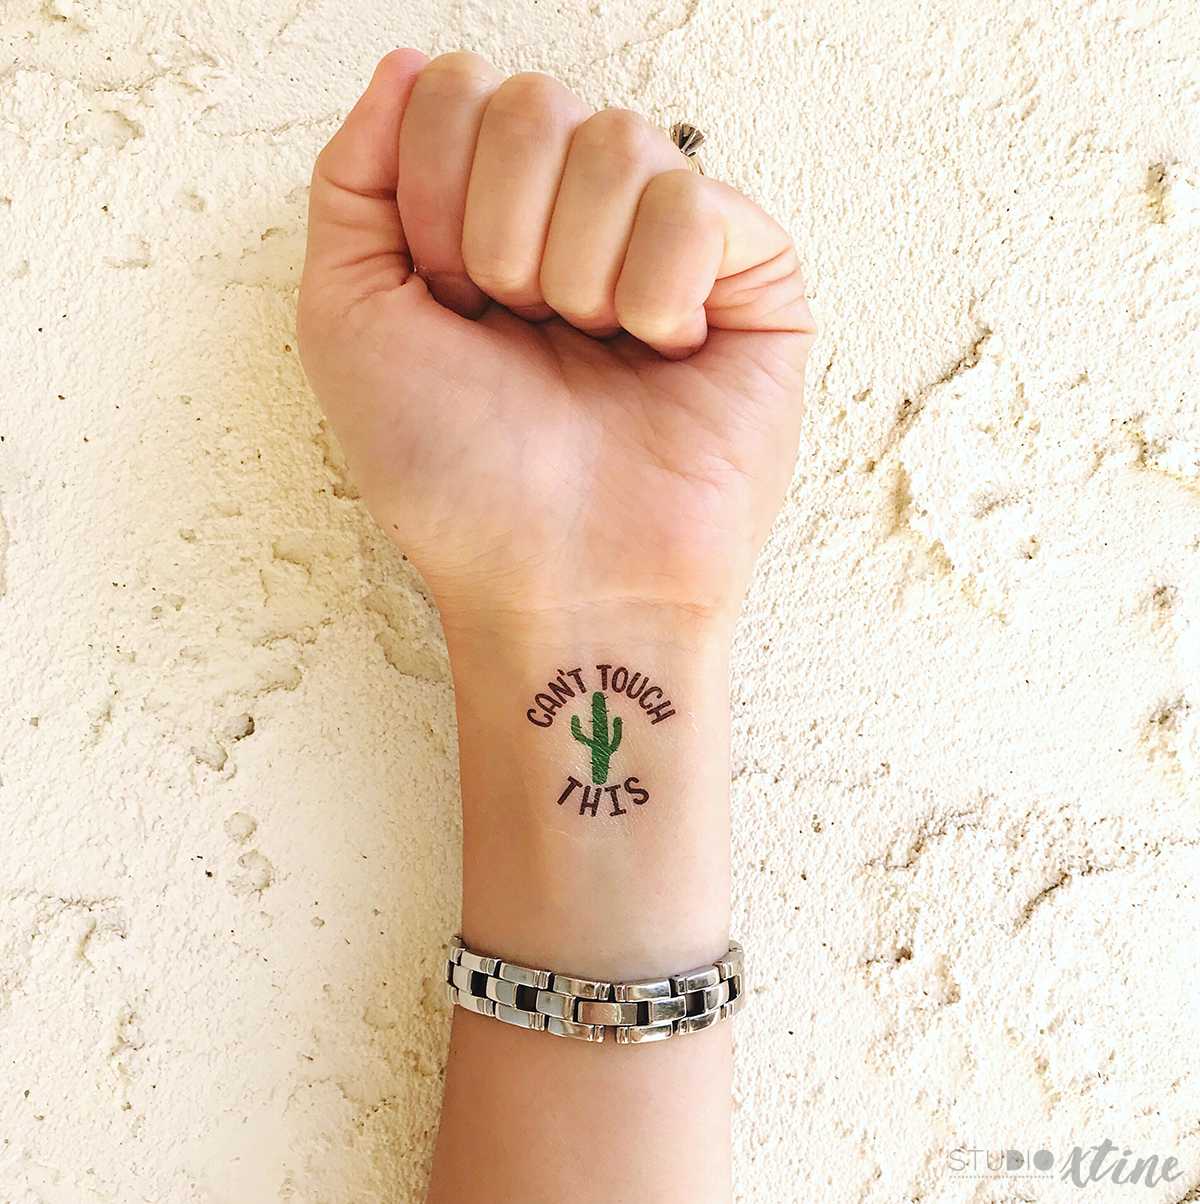
The crafting hiatus last month was hard for a creative spirit like me but fortunately I had a good project to jump on once I was back in my craft room. Sorry, not sorry, for the upcoming posts featuring elements from a fiesta/taco/Dragon Loves Taco-themed baby sprinkle! I’m waiting until after the sprinkle on Saturday to share everything but since waiting is so dang hard, I am going to give you a sneak peek with this temporary tattoo tutorial!
Silhouette has a ton of specialty media, one of which is called printable tattoo paper. I’ve experimented with this on other surfaces such as wooden Easter eggs and the results are amazing! Today’s post is going to show you how to turn a Silhouette cut file into a printable color-filled image.
For this project, I am using Design ID#260021 by Sophie Gallo.
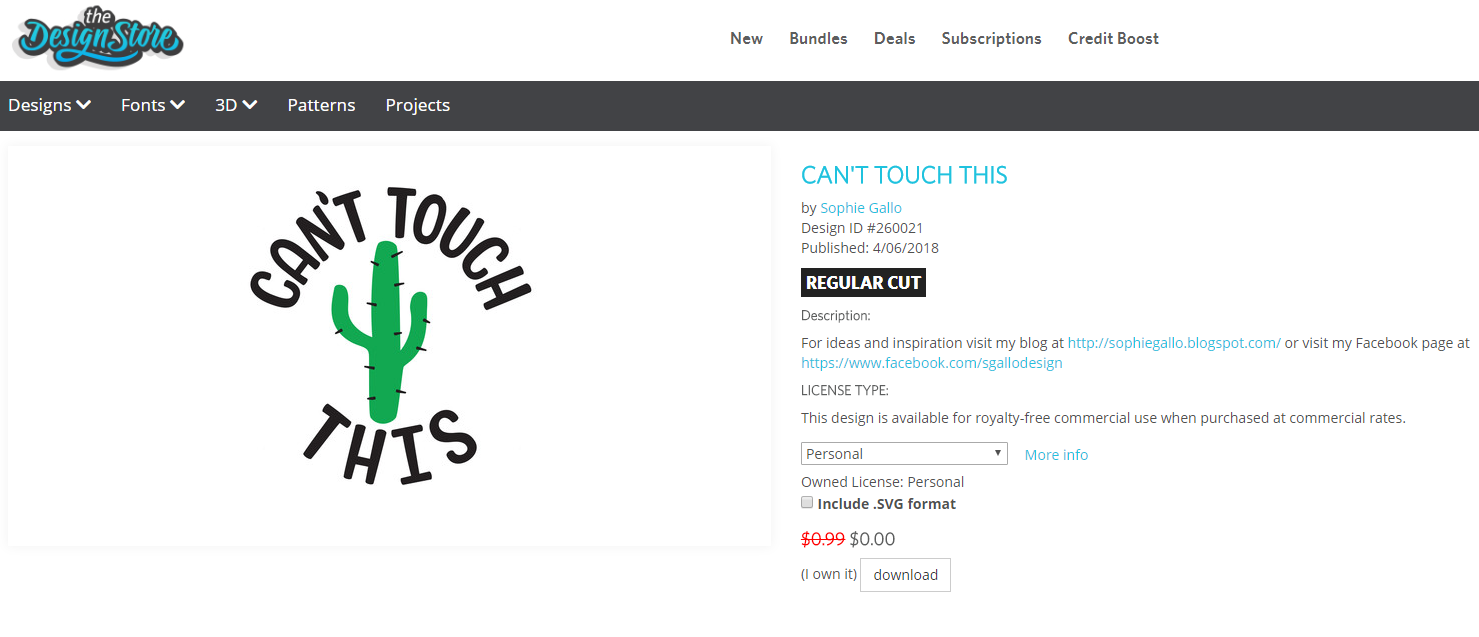
I love puns so this ranks high on my favorite cut files! Takes me back to the 1990! I seriously have flashbacks to summer camp where we played this song non-stop. Anyone else an 80s baby?
Okay, are you ready to learn how to make any unfilled cut file into a printable image? Here we go!
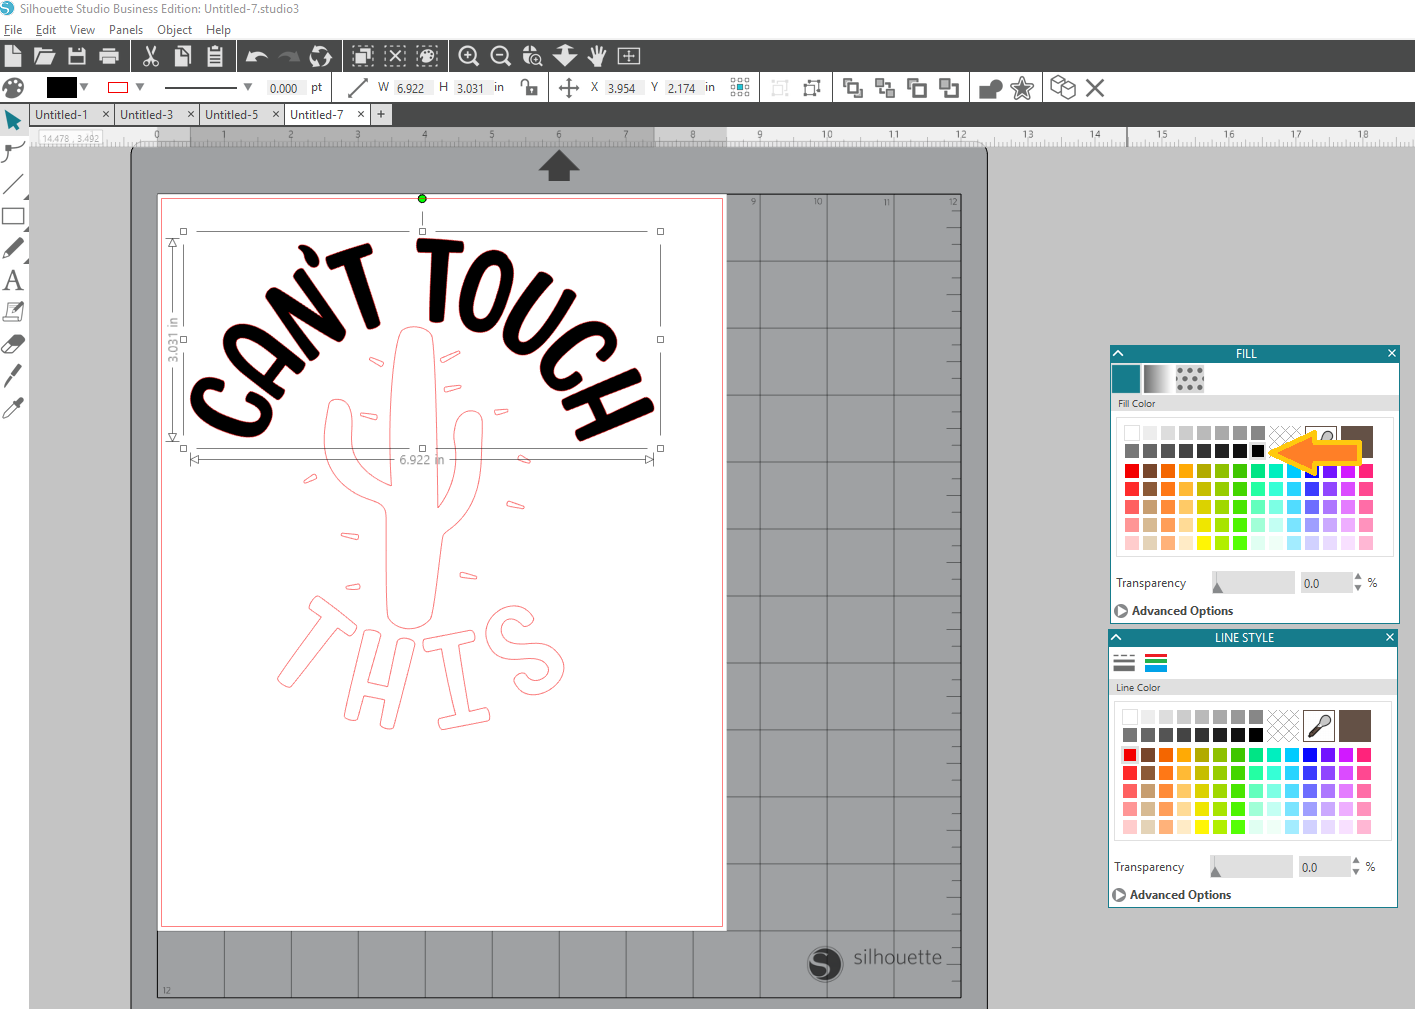
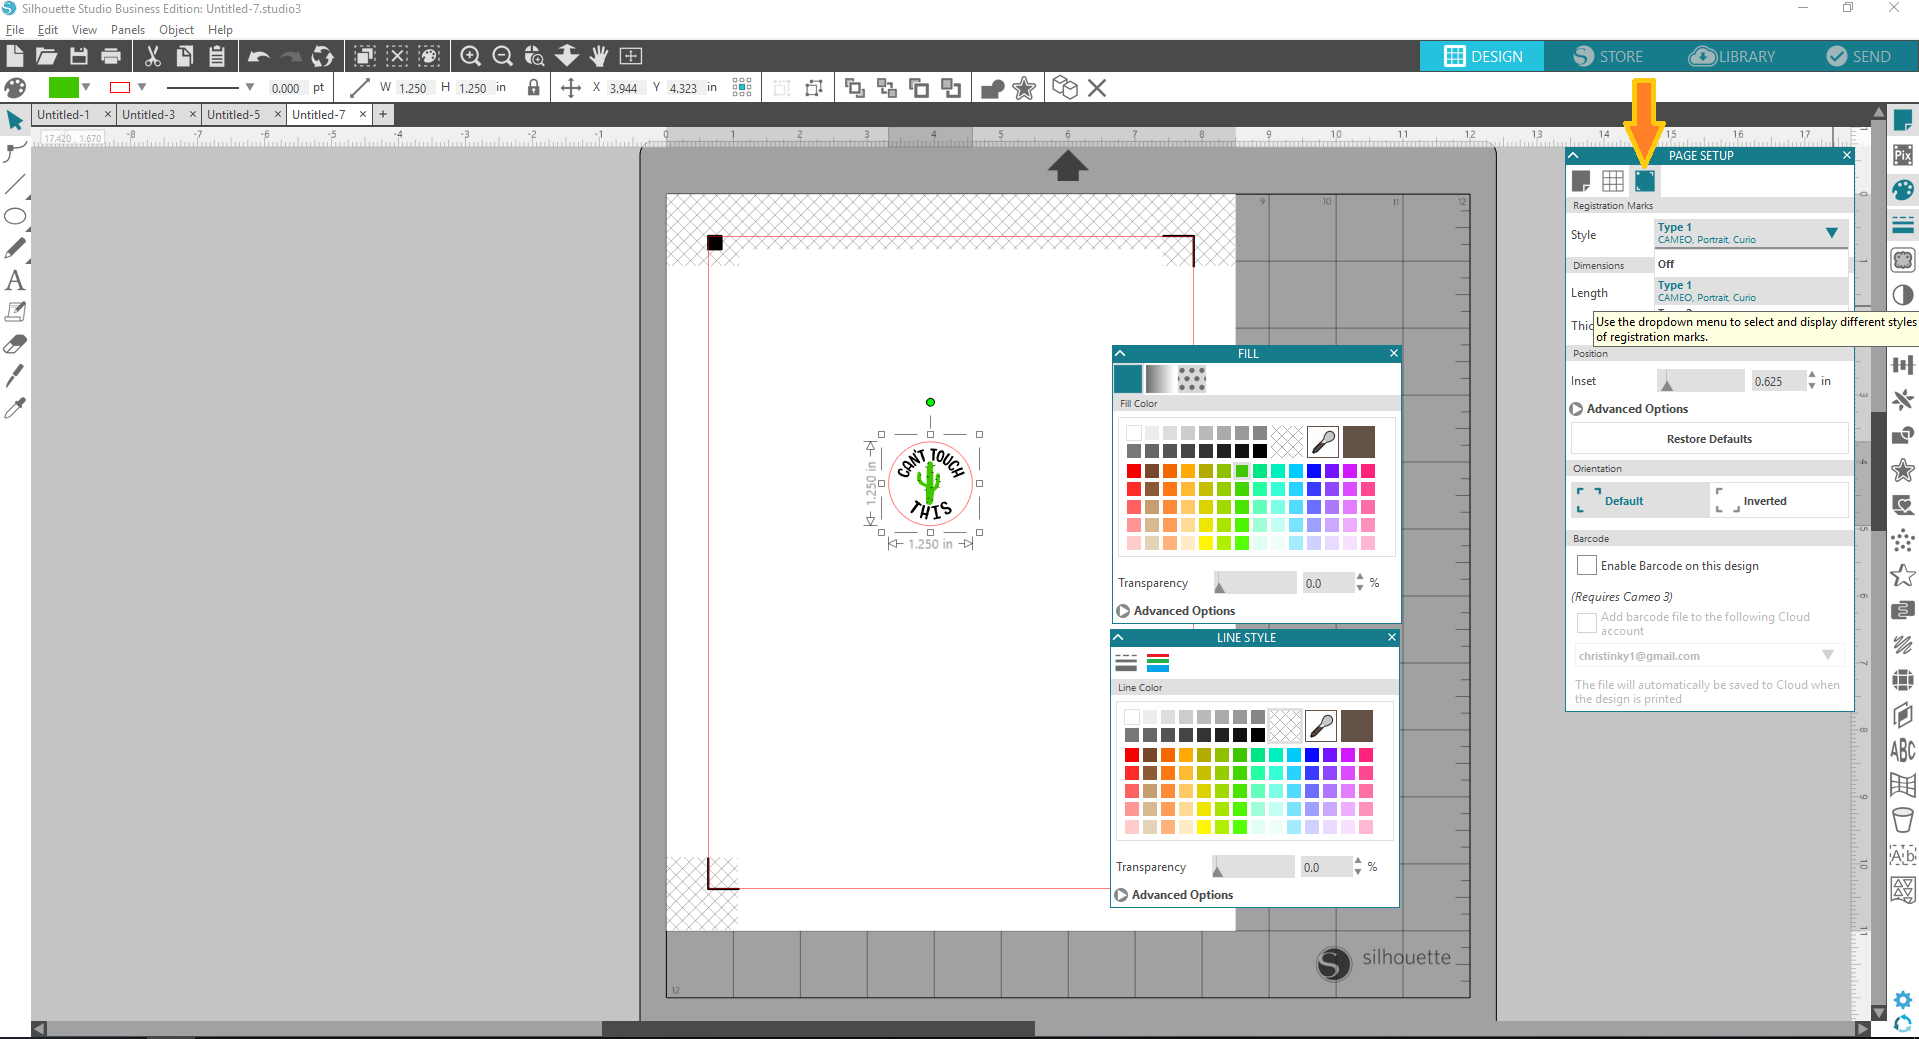
- Open up the “Can’t Touch This” cut file in Silhouette Studio.
- Right-click and Ungroup
- Click on the text objects
- Choose black in the Fill Color Window
- Choose clear/transparent in the Line Color Window

- Click on the cactus object (minus the pokey spines)
- Choose green in the Fill Color Window
- Choose clear/transparent in the Line Color Window
- Select all the pokey spines
- Choose black in the Fill Color Window
- Choose clear/transparent in the Line Color Window
- Move each pokey spine wherever you like on the cactus. OPTIONAL: You may want to add more and you can do so by simply copying/pasting the pokey spine(s).
- Select everything, right-click and choose Group.
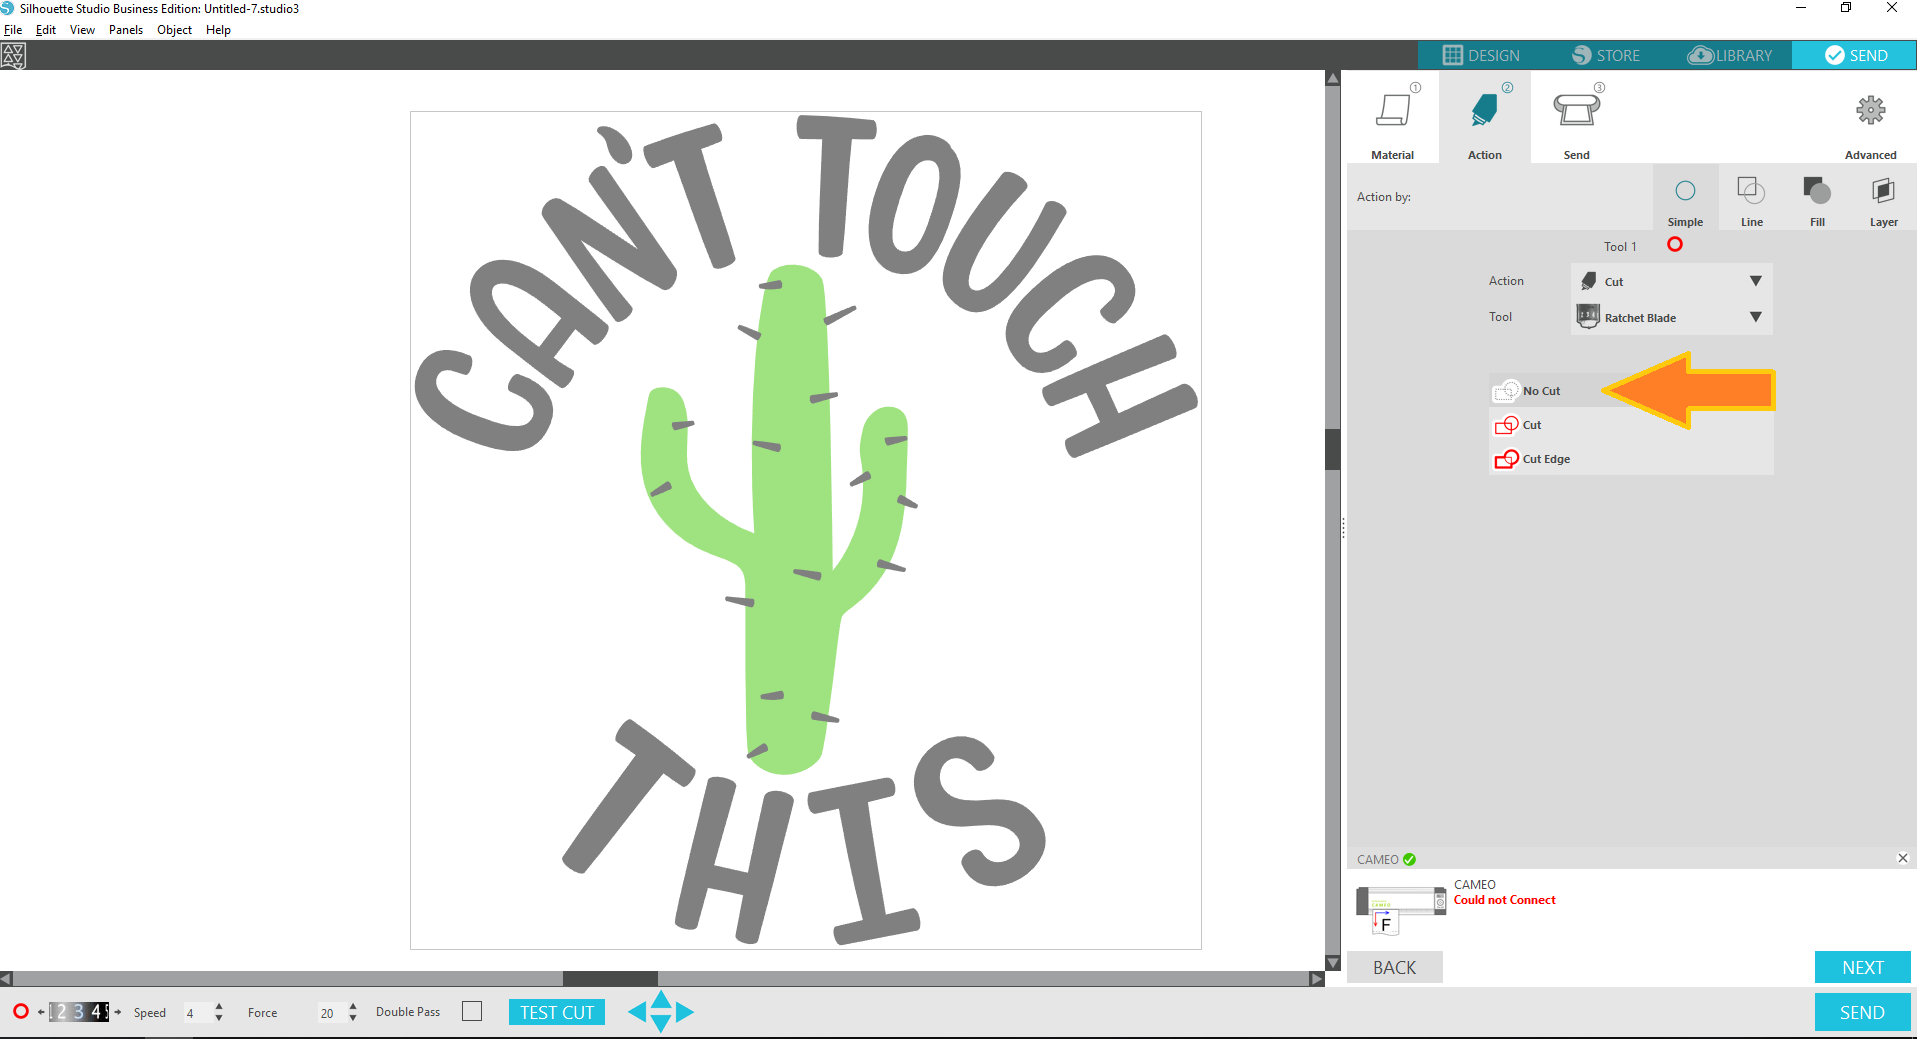
- Next, go to the Send tab and click on the Action sub-tab. Click on No Cut. This removes the cut action so that your design is simply a graphic.

- Resize your graphic as necessary. Be sure to lock aspect ratio. For my tattoo, I made it about 1in wide.
- To make into a circular temporary tattoo piece, draw a 1.25in circle around the graphic. Adjust the graphic so that it’s centered to the circle.
- Select all and Group.
- Then, set up your design file to include registration marks (under the Page Setup Window).
- Lastly, follow instructions on the back of the Printable Tattoo Paper package.
NOTE: This process is similar to making your own Print & Cut files with the exception of one more step (adding a border/shape around your graphic with a “Cut” action).
I suggest you fill up your sheet with as many tattoo designs because it can only printed one time so make the most of the material. These printable temporary last for 1-3 days depending on water contact and the sticky residue is best removed by it rubbing a wet washcloth. Thankfully these custom temporary tattoos are so easy to make that you’ll be making them again and again and again! 🙂