In order for this mama to not lose her mind this Halloween, most of the kids’ costumes are store-bought. *insert crying face* In years past, I’ve made Paw Patrol vehicle wearable costumes and head-to-toe Baby Shark and Lion Guard Kion costumes.
But also in order for this mama to not lose her (creative) mind, I have found other ways to DIY. I decided to make their trick or treat totes to match their costumes.
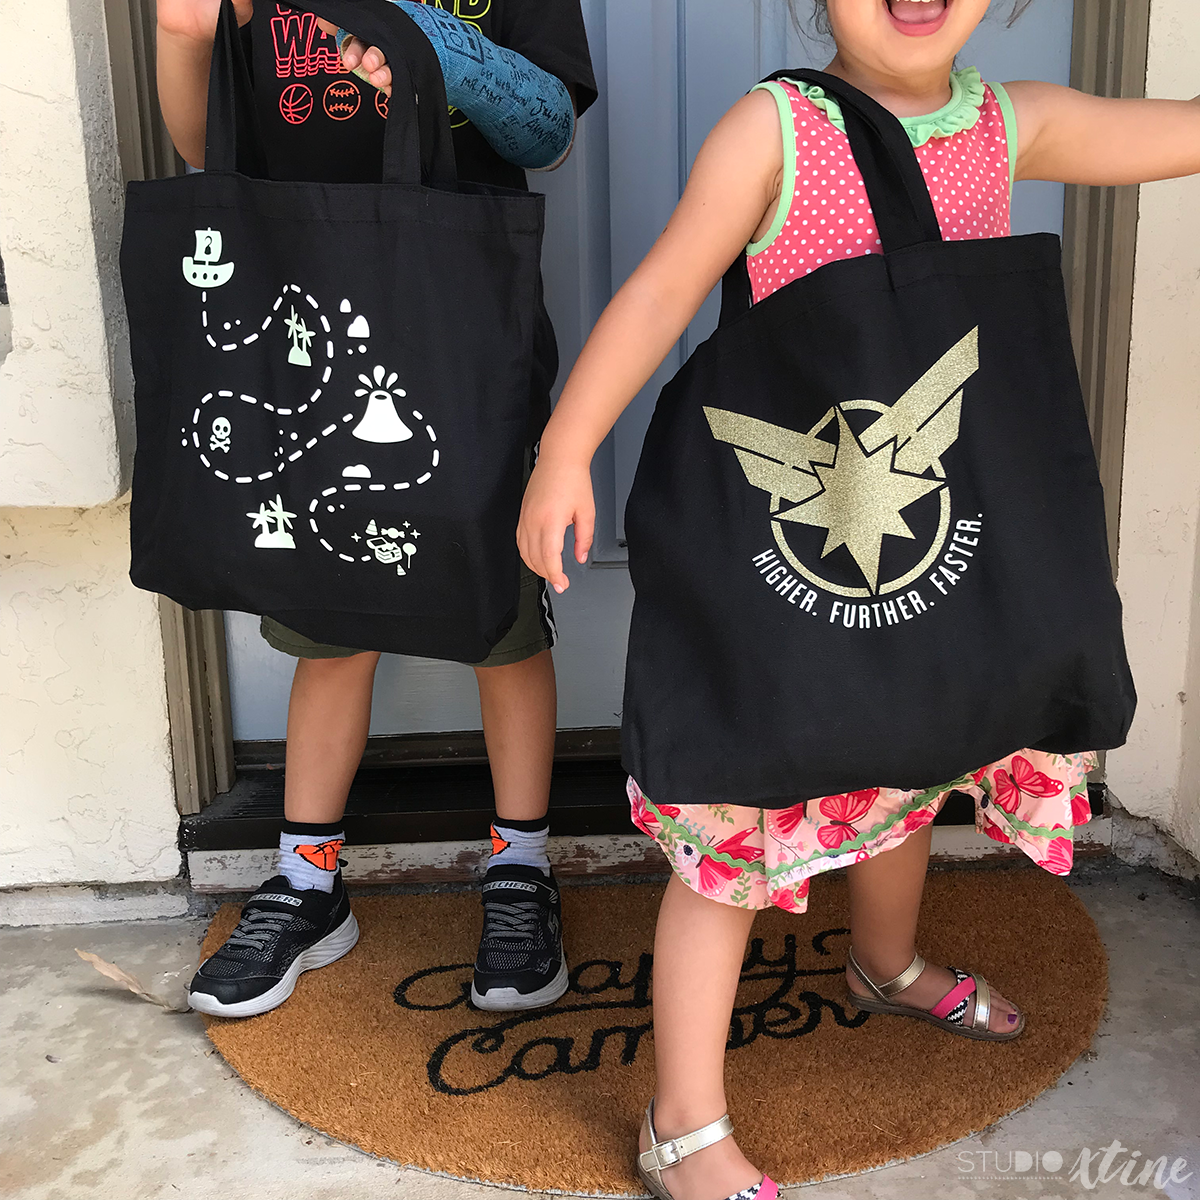
This year, we are a family of Captains. I’ll be Captain Crunch, hubby will be Captain Kirk (from Star Trek), my son will be Captain Hook (which ironically goes perfectly with his cast), and my daughter will be Captain Marvel.
I snagged a 3pk of black totes from Joanns with a coupon for a little over $7. Other supplies I used were heat transfer vinyl (HTV) in white (Siser brand), glow-in-the-dark (Silhouette brand, this is similar), and metallic gold (oops, sorry, I don’t remember what brand I used). I love adding glow-in-the-dark HTV when it comes to Halloween projects. I feel like it’s a must!

My pirate son’s tote features this cute treasure map Silhouette cut file that I modified with a hook in the pirate ship’s sail and an open treasure box with candies. I used smooth white HTV for his design except for the larger map elements, I used glow-in-the-dark HTV.
I created superhero daughter’s tote design by creating the Captain Marvel symbol in Illustrator and importing it into Silhouette Studio. I felt like the design needed a little more something and found the perfect quote to go with it. I used metallic gold HTV for the CM symbol which matches the gold elements on her costume and glow-in-the-dark HTV for the “Higher, Further, Faster” quote.
Since there are multiple HTV layers, I ironed one one layer at a time, starting with the layer with the larger design. The reason being I wanted to make sure the larger design was centered on the tote. So, for example, for my son’s tote, I ironed on the treasure map design first then ironed on the map elements. Once all the pieces were ironed on and the carrier backings have been peeled off, I pressed my iron over the entire design one last time (with a layer between the iron and HTV of course).
Sure, these tote bags cost more than the $1 jack-o’-lantern plastic orange pails but not by much. The glow-in-the-dark effect is also pretty awesome! Plus, these totes look like they go with the costumes! Totes, right? 🤣#ilovepuns