Our youngest turned four earlier this month and we celebrated with a kitty-themed painting party. I know, kind of a weird combo but if it makes the birthday girl happy, I’m going to do it!
Fall/winter birthdays are tough because of questionable weather (yes, even in Southern California!). I was thrilled to find out that my local Michaels store had a party room that I could rent out. They also offer a full-service package where you just show up! But this crafty mama couldn’t resist to do a little arts and crafts with young kids, especially when it’s not in my own home! 😉
In addition to creating our own patterned washi tape with the Silhouette Mint custom stamp machine, some other DIY party decor/items included:
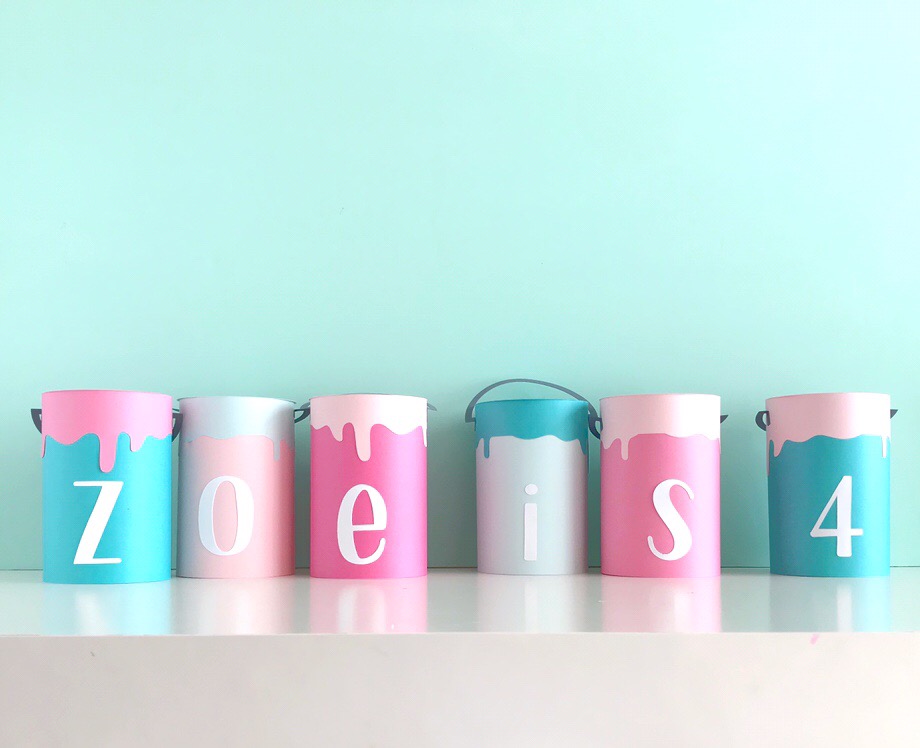
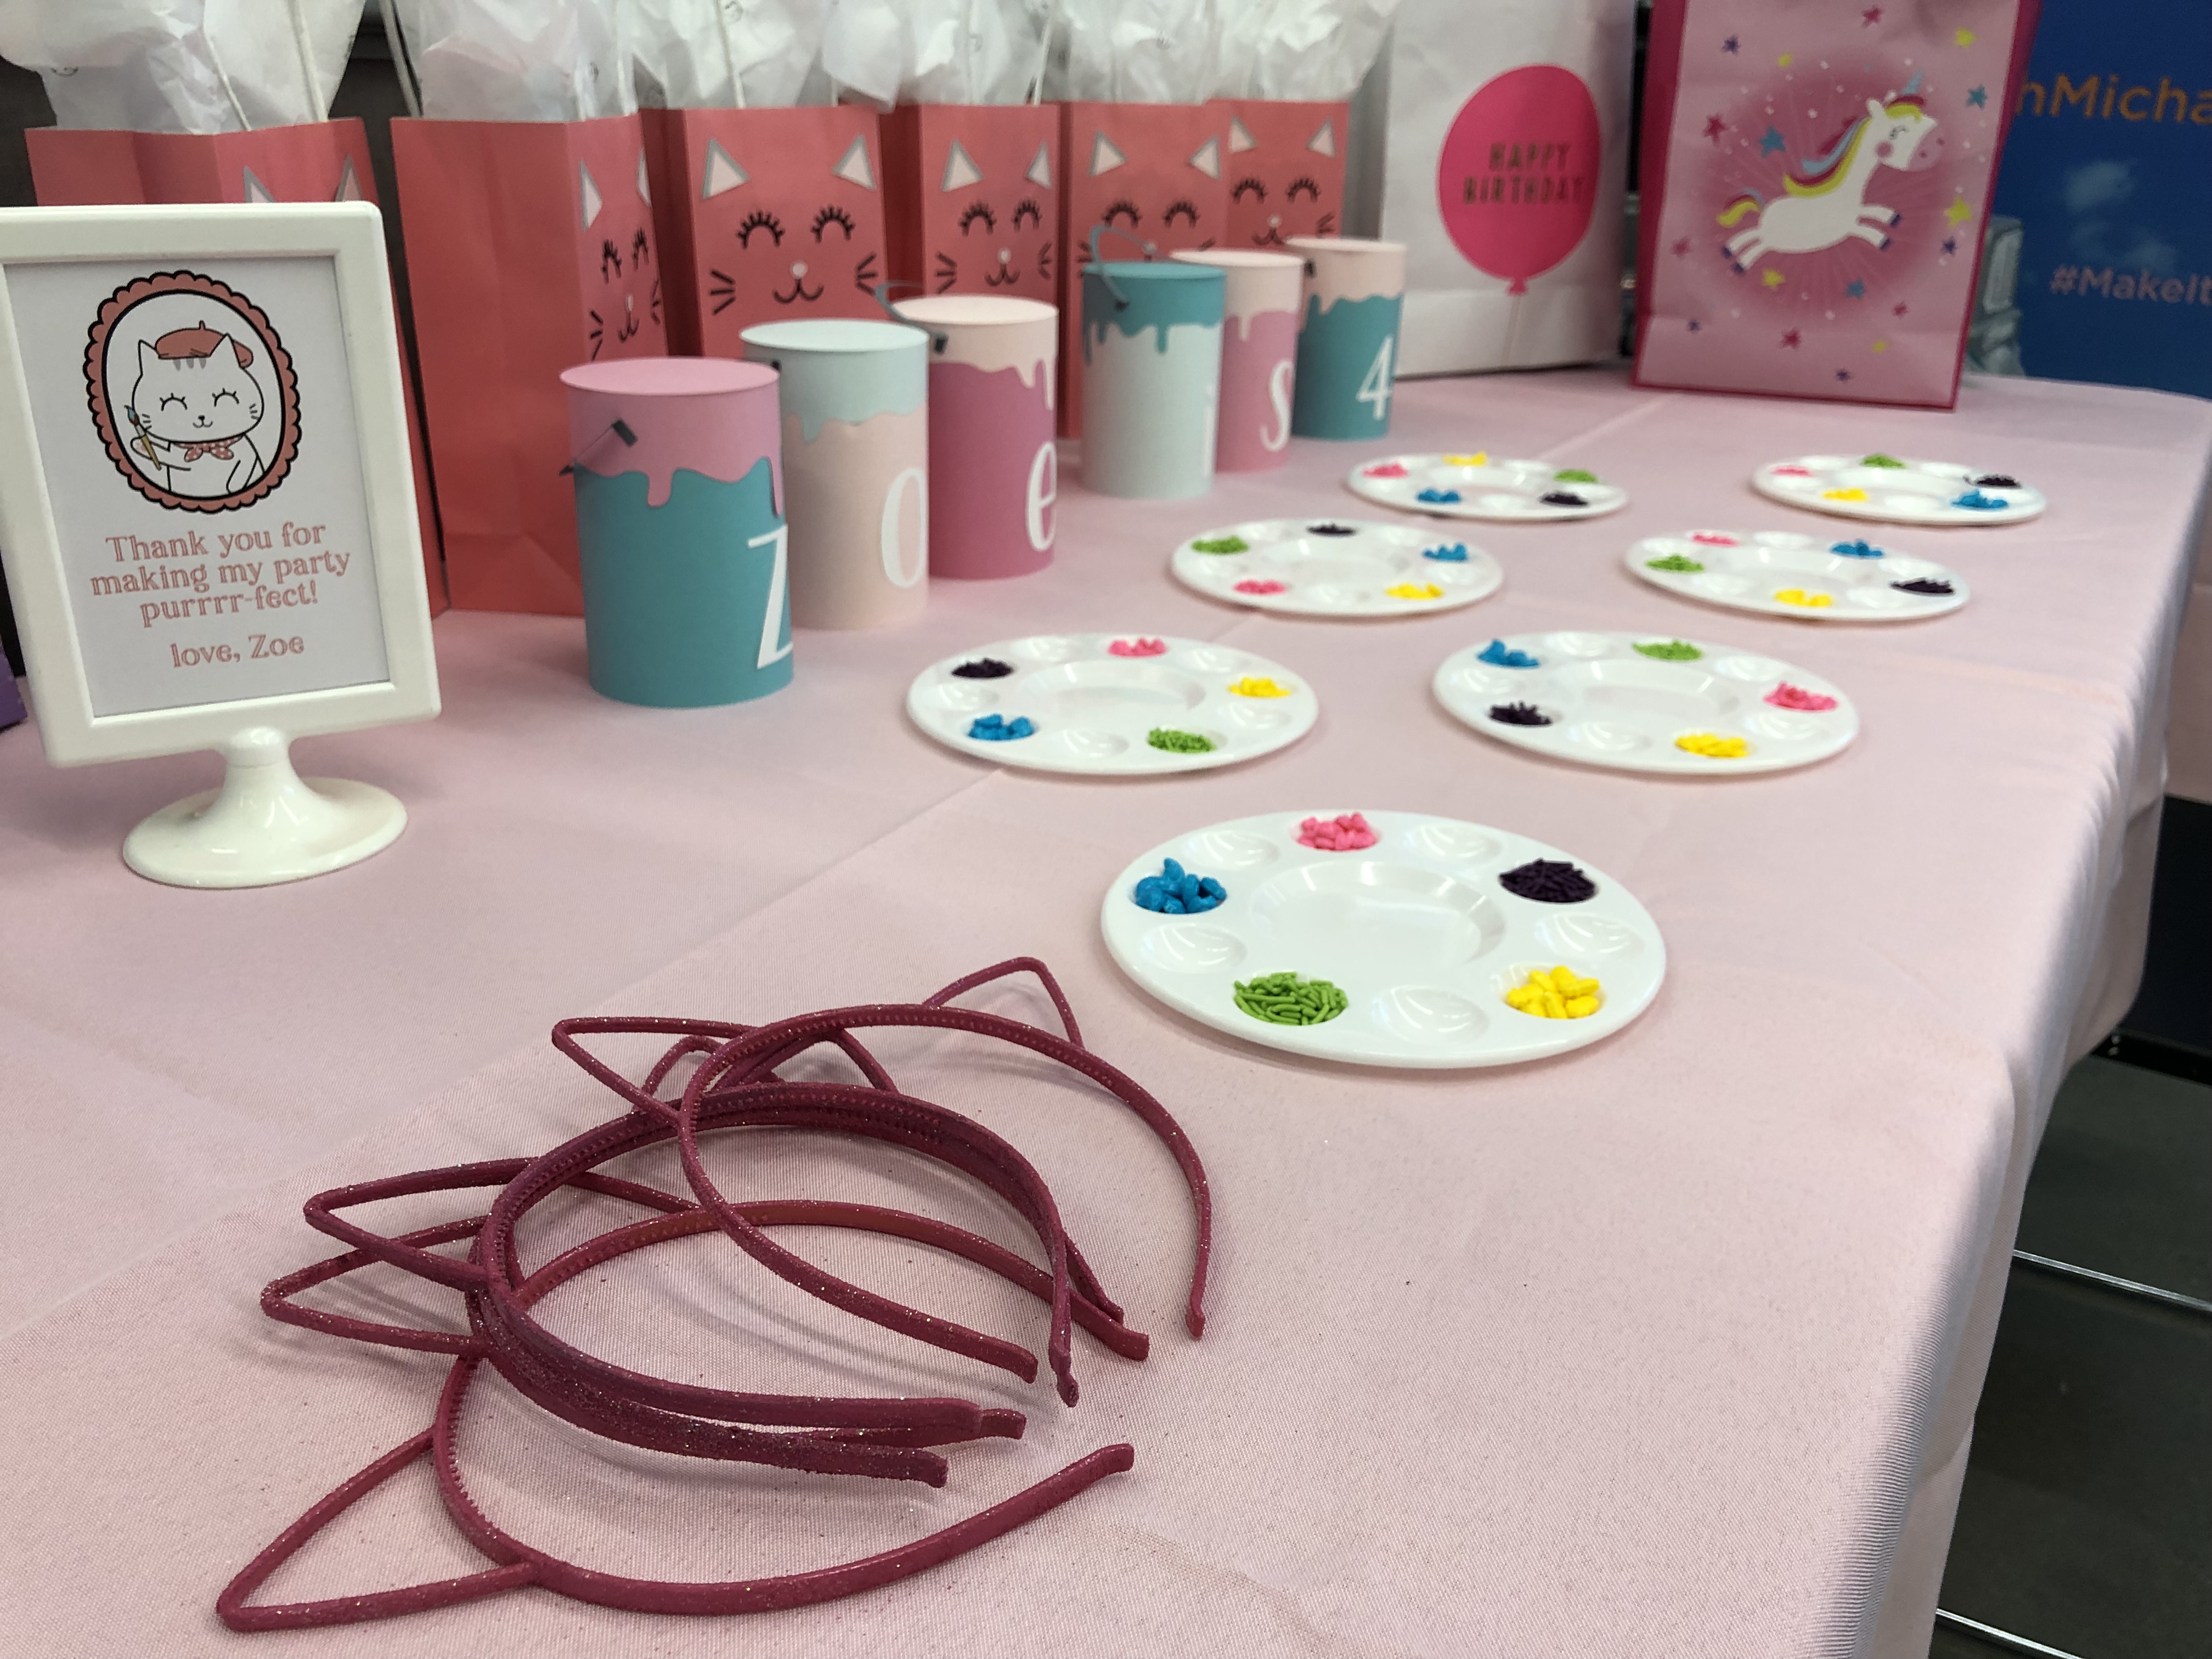
Paper Paint Can Banner: Since I wasn’t sure where I could hanging a traditional birthday hanging banner, I decided a “sitting” banner would be best. I used my Silhouette CAMEO to create the dripped edges as well as the letters. You certainly can cut the dripped edges with scissors too if you don’t have a die-cutting machine.
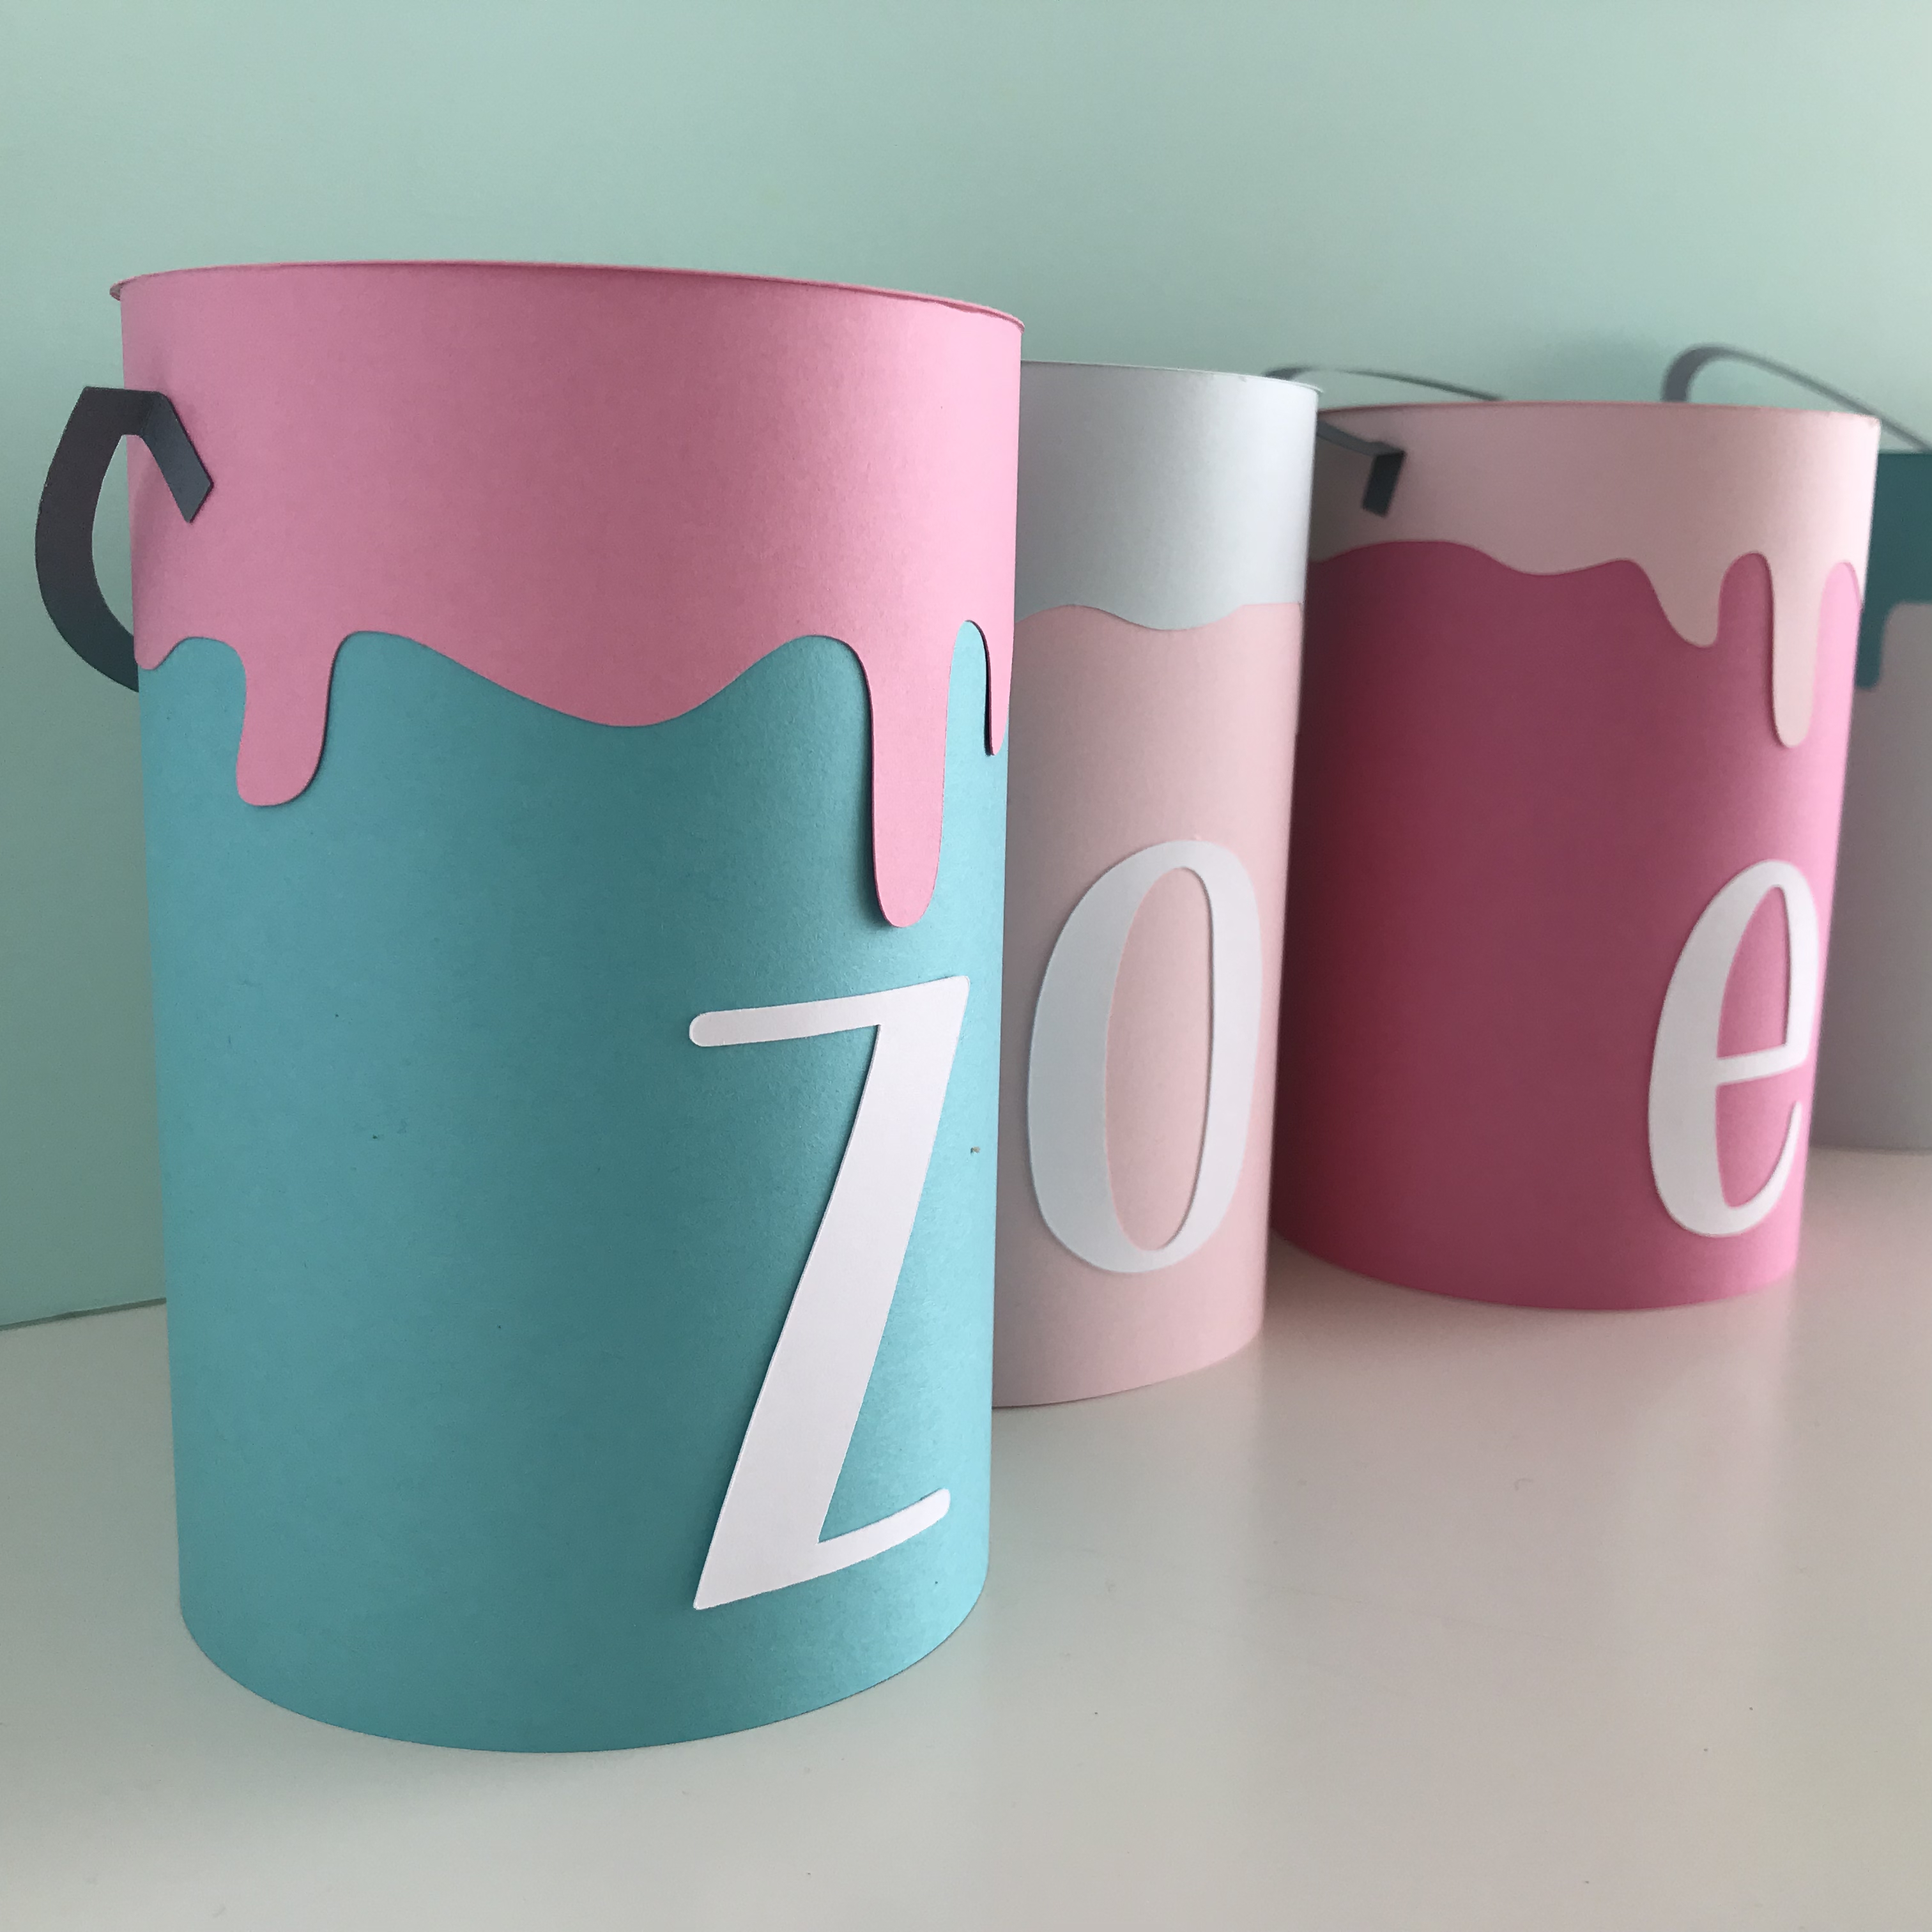
To make these, I used my Silhouette to cut dripped edge strips (2″ x 11″) and paint can strips (5″ x 11″) from various colored cardstock. Then, I used scrapbooking double-sided tape to stick the dripped edges to the top edge of the paint can and the letter diecuts to the middle of the paint can. Lastly, I hot glued the two edges of the paint can together.
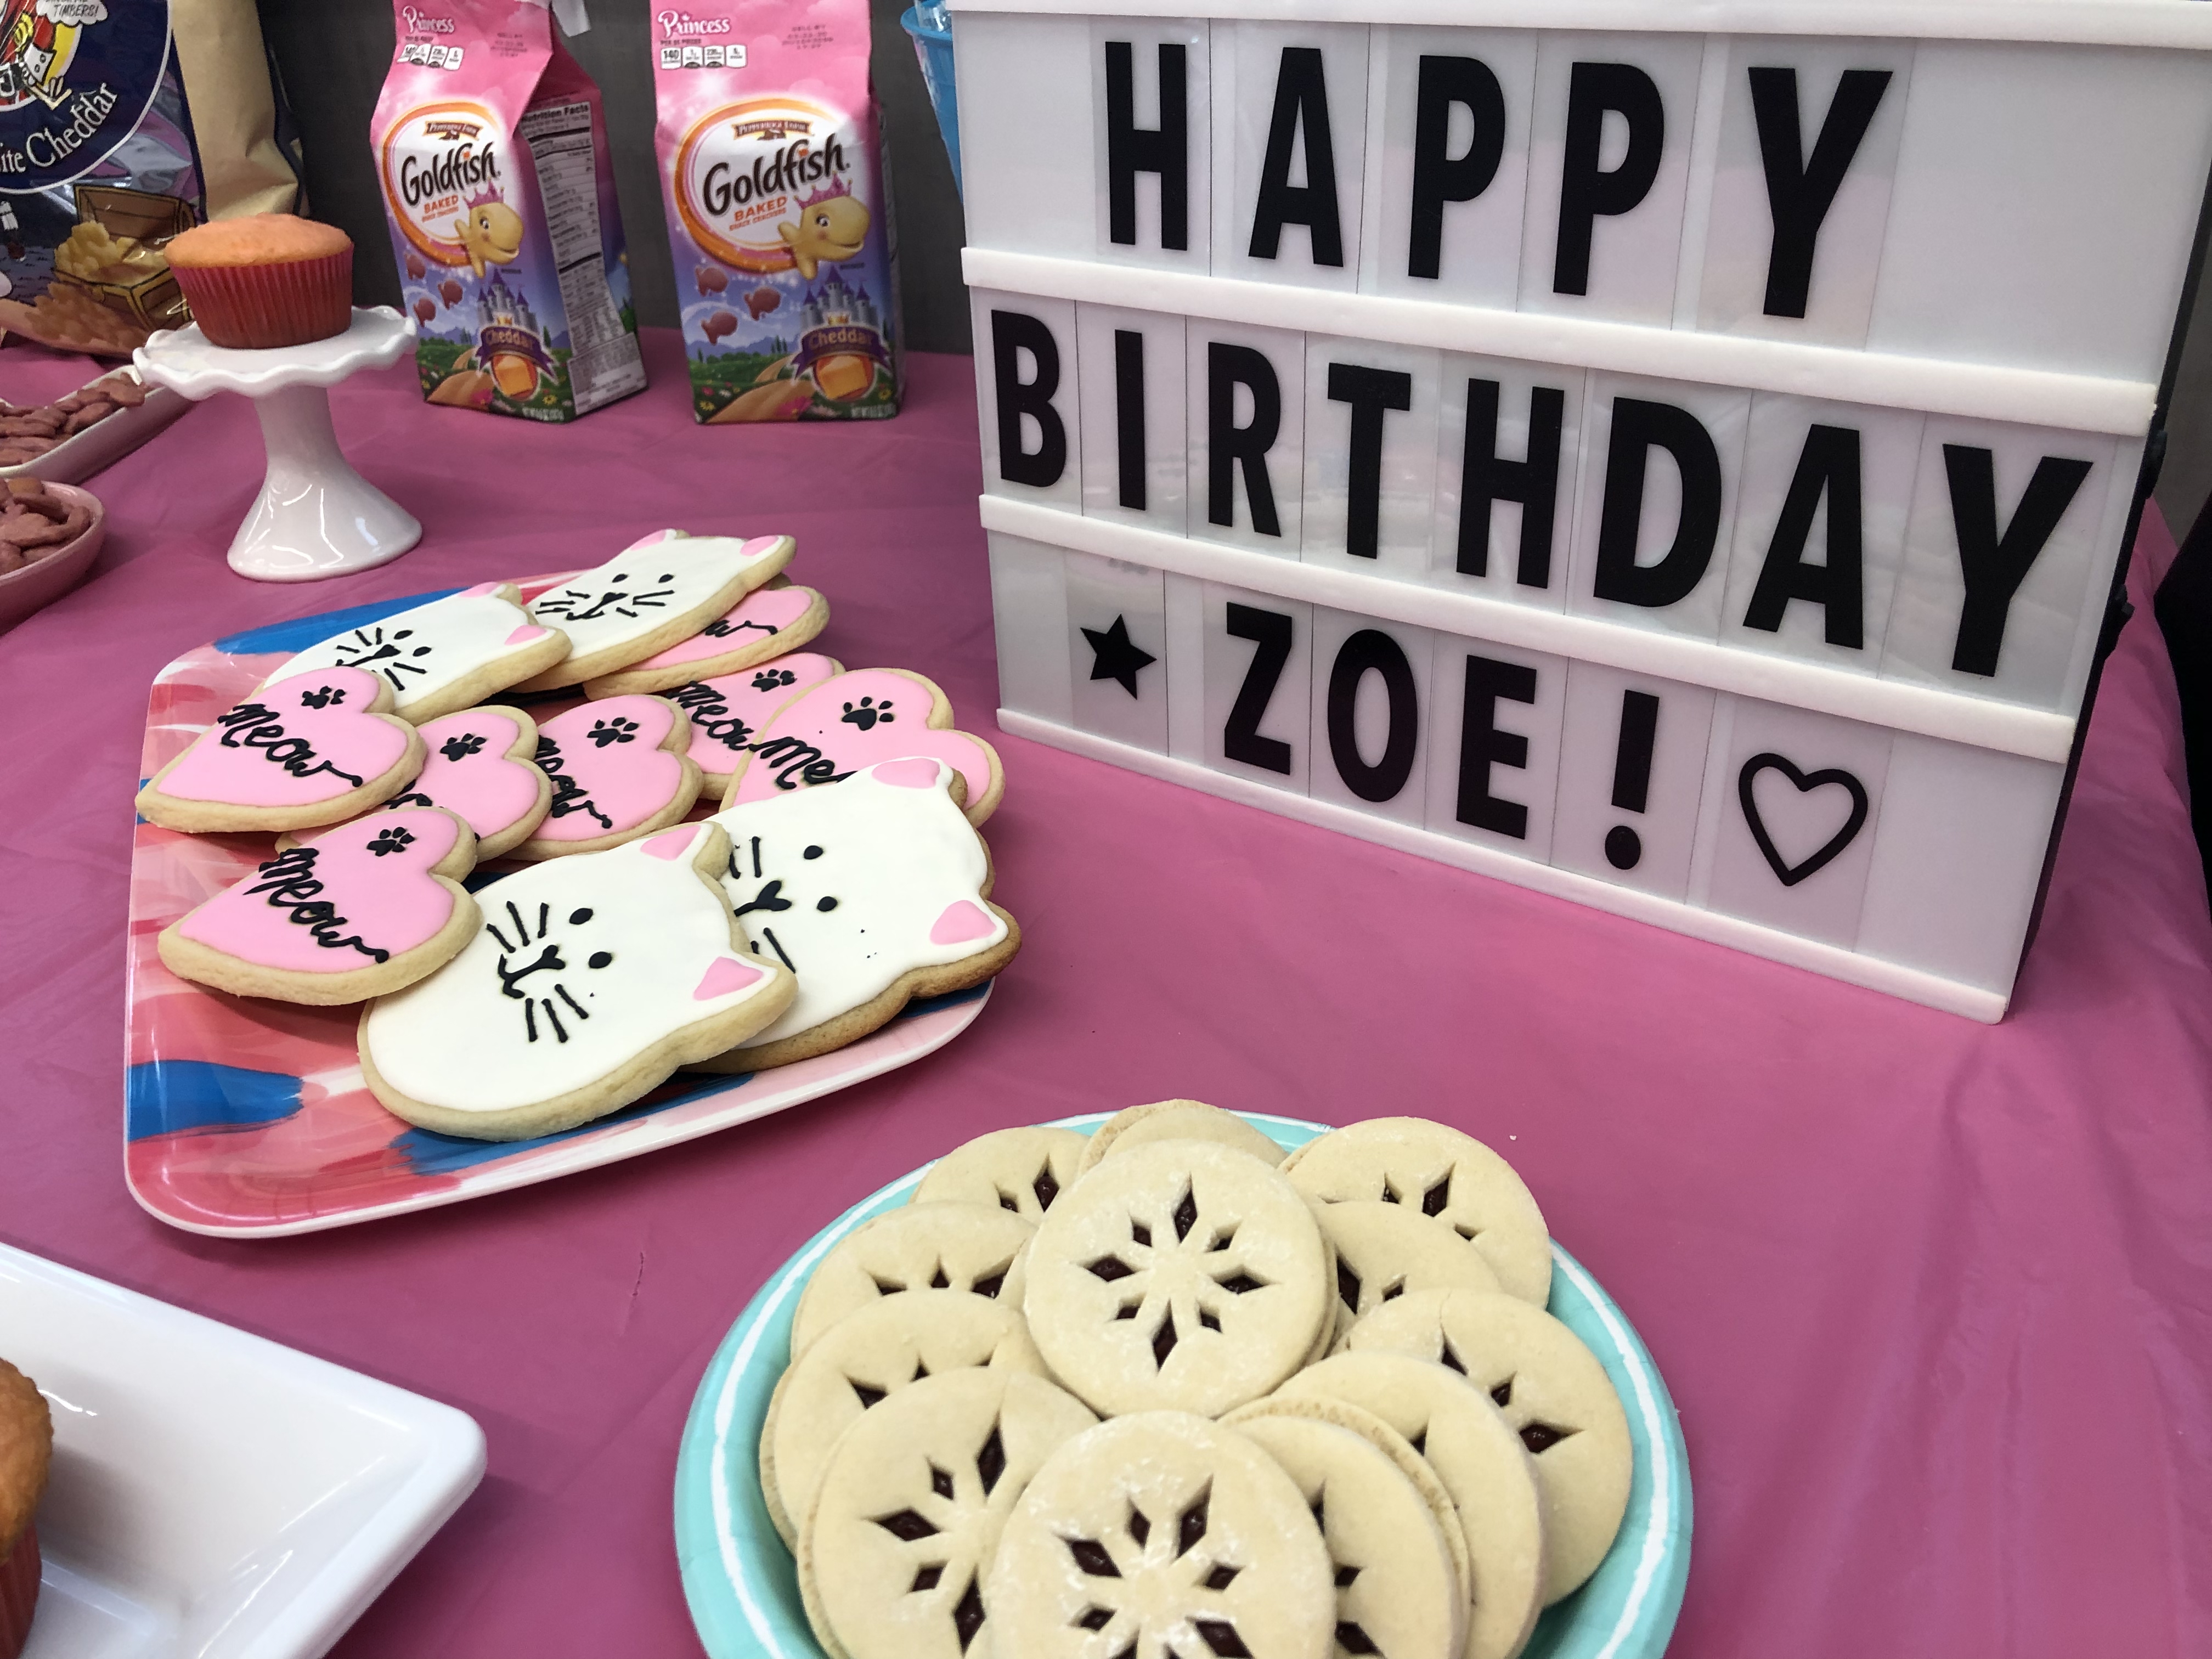
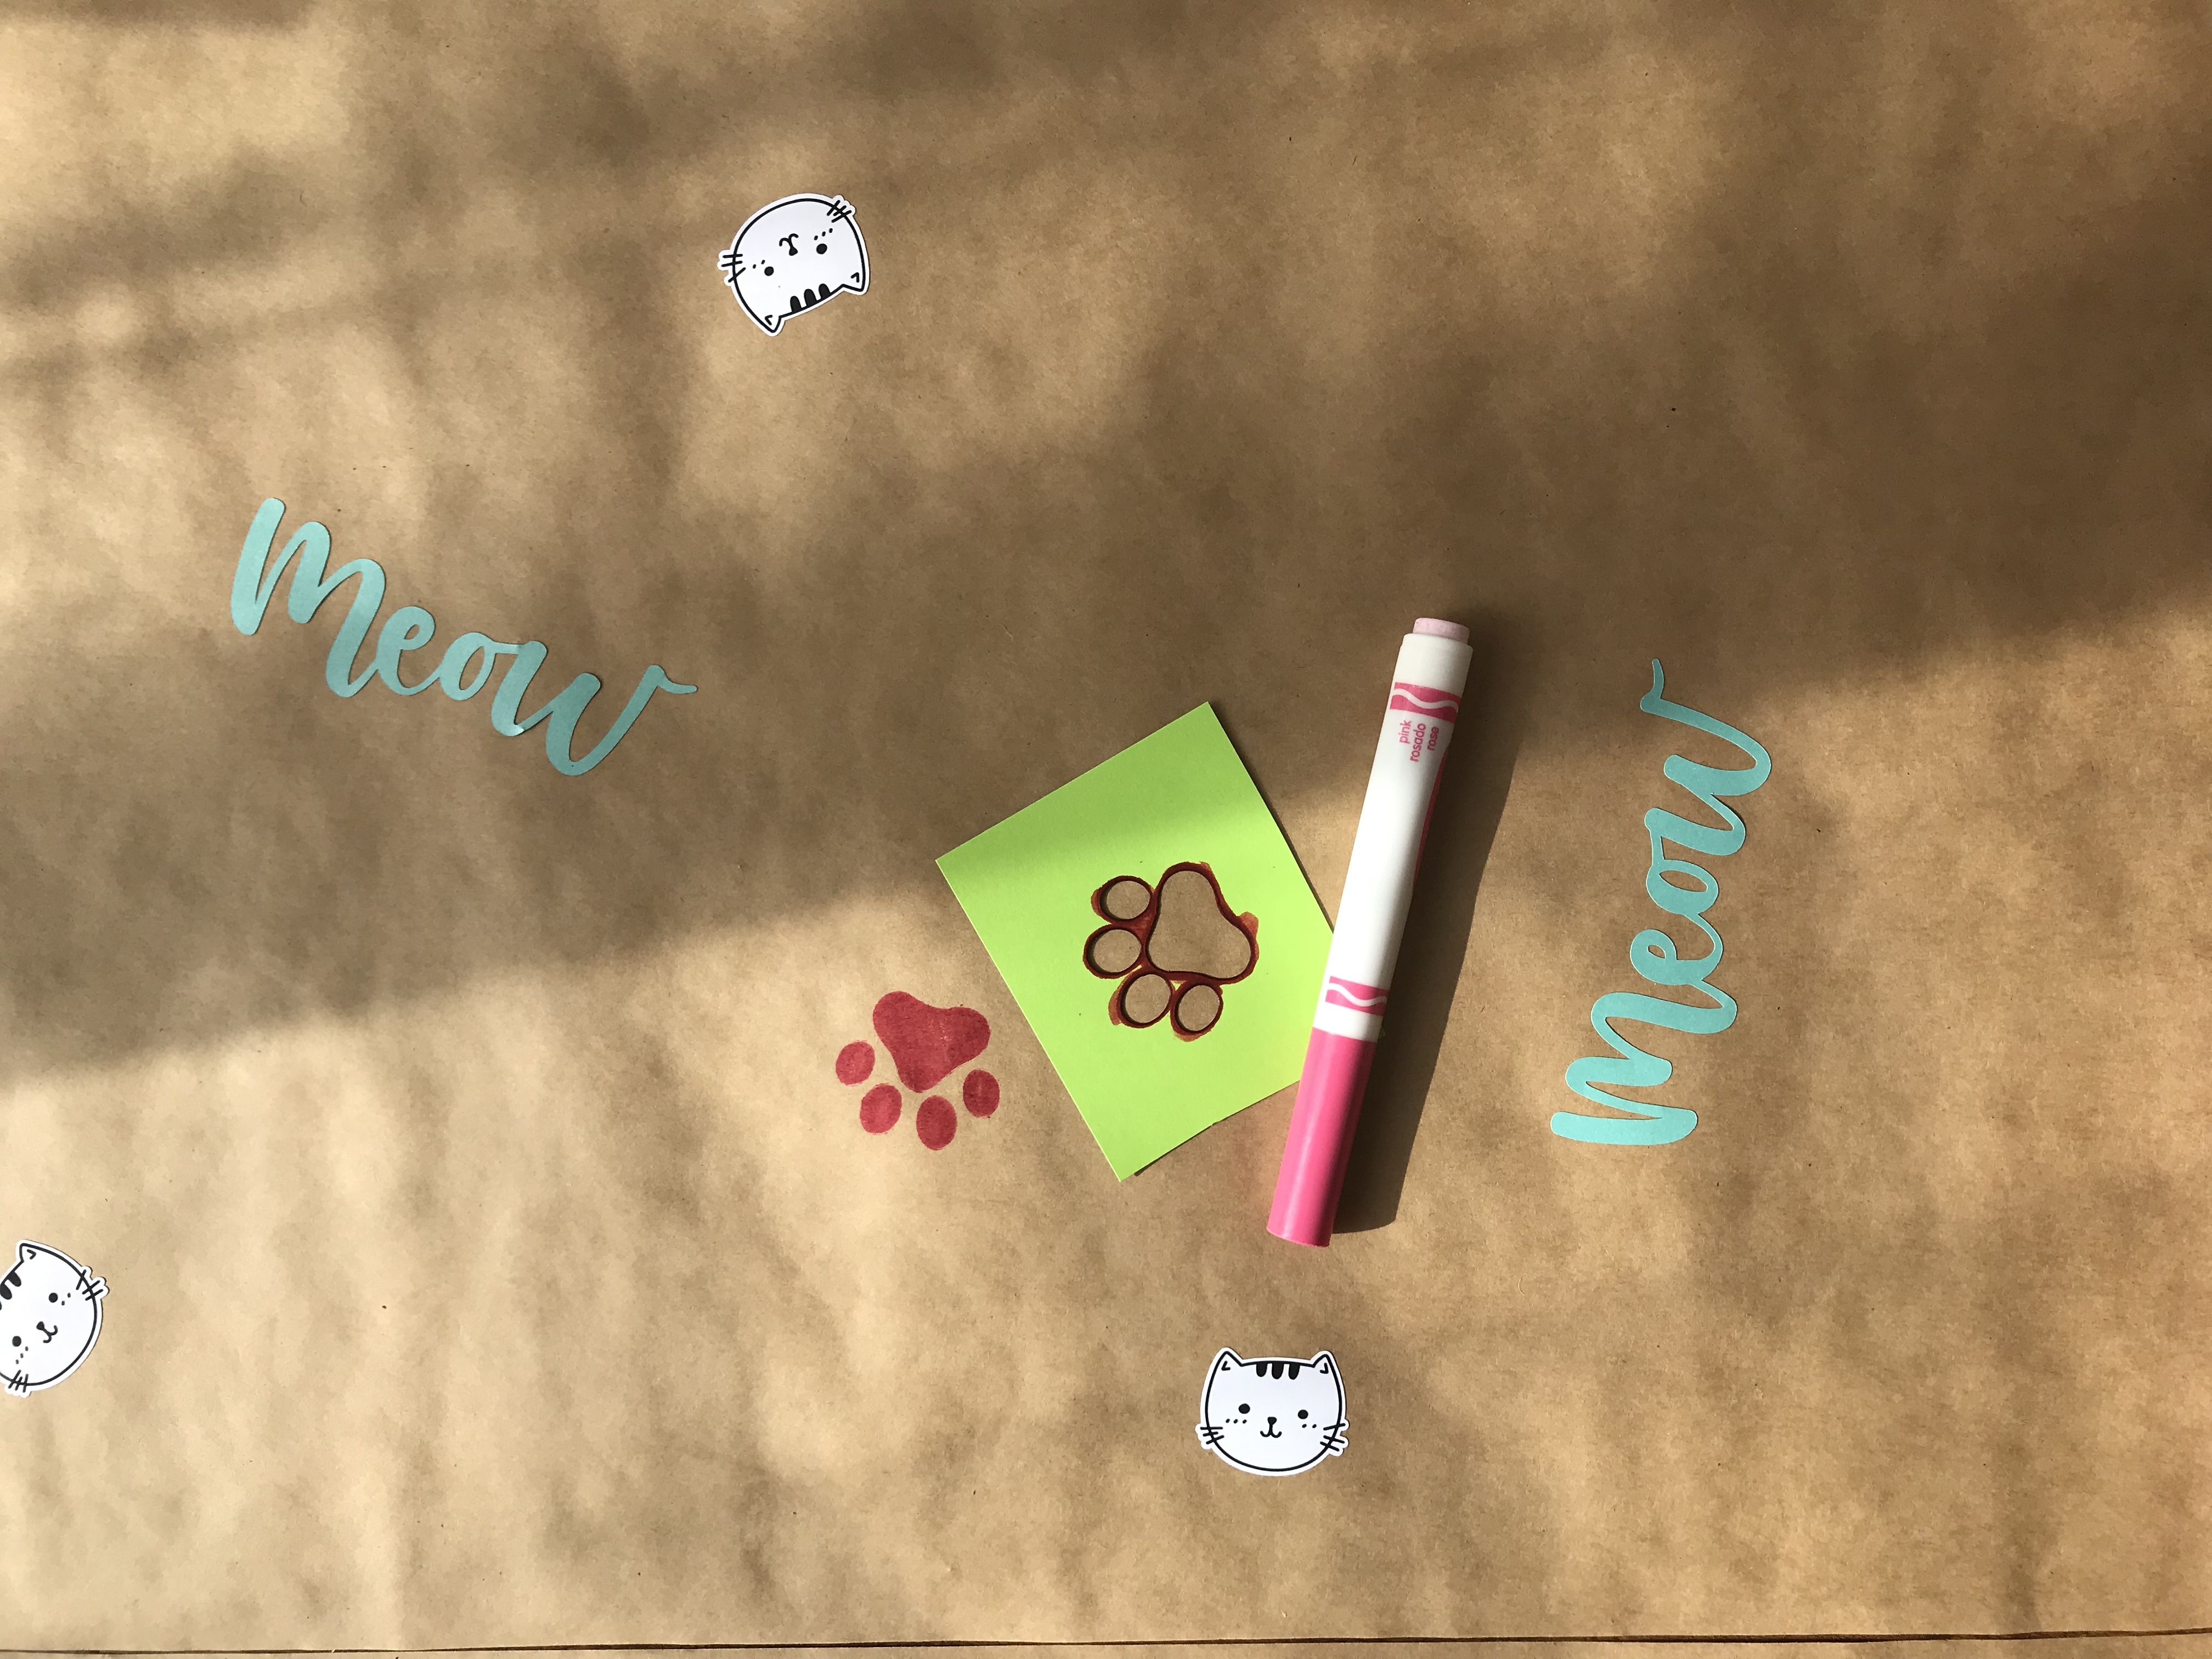
Kitty-themed Table Runner: With a painting party (especially with preschoolers!), plastic tablecloths are the way to go! But you can still incorporate some party theme with a table runner. I used a kraft paper roll (found at the dollar bins at Michaels near the checkout) and added kitty paw prints, the word “meow,” and kitty face diecut stickers (same design used on the DIY washi tape. Paw prints were drawn in with markers using a cardstock stencil I made with my Silhouette. The word “meow” are diecuts that I simply glued on.
Pink Glittery Cat Headbands: I scored a set of 8 plastic cat headbands on post-Halloween clearance from Target. Unfortunately, it came in Halloween colors, which wouldn’t work for the birthday party. Luckily, I had leftover magenta spray paint from last year’s Peppa Pig birthday party and gave each headband a good coat or two. While it was drying, I quickly sprinkled light pink fine glitter.
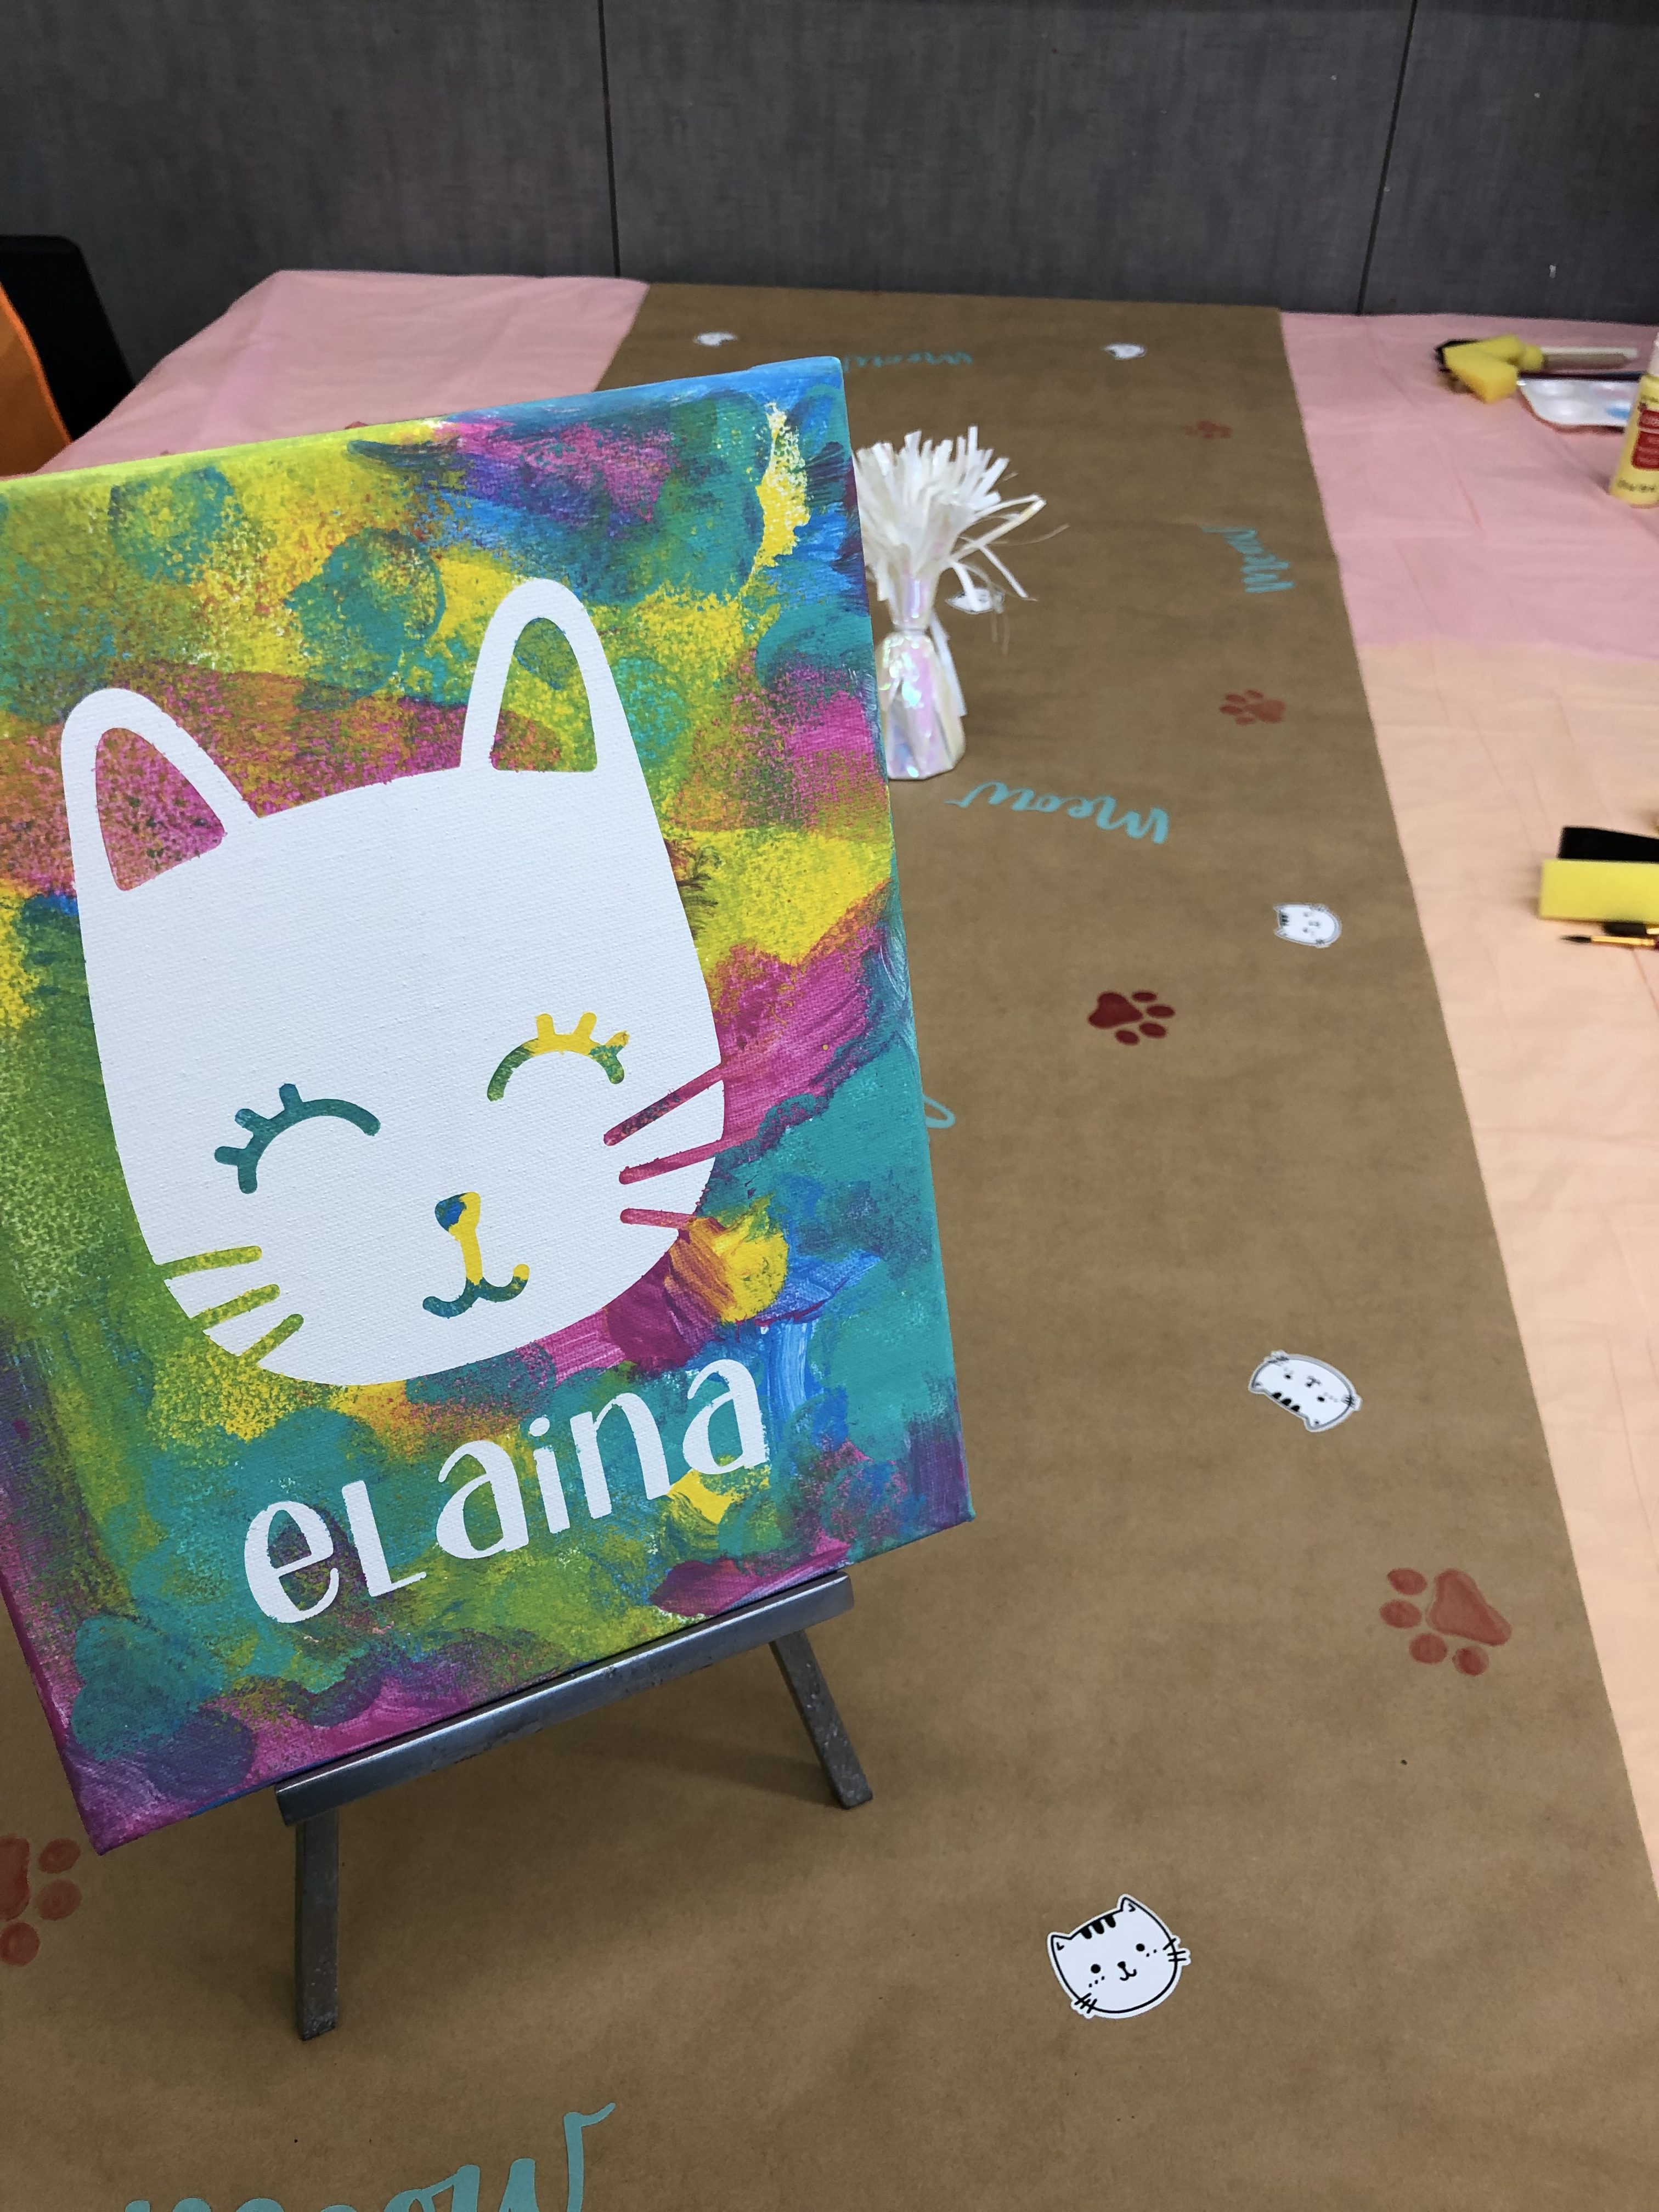
As for birthday party activity, each child painted their own 8″x 10″ canvas that they got to bring home as a keepsake. This craft was SO easy, SO cute, and another opportunity to tie in the party theme!
Here’s how you can do this for your little Picasso:
- Prime each canvas with a single coat of white acrylic paint. This is crucial for the stencil film to adhere to avoid paint bleeding. For some reason, the stencil film will not stick to the canvas if unpainted.
- Cut out your design using stencil film. I recommend Oramask 813 stencil film (affiliate link).
- Once cut, weed (aka remove) the unwanted parts. Oramask 813 is pretty easy to weed but should you need a sharp tool to remove tiny pieces, I recommend Fiskars fingertip craft knife (affiliate link).
- Cut a piece of transfer tape that is about the same size as your design and lay it on top of your stencil film diecut. Use a scraper tool (or a thick plastic gift/credit card) and burnish (aka rub) tape onto the stencil film diecut. Carefully peel away so that the diecut is now adhered to the transfer tape, not to the original paper backing that came with the stencil film.
- Determine where the design will go on the primed canvas and burnish with the scraper tool. If you do this step days prior to party, I recommend burnishing again right before painting to ensure the stencil adheres well.
- Now, it’s time to paint! Tell your little artists to cover the entire canvas but not too heavily with paint. Use a variety of painting tools, like paint brushes, daubers/pouncers, or foam brushes. Also pick a handful of acrylic paint in fun colors. For extra flair, lightly sprinkle fine glitter while the paint dries.
- After 30 mins (check to see that most of the paint has dried), carefully peel the stencil film from the canvas. And voila! Your little Picasso has created a masterpiece!
Another fun activity is letting each partygoer decorate their own cupcake. I didn’t realize how much of a parent win this would be. This is what I mean…I baked my own cupcakes and kept them unfrosted. Not only did I saved money not having to order them from a bakery, I was able to transport them without worrying about ruining decorated cupcakes. Then, I bought Pastry Bag Frosting (affiliate link) and quickly frosted them on the spot at the party. I filled wells of paint tray palette with colorful sprinkles. Michaels now sell mini packets of sprinkles in all sorts of colors and shapes and for only a dollar!! Tip: They frequently offer 40% ALL regular purchases if you purchase online and pick up in store. This is a great purchasing option when you’re buying a ton of stuff! #yourewelcome
Our birthday girl had a great time at her party! Her and her group of 3- and 4-year-old buddies were fantastic artists! Many of them were so excited to bring home their paintings and hang them in their rooms! 🎨 Hooray for a crafting win with little kiddos! 🙌🙌🙌