Halloween decorations are a-plenty in my house so this year I am decorating very minimally. I am in complete awe of all the beautifully decorated no-carve pumpkins that are all over Instagram. I mean, look at these gorgeous ones on think.make.share’s feed! Or how about these 90s themed pumpkins by kailochic?
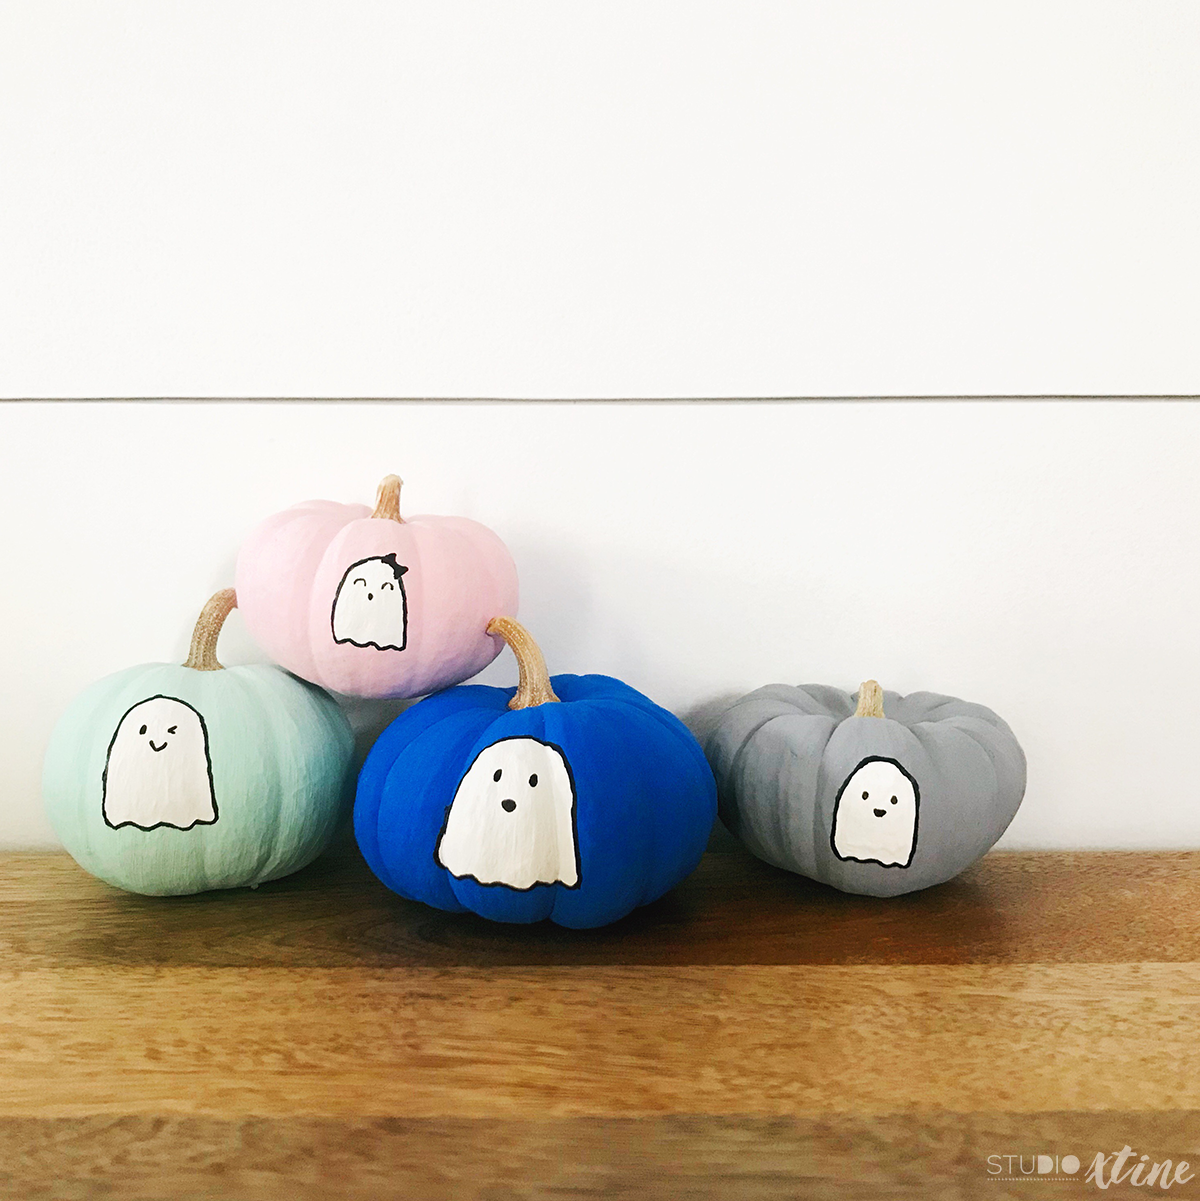
So, here’s my take on painted no-carve pumpkins…let me introduce you to The Boo Crew! Each pumpkin represents the peeps in my crew: me, my hubs, and our two boo-tiful kiddos. I painted each pumpkin using each person’s favorite color. My son’s favorite color is actually black but we went with grey for his pumpkin. This DIY project is super easy, using craft supplies you probably already have!
Supplies used:
- Mini pumpkins (I got ours from Trader Joe’s)
- Acrylic paint (from Michaels)
- FolkArt 4621 Minted Aqua
- Craft Smart Mediterranean Blue
- Craft Smart Light Pink
- Craft Smart Black
- Craft Smart White
- Paintbrush
- Black Sharpie marker (link) and pen (link)
Each pumpkin has 2-3 coats of base color paint. Each ghost is also 2-3 coats of white paint. I found it best to paint multiple lighter layers than to paint with a heavy amount of paint. The result is smoother with multiple light layers. After all the paint is dried, simply use the black Sharpie marker/pen to outline the ghost and add little features. I used the Sharpie pen to fix any stroke issues or to draw fine details like the eyes on the pink pumpkin.
Isn’t this a super easy project? Such a simple, decorative way to personalize your Halloween/fall decorations for your home! Paint away friends!