Ever come across a really cute cut file in the Silhouette Design Store and wish it could be a Print & Cut design? Last year, I converted an unfilled cut file into a printable design for temporary tattoos – check out that post here.
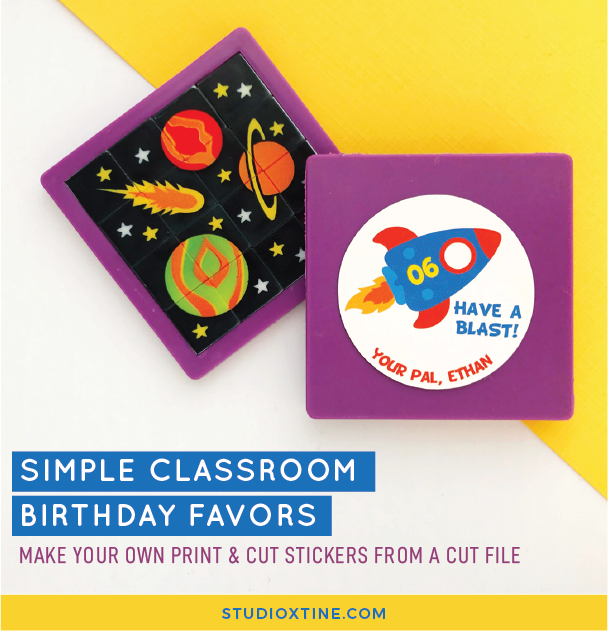
In this post, I am sharing the same steps but on a different medium. I made DIY party labels using Silhouette’s White Sticker Paper. These labels went on the back of slide puzzles that we gave as classroom birthday favors. My son loves puzzles!
FYI: Oriental Trading is running a Free Shipping deal right now! Use promo code: CE193202. Offer ends Tuesday, Feb 5 at midnight CST.
If you can master this DIY, you can do SO much! From personalizing your parties/wedding to making planner stickers, the possibilities are endless and you’ll want an endless supply of white sticker paper!
For this tutorial, you will need the following supplies:
- Silhouette CAMEO or Portrait
- Silhouette White Sticker Paper (link)
- Cutting Mat
- Color Printer
- Slide puzzles from Oriental Trading (link)
- Design ID#247297
Ok, ready? Let’s begin!
Step One: Convert Cut File to Print & Cut
- Open up the “Love You To The Moon – Rocket ” cut file in Silhouette Studio.
- Starting with the light orange piece on the bottom, stack these pieces on top of each other in the following order: orange, light blue, blue, and all red pieces.
-
- TIP: to grab all the red pieces at once, hold down the Shift button while clicking each red piece and you can move them all together).
-
- NOTE: On this particular project, I deleted the red fin piece so that I could add “06” to the rocket as a nod to my son’s 6th birthday.
- With the red ring piece, right-click to Ungroup and right-click again to Release Compound Path.
- Change the color of the smaller circle to white via the Fill Color Panel.
- Select all and right-click to Group.
- Change the grouped pieces’ lines to transparent via the Line Color Panel.
- Within the Send Tab, choose No Cut via the Action Panel. This is because we are making the design a printable image.
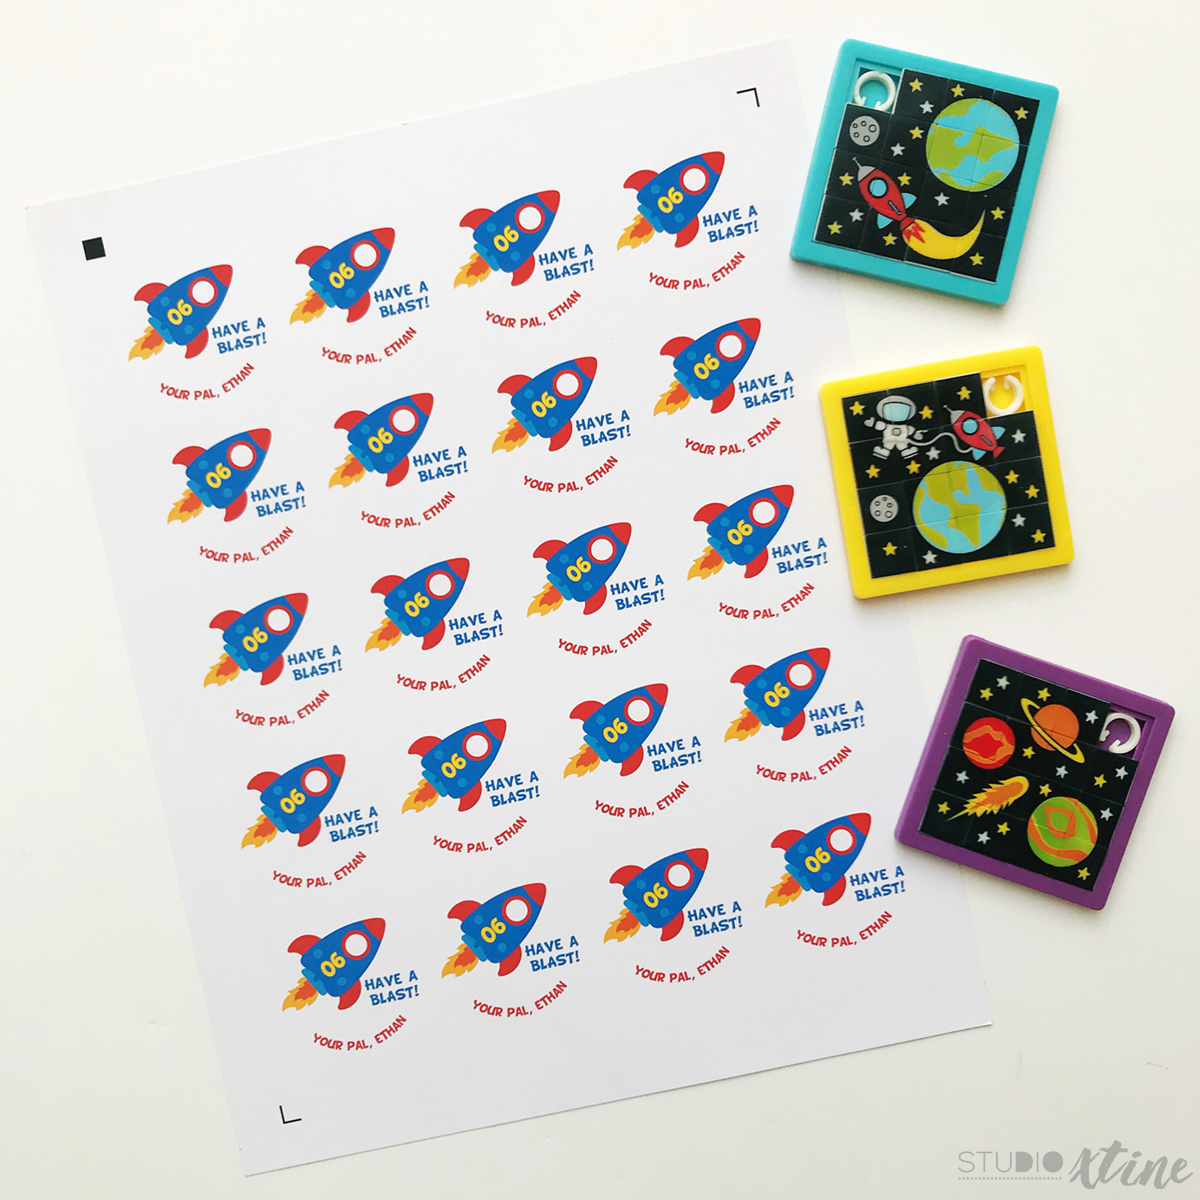
- Resize the grouped design accordingly. For my project, I shrank it to fit within 1.75 inch round labels and added some text.
-
- NOTE: I removed “cut” action to the text as well. The only Cut action is on the 1.75-inch circle.
- Set up Registration Marks within the Page Setup Panel.
- Replicate the circular label design as many times as you can to fit the 8.5 in x 11 in white sticker sheet as well as within the registration marks (very important!).
You did it! You *just* created your Print & Cut design from a cut file! Pat yourself on the back or if you’re really stoked, do a happy dance!! Now…onto the Printing and Cutting part!
Step Two: Print & Cut
- Insert the White Sticker Sheet into your color printer feeder tray (be sure to put it down the correct side depending on how your printer pulls the sheet) and click Send to Printer in Silhouette Studio.
- Once your print has dried, place it on a cutting mat and send to Silhouette to cut. Your Silhouette machine will read your registration marks (the black square and lines on the corners of your print) and should cut exactly as you’ve designed in Silhouette Studio.
The Print & Cut feature is amazing once you’ve mastered it! I use it all the time and it really produces a professional look to my projects and crafts.